
Today's cards all show changes with the strips across the middle. There are so many different products you can use instead of just the simple strip and scallop strips like, border stickers, ribbon, a banner, a felt border, several layers of different patterned papers, and fabric.
Card Sketch #5

You can download and print this sketch by clicking on the card sketches link found under the "printable sketches" tab on the right sidebar.
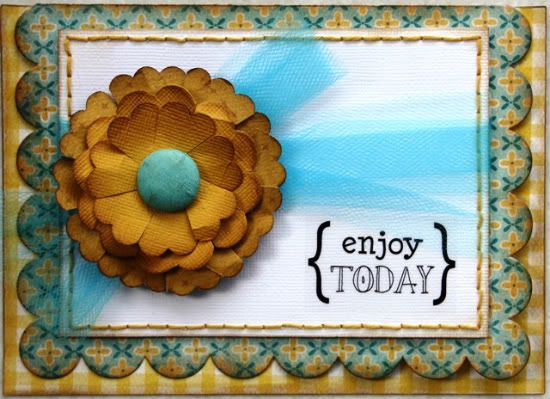
"Enjoy Today" card by Carolyn Wolff
Supply List - Cardstock: American Crafts; Patterned paper: My Mind's Eye (Stella & Rose); Die-cut: Accucut A7 Card Scallop; Sticker: SRM Stickers; Punch: EK Success; Brad: Bazzill; Embroidery floss: We R Memory Keepers; Tulle: fabric store; Ink: Ranger Distress Ink (Vintage Photo)
I changed my version of the sketch quite a bit. I started by using a die-cut for the base of my card. I love how it creates a scalloped front. I used double-sided pattern paper and because the front of the card is slightly smaller, both patterns show.
Variation #1 – Instead of having a scalloped border on my card, I chose to incorporate the scallop as an edge.
Variation #2 – To create the layers on the front panel I layered a piece of white cardstock on top of the scalloped pattern. I stitched a border around the white cardstock to create another layer.
Variation #3 – To replace the border element shown in the sketch I tied a piece of teal blue tulle around the white cardstock. I made my own flower by layering scalloped circles on top of each other.
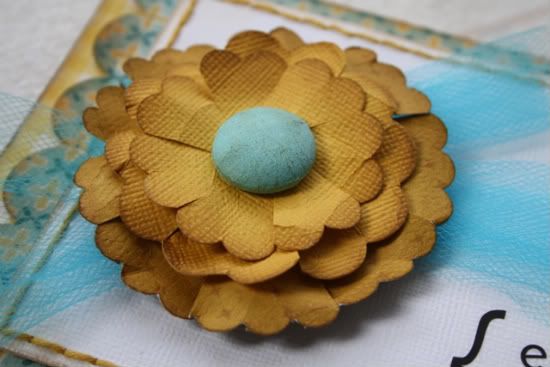
With scissors, I cut slits between the scallops and then I crumpled the cardstock before attaching them together with a large blue paper brad. I placed the flower over the knot in the tulle and placed it to the left side of the card front.
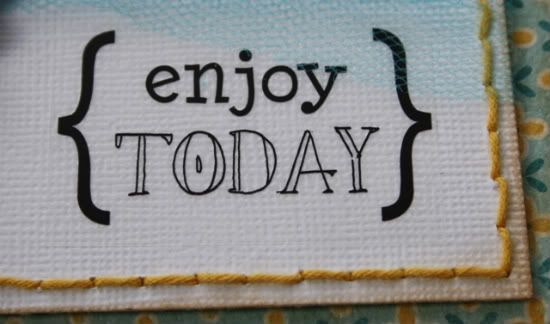
Variation #4 – I placed a clear sticker in the lower right corner of the white cardstock for my sentiment.
• • • • • • • • • • • • • • • • • • • • • • • • • • • • • • • • • • • • • • • • • • • • •
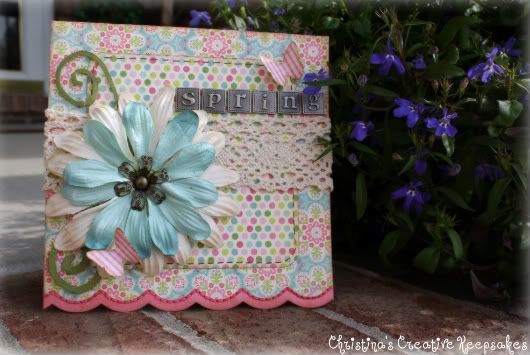
"Spring" card by Christina Hoffman
Supplies - Patterned paper: My Mind's Eye; Flowers and Metal Accents: Unknown; Butterfly punch: Martha Stewart; Embroidery floss: DMC
Variations:
• Scallop edge on the bottom of the card.
• One block of patterned paper.
• Lace ribbon instead of strips.
• Big flowers on top of the flourish.
• Moved the message above the ribbon.
• Added butterflies around the card.
• • • • • • • • • • • • • • • • • • • • • • • • • • • • • • • • • • • • • • • • • • • • •
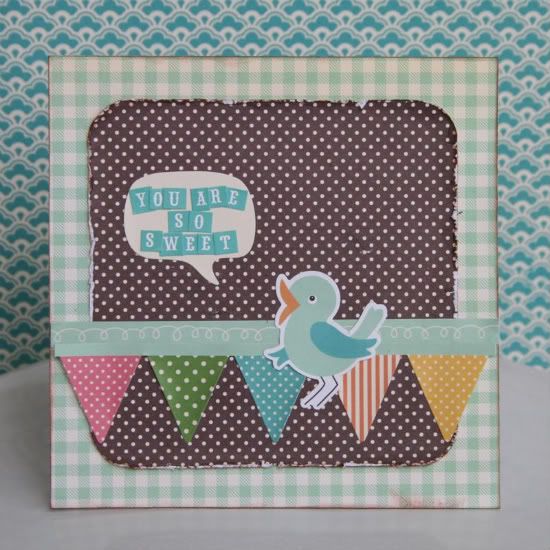
"You are so Sweet" card by Shari Thurman
Suppy List - Pattern paper and stickers: October Afternoon; Alphabet stickers: Cosmo Cricket Tiny Types; Ink: Colorbox Chalk Ink (Chestnut Roan); Tools: We R Memory Keepers Corner Chomper; Other: Cardstock
On this card I used a gingham patten paper for the background and used one smaller square rather that multiple papers as the sketch suggested. I distressed the edges of the brown polka dot paper with ink and ruffed the edges up with my scissors to give it a shabby look. Instead of placing my border in the center of the card, I lowered it a bit. This gave my bird more room to tweet. The sketch suggested a flourish, but I used a word bubble instead.
• • • • • • • • • • • • • • • • • • • • • • • • • • • • • • • • • • • • • • • • • • • • •
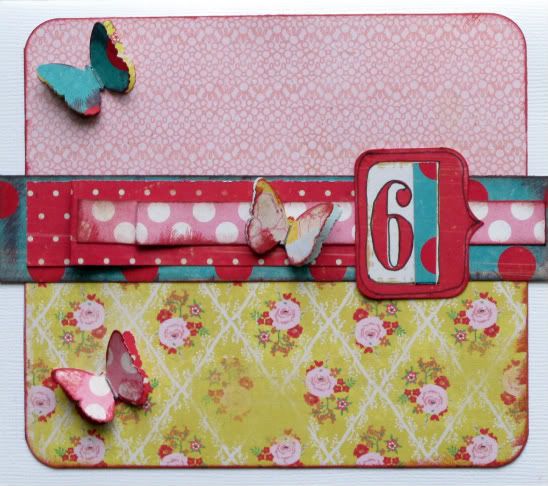
"6th Birthday Card" by Christy Arthur
Products - Crate Paper Emma's Shoppe: Quilts, Inventory, Dresses and Chipboard; Martha Stewart Classic Butterfly Punch; Jenni Bowlin Cough Syrup ink; The Girls Paperie Jubilee Picnic Basket and Sticker Market
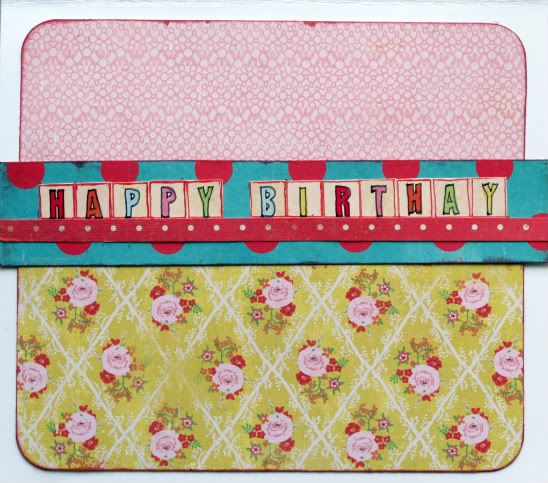
Inside of the card
Details:
• I added the butterflies around, which is different than the sketch
• Instead of a message on the front, I added a simple #6
• I layered the middle paper and added a slight ruffle in the top two. I kept the edges straight on this card, which is different than the sketch.
••••••••••••••••••••••••••
9 comments:
Great cards!
Love the flowers on the first one, the colors of the second one, the third ones bird is adorable and the fourth one is cute (birthday is misspelled though )
Oh my goodness - I cannot believe I misspelled birthday! I have looked that card over and over and never caught that!! How embarrassing! Thanks for catching that Crystal!! :)
They are all adorable! Great job ladies!
Christy, my sister made me a birthday cookie once and she spelled birthday the same way. We all got a good laugh out of it! Don't be embarrassed! I didn't even notice it! :)
Christy, it could have been because we were gabbing so much! LOL
Beautiful cards ladies!
Christy-Don't be embarrassed! It could have happened to any one of us. I still think the card is super cute!
Ah, thanks ladies! Katrina - that certainly did not help!! :) I think it was because I kept moving the letters and unsticking them and re-sticking them into the perfect place. Wonder where the "d" ended up? :)
Well Christy, if your anything like me you were probably walking around wearing it the whole time. LOL! I've had that happen so many times.
Post a Comment