Showing posts with label Melissa Bell. Show all posts

Tuesday, May 1, 2012

Card Week, Part 2

•••••••••••••••••••
Card Sketch #19

You can download and print this sketch by clicking on the card sketches link found under the "printable sketches" tab on the right sidebar.


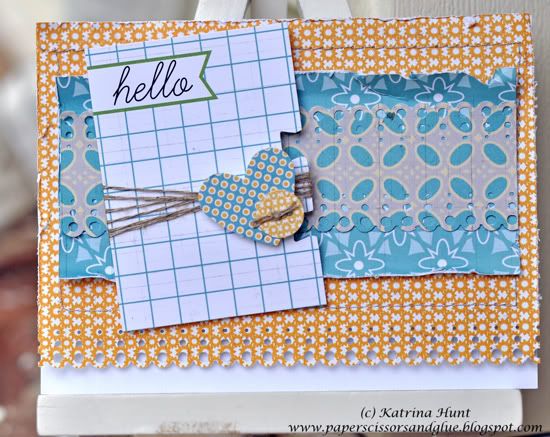
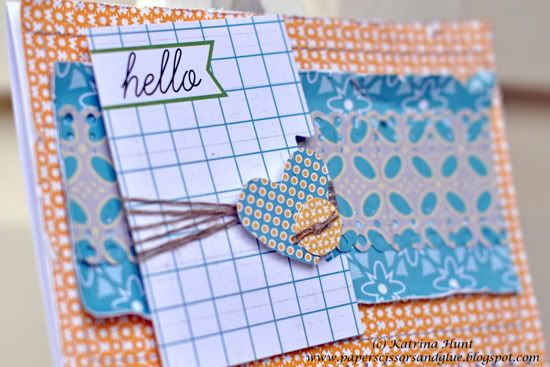
"Hello Card" by Katrina Hunt 
Supplies - Patterned Paper: LilyBee Design (Buttercup Collection); Die Cuts: LilyBee Design (Buttercup Collection); Cardstock: American Crafts; Punch: EK Success; Adhesives: Scotch, Fabri-Tac and Scrapbook Adhesives; Sewing Machine

Variation 1 - Changed direction.

Variation 2 - Left off circles and opted for just a couple of strips.

Variation 3 - Used index card as my message and added a few die cuts to it.


Variation 4 - Added a background layer.


  • • • • • • • • • • • • • • • • • • • • • • • • • • • • • •


"You Make Me Smile" card by Melissa Bell 
Supplies - Patterned Paper: We R Memory Keepers; Ink: Colorbox Fluid Chalk Ink; Circle Cutter: Creative Memories; Other: Pop dots

Variation #1 - Instead of doing stitching down the vertical strip I just used lined patterned paper.

Variation #2 - Since my message was scalloped I decided to omit the flower.

Variation #3 - I used 2.5" circles instead of the 2" circles

  • • • • • • • • • • • • • • • • • • • • • • • • • • • • • •


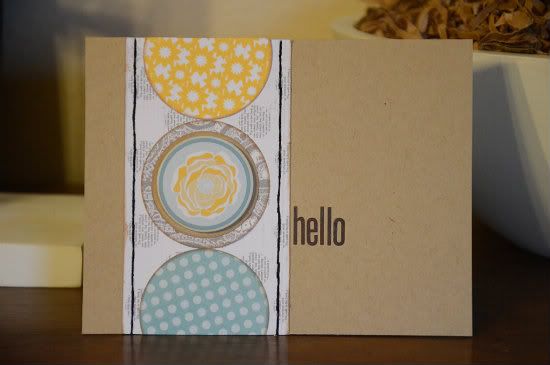
"Hello" card by Allison Davis
Supplies - Cardstock: Bazzill; Patterned paper: Lily Bee Design; Flower sticker: Lily Bee Design; Alphabet stickers: Lily Bee Design

Variation #1 - I used smaller circles and I used a smaller strip behind the circles.

Variation #2 - Instead of having my message on the rectangle, I just placed mine directly onto the card.
••••••••••••••••••

Monday, April 2, 2012

Card Week, Part 1

•••••••••••••••••
Card Sketch #18


You can download and print this sketch by clicking on the card sketches link found under the "printable sketches" tab on the right sidebar.


"Happy Birthday" by Cherie Nymeyer
Supplies - Cardstock: Bazzill Basics; Patterned Paper: Jillibean Soup; Punch: Fiskars; Stamp: Papertrey Ink; Ink: Stampin' Up!

Variation #1 - I rounded the corners of the square piece of cardstock


Variation #2 - I chose to make the sentiment piece longer and thinner and not round the corners

Variation #3 - I used stars instead of butterflies.

  • • • • • • • • • • • • • • • • • • • • • • • • • • • • • •


"Me Right Now" by Jennifer Larson
Supply list - Cardstock: Bazzill; Patterned paper: October Afternoon, Pebbles, Crate Paper, Jillibean Soup; Stickers: October Afternoon, K'esi Art, American Crafts; Diecuts: October Afternoon, Russell & Hazel; Punch: EK Success; Buttons: October Afternoon; Mist: Studio Calico; Ink: Jenni Bowlin

Variation #1 - The sketch looked like an 8.5x11 piece of paper, so I turned it into a layout.

Variation #2 - I kept it basically the same, substituting the title for the sentiment and adding journaling next to the photo.

Variation #3 - I removed some of the embellishments, since the mix of papers was so eye catching.

  • • • • • • • • • • • • • • • • • • • • • • • • • • • • • •


"You Take the Cake" card by Melissa Bell
Supplies - Patterned Paper: DCWV; Ink: Colorbox Fluid Chalk Ink; Corner Rounder: We R Memory Keepers; Black Pen: Sharpie; Other: Pop dots


Variation #1 - I felt that my card was busy enough so I decided not to add the three embellishments.

Variation #2 - I decided to round the corners of my card.

Variation #3 - I pop dotted my message.
•••••••••••••••••

Monday, February 13, 2012

Add-on Week, Part 1

•••••••••••••••••
Add-on Sketch #14


You can download and print this sketch by clicking on the add-on sketches link found under the "printable sketches" tab on the right sidebar.


"Love" by Penny Grimsley
Supplies - Patterned paper: Echo Park (Yours Truly), My Minds Eye (On the Bright Side); Alphabets: Silhouette Die Cutting Machine (Kerri Bradford Smitten set); Embellishments: Maya Road, Lasting Impressions, Melissa Frances; Twine: The Twinery; Ink: Jenni Bowlin; Stamp: Hero Arts; Heart Tray: The Paper Studio

I picked up this tray in late December and know Allison's February add-on would be perfect for one of the quadrants. The My Minds Eye paper arrived at just the right time to help me tone down the Valentine theme, so that I can keep the tray out year round. Kerri Bradford's subway art worked perfectly and some rosettes cut on the silhouette set off it and our picture.

Variation #1 - I used twine to stitch the rows of hearts and resized the add-on to fit one of the heart's quadrants.


• • • • • • • • • • • • • • • • • • • • • • • • • • • • • • 


"All You Need is Love" gift bag by Melissa Bell
Supplies - Cardstock: Bazzill; Patterned Paper: We R Memory Keepers; Ink: Colorbox Fluid Chalk Ink; Corner Rounder: We R Memory Keepers; Floss: DMC; Tissue Paper: Hallmark; Hearts: Cricut; Other: Gift Bag

Variation #1 - Since I used the add-on on a gift bag I increased the sizes of the heart.
••••••••••••••••••••••••

Monday, January 30, 2012

Card Week, Part 1

••••••••••••••••
Card Sketch #16


You can download and print this sketch by clicking on the card sketches link found under the "printable sketches" tab on the right sidebar.


“Happy Birthday” by Sue Althouse
Supplies - Cardstock: Bazzill; Patterned Paper: Crate Paper (Paper Heart); Stamps: Hero Arts; Ink: Colorbox (Chestnut Roan); Other: Signo uni-ball white pen, buttons, white thread

Both my mother and mother in-law celebrate birthdays in February, so I used this sketch to create their birthday cards.

Variation #1 - stamped a background using a masking technique.

Variation #2 - substituted buttons for some of the hearts.


Variation #3 - layered the heart patterned paper onto six layers of white cardstock for a chipboard look.

Variation #4 - omitted the stitching through the hearts and used a white pen for faux stitching around the frame.

• • • • • • • • • • • • • • • • • • • • • • • • • • • • • • 


"Happy Valentine's Day" card by Melissa Bell
Supplies - Cardstock: Bazzill; Patterned Paper: BoBunny; Ink: Colorbox Fluid Chalk Ink and Staz On; Corner Rounder: We R Memory Keepers; Stamp: craft smart; Floss: DMC

Variation #1 - I made my card just slightly bigger.


Variation #2 - I added a layer of cardstock to add some dimension.

Variation #3 - I stamped the message on patterned paper.

Variation #4 - I double layered each heart.

Variation #5 - I did not stitch through my hearts.

• • • • • • • • • • • • • • • • • • • • • • • • • • • • • • 


“Remember” by Andrea Friebus
Supply list - Cardstock: American Crafts, Bazzill Basics, Core’dinations; Patterned paper: Basic Grey, Bo Bunny, Echo Park, Studio Calico, Pink Paislee;stickers: My Little Shoebox, KI Memories, Echo Park; ink: Clearsnap; embroidery floss: DMC; brads: Making Memories; embellishments: TPC Creations, Prima, Pink Paislee, My Mind’s Eye

Variation #1 - I made an 8.5”x11” layout instead of a card.

Variation #2 - I matted the layout on kraft cardstock.

Variation #3 - Labels were added to the bottom left for journaling.

Variation #4 - Each heart is embellished with a different accent including a photo of my son that I popped up for dimension.

• • • • • • • • • • • • • • • • • • • • • • • • • • • • • • 


"Happy Valentine's Day" card by Jill Sarginson
Supplies Used - Patterned Paper: My Mind's Eye; Kraft paper: Jillibean Soup; Rub-on: American Crafts; Tools: Creative Memories heart punch; Floss: DMC; Ink: Vibrance

Variations:

• I made a grid out of the hearts/lines vs. stitching through the hearts.

• I matted the design onto kraft paper and then added a scallop strip.
•••••••••••••••••••••

Friday, December 23, 2011

Add-on Week, Part 5

•••••••••••••••••••••
Add-on Sketch #12

You can download and print this sketch by clicking on the add-on sketches link found under the "printable sketches" tab on the right sidebar.


Christmas Trees by Carolyn Wolff
Supply List - Patterned paper: Christmas wrapping paper from HomeSense; Foam cones: Michaels; Straight pins: Dollar Store; Chipboard stars: Bazzill; Ribbon: unknown

This was so much fun!!

Variation #1 – I used three foam cones that I purchased at Michael’s for my tree body.


Variation #2 – Instead of using patterned scrapbook paper, I used Christmas wrapping paper. I cut ½ inch strips in varying lengths from 2” to 6”. I folded them in half and attached the open end to the foam cone with a straight pin.

Variation #3 – I used a chipboard star and covered it with leftover wrapping paper. I added some ribbon and tulle and attached it to the top of the cone with straight pins.


  • • • • • • • • • • • • • • • • • • • • • • • • • • • • • •


"Christmas Tree" by Melissa Bell
Supplies - Paper Mache Cone: Darcie; Patterned paper: Best Creations Inc.; Paint: Apple Barrel; Glitter: Stickles; Other: Wooden Star, Glue Gun

Variation #1 - I made my Christmas tree three dimensional.


Variation #2 - I opted not to put a garland around my tree and so that it sits flat I didn't include a trunk.
•••••••••••••••••••

Thursday, December 8, 2011

Card Week, Part 4

••••••••••••••••
Card Sketch #14


You can download and print this sketch by clicking on the card sketches link found under the "printable sketches" tab on the right sidebar.


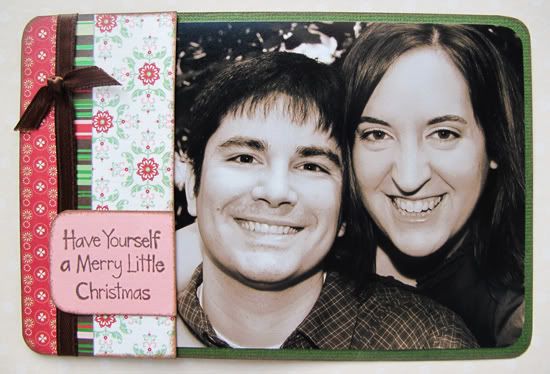
"Have Yourself a Merry Little Christmas" by Melissa Bell
Supplies - Cardstock: DCWV; Patterned paper: SEI; Ribbon: Offray; Rub-ons: Provo Craft; Stamps: Studio G; Corner Rounder: We R Memory Keepers; Ink: Colorbox Fluid Chalk Ink and Staz On

I love this card sketch and it really did inspire me, but what I ended up creating doesn't really look much like it this time around. For the last couple of weeks I have been looking at Christmas photocards at various sites online trying to decide which one to choose. I guess you could say photocards have been on my mind and I thought why not try creating my own.

Variation #1 - Instead of making a folding card I made mine a flat 6x4 card.

Variation #2 - Since I made my card horizontal I just stretched out the white space and had that be my photo.

Variaton #3 - Instead of using a tree embellishment I decided to keep it simple by just using strips of patterned paper and ribbon.

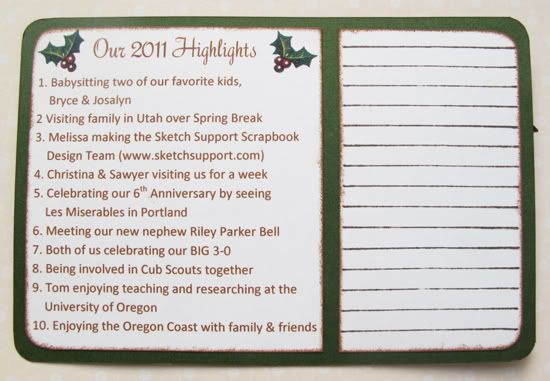
For the back of the card I decided to go with a top ten list for 2011 and then create a place to write a personal note.


Now who is willing to create 39 more of these for me?

  • • • • • • • • • • • • • • • • • • • • • • • • • • • • • •


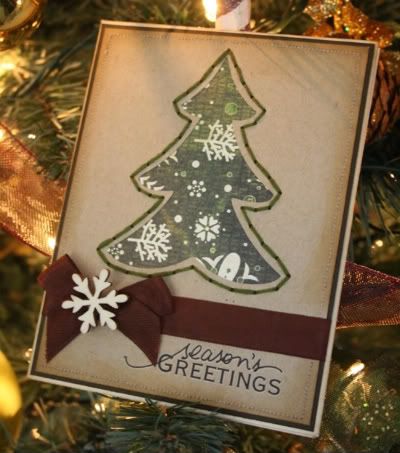
"Season's Greetings" by Carolyn Wolff
Supply List - Cardstock: Bazzill; Patterned Paper: Basic Grey; Rub-On: Little Yellow Bicycle; Ribbon: May Arts; Ink: Ranger Distress Ink; Floss: DMC; Die-Cut: SVG File From The Cutting Café; Snowflake: Maya Road

Variation #1 – I die-cut the tree shape in to the kraft cardstock and placed patterned paper behind instead of creating a tree and placing it on the card front.

Variation #2 – Instead of adding the stitching to the tree, I stitched around the outside of the die-cut using embroidery floss.

Variation #3 – I eliminated the star and the trunk of the tree. I added ribbon and the snowflake.

Variation #4 – I used a rub-on for my sentiment and placed it in the lower right corner rather than overlapping my tree.

  • • • • • • • • • • • • • • • • • • • • • • • • • • • • • •


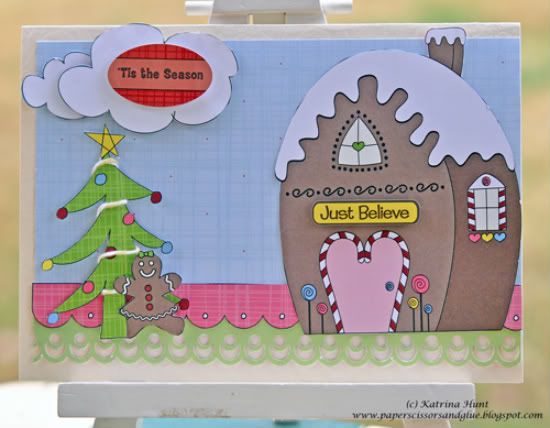
"Tis The Season" by Katrina Hunt
Supplies - Patterned Paper: Nikki Sivils, Scrapbooker (Gingerbread Land Collection); Cardstock: American Crafts; Die Cut Embellishments: Nikki Sivils, Scrapbooker (Gingerbread Land Collection); Adhesives: Glue Arts, Fabri Tac and Scrapbook Adhesives; Twine: The Twinery (Baker’s twine in Buttercup)

Variation 1 - Flipped card to open from bottom

Variation 2 - Tree flipped and made smaller

Variation 3 - Added additional elements, which caused me to move the message to above the tree instead of below.

Variation 4 - Instead of a die cut bracket shape layer, I just layered border strips for something different.

  • • • • • • • • • • • • • • • • • • • • • • • • • • • • • •


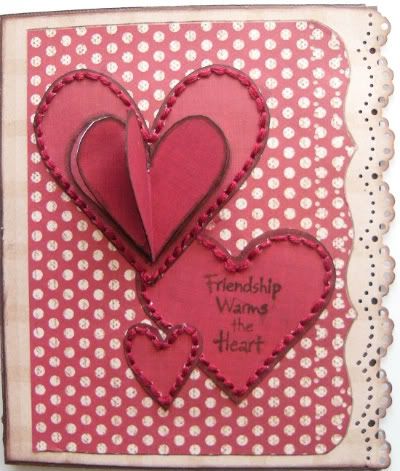
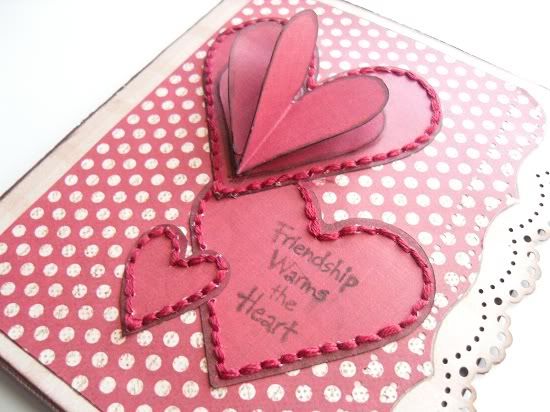
"Friendship Warms the Heart" by Amy Roller
Supplies - Patterned paper: Die Cuts With a View, Lasting Impressions; Thread: DMC; Stamps: Hero Arts; Ink: Colorbox;

Variation# 1: I added a border punch along the edge of my cardstock.

Variation # 2: I decided I wanted to use another shape other than the tree for this one. I went with a cluster of hand cut hearts instead. The largest heart has 4 smaller, identical hearts folded and glued together accordion style and then both ends were glued to the large heart to make a 3-D shape and add some extra depth.


Variation # 3: Obviously because of changing the shape, my stitching was placed differently than on the sketch. I went around each heart instead of across them. Then I stamped my sentiment directly on one of them.
•••••••••••••••••

Thursday, November 17, 2011

Add-on Week, Part 4

•••••••••••••••••••
Add-on Sketch #11
You can download and print this sketch by clicking on the add-on sketches link found under the "printable sketches" tab on the right sidebar.


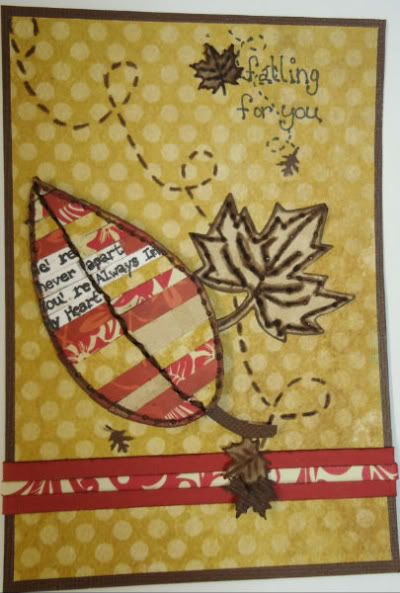
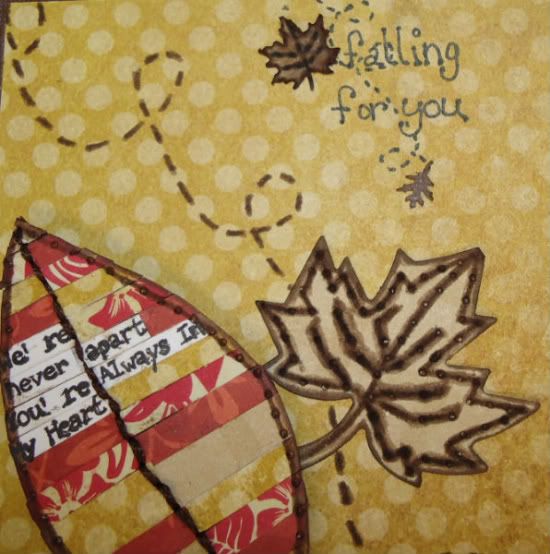
"Falling For You" by Amy Roller
Supplies - Patterned paper: My Minds Eye, Lasting Impressions, unknown-(reds-scraps ); Cardstock: Stampin up!

I decided to make a card for my husband with this add-on, sort of a Valentines card. I thought the leaf fit perfectly tying into the "Falling For You" title.

Variation #1: I took the strips straight across the leaf instead of angling down it. I did this because I had word strips I wanted to incorporate and they have to go horizontally.


  • • • • • • • • • • • • • • • • • • • • • • • • • • • • • •


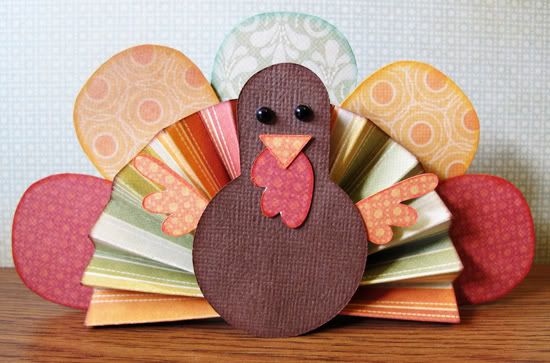
"Turkey" by Melissa Bell
Supplies - Cardstock: Bazzill; Patterned paper: We R Memory Keepers; Chalk Ink: ColorBox; Tools: Cricut (Simply Charmed); Scoring Board: Martha Stewart; Pearls: Queen & Company

When I saw this sketch I tried to think of something fun I could do with the leaf motif. No inspiration was to be found. My mom suggested that it would make a cute turkey feather and that got me excited!

Variation #1 - I turned the sketch upside down and used it as a template for my turkey feathers.

Variation #2 - I originally planned covering the feathers in strips of patterned paper but decided that would take too long. I'm making this turkey for a place cards for Thanksgiving. I wanted to be able to mass produce it easily.
••••••••••••••

Tuesday, November 8, 2011

Two-page Week, Part 2

•••••••••••••••••••
Two-page Sketch #22


You can download and print this sketch by clicking on the two-page sketches link found under the "printable sketches" tab on the right sidebar.


"A Perfect Moment" by Carolyn Wolff
Supply List - Cardstock: American Crafts; Patterned Paper: Little Yellow Bicycle; Canvas Banner and Border: Little Yellow Bicycle; Journal Die-cut: Sizzix Die; Alphas: American Crafts and October Afternoon; Sanding Tool: Basic Grey; Ink: Ranger; Brads: Basic Grey

Another awesome 2-page sketch!

Variation #1 – I followed the background fairly close to the sketch. I may have slight variations in the strips because of the striped paper I chose. I added hand stitching where shown on the sketch as well.

Variation #2 – I moved my title more to the center of the left page and incorporated a canvas banner that matched the papers.


Variation #3 – I eliminated the embellishment shown on the sketch for the left page and I created a border using one of the patterned strips by adding hand-cut circles and popping them up with foam adhesive.

Variation #4 – I created two journal areas, one on the bottom of the right page and a second on the top.


  • • • • • • • • • • • • • • • • • • • • • • • • • • • • • •


"The King & Us" by Melissa Bell
Supplies - Cardstock: Bazzill; Patterned paper, Cardstock Stickers, Pearls, Circle Embellishments: My Mind's Eye; Alphabet stickers: American Crafts; Chalk Ink: ColorBox


Variation #1 - I turned two of the 4x4 photos into two 6x4 photos.

Variation #2 - Because I used larger photos I added a strip of patterned paper to each side of the layout.

Variation #3 - I decided to have the background rectangles reach the sides of the layout.
•••••••••••••••

Friday, October 28, 2011

One-page Week, Part 5 - Simple Stories Product Challenge

It's time for the Simple Stories product challenge! We're sharing another round of projects from the challenge today.

If you missed the product challenge for Card Week, Two-page Week, or Add-on Week, Simple Stories has provided a kit of the same materials for each member of the Sketch Support Creative Team. Together with the October sketches we have been showing you how using the same products and even the same sketches can produce so many different results.

Since it is One-page Week all of the projects (and we've got a lot of them!) we are posting today are based on One-page Sketch #14.
One-page Sketch #14


You can download and print this sketch by clicking on the one-page sketches link found under the "printable sketches" tab on the right sidebar.


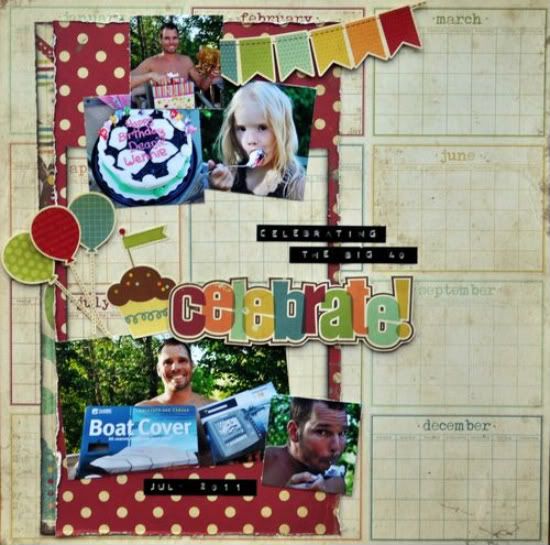
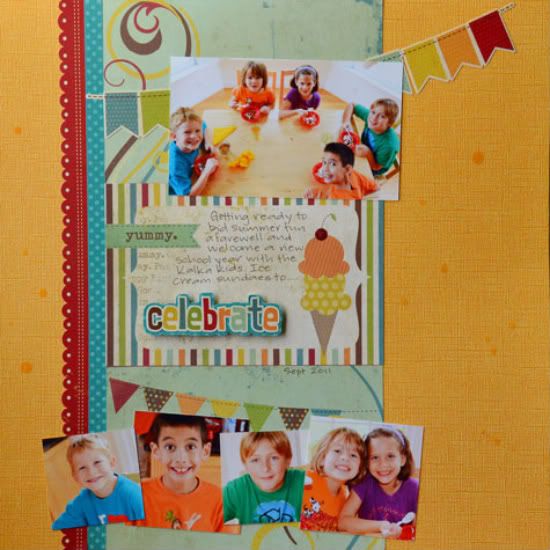
"Celebrate" by Jill Sarginson
Supplies Used - Patterned Paper: Simple Stories; Ink: Vibrance; Stickers: Simple Stories; Adhesive: Pop dots; Miscellaneous: Dymo Gun

As per usual, I stuck closely to the sketch here, I think I even kept my photos the same size! This page was very easy to create because Simple Stories kits are jammed packed with stickers and all sorts of fun designs you can cut out and adhere to your page!

• • • • • • • • • • • • • • • • • • • • • • • • • • • • • •

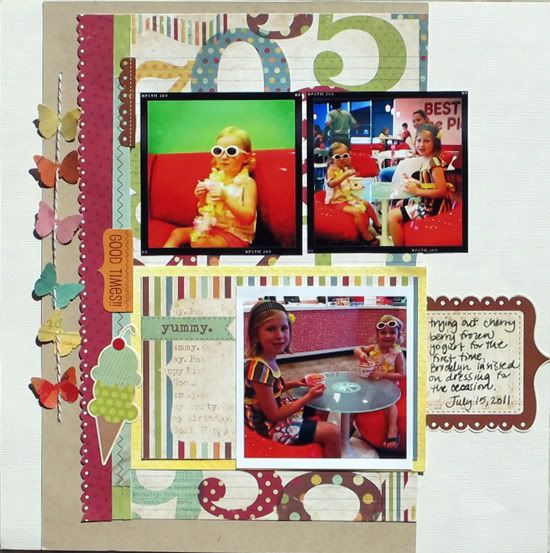
"Yummy" by Christy Arthur
Products - Cardstock: Bazzill; Patterned Paper: Simple Stories (Happy Day Make A Wish, It's Your Day; 100 Days of Summer Flash Cards); Mist: Studio Calico (Mister Huey Lemonade, Piglet, Orchard and Bluegrass); Stickers: Simple Stories (Happy Day Fundamental Cardstock); Punch: Martha Stewart (Classic Butterfly); Floss: Brown Twine

Variation #1: Instead of the flag banner at the top, I moved the banner to the left side and used butterflies.


Variation #2: I used less photos than are shown in the sketch. I simplified and used two smaller photos at the top, similar to the sketch, and one larger photo below.

Variation #3: I moved the larger photo up on my layout, even with the title.

Variation #4: I moved the journaling to the right side, instead of below the title.


Variation #5: I did not add stitching along the borders of my layout.

• • • • • • • • • • • • • • • • • • • • • • • • • • • • • •


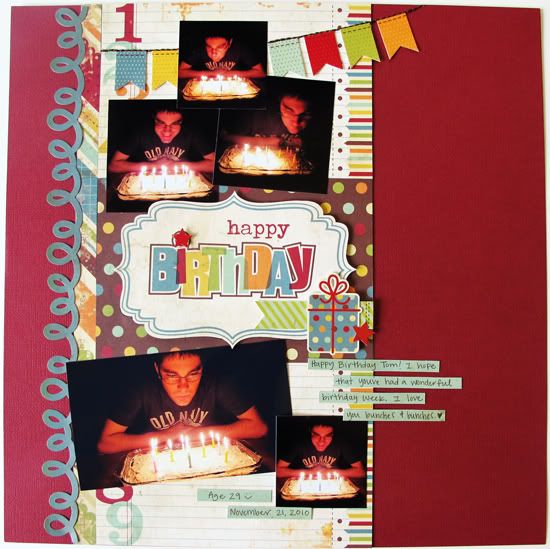
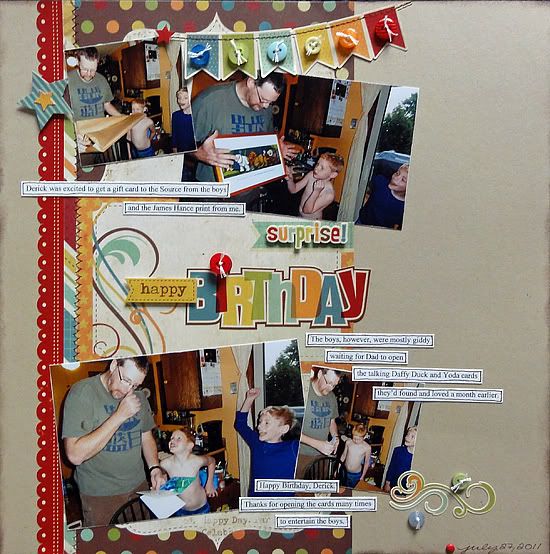
"Happy Birthday" by Melissa Bell
Supplies - Cardstock: American Crafts; Patterned paper: Simple Stories; Stickers: Simple Stories; Pop Dots: EK Success; Floss: DMC

Variation #1 - I used a cardstock border sticker instead of patterned paper for the far left vertical strip.

Variation #2 - I hand stitched across the top of the banner.

Variation #3 - I didn't stitch around the center 6x4 rectangle and embellished it differently.

• • • • • • • • • • • • • • • • • • • • • • • • • • • • • •


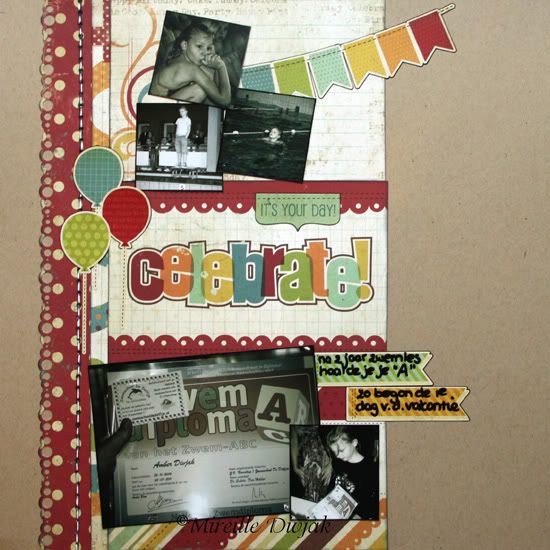
"Celebrate" by Mireille Divjak
Supply list - Cardstock: Canvas Corps (kraft); Patterned Paper: Simple Stories (Happy Day collection); Ink: Colorbox cat eyes (Black); Adhesives: Aleene's (tacky glue); Borderpunch: EK Success; Stickers: Simple Stories; Pens: American Crafts and Sakura

Variation #1: I used balloons instead of candle.

• • • • • • • • • • • • • • • • • • • • • • • • • • • • • •


"Celebrate" by Suzanna Lee
Supplies used - cardstock: Coredinations, Bo Bunny Press; patterned paper: Simple Stories; mist: Maya Road; stickers: Simple Stories

Variation 1: I flipped the picture placement with my larger picture up top and a row of smaller pictures at the bottom.

Variation 2: Title is still in the box per the sketch but my journaling is there as well. I omitted the journaling strips as a result.

• • • • • • • • • • • • • • • • • • • • • • • • • • • • • •


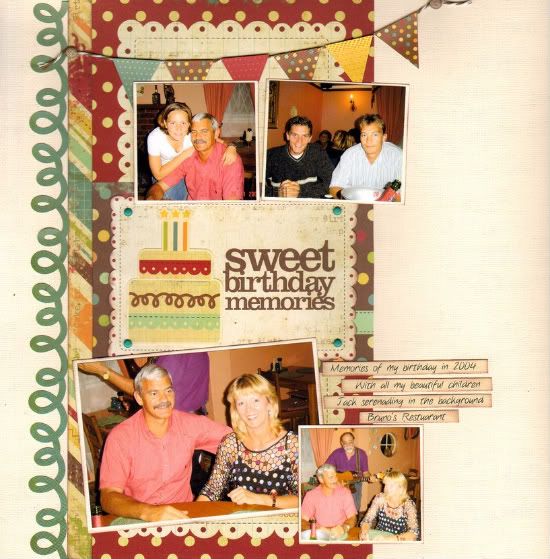
"Sweet Birthday Memories" by Lynette Jacobs
Supply List - cardstock: bazzill; patterned paper: Simple Stories; banner stickers: Simple stories; ink: Versa Magic; brads: Upikit, doodlebug.

Variation 1: I replaced the photos with different size photos.

Variation 2: I replaced the solid strip of paper with the doodle border.

Variation 3: I added the brads to the title block.

• • • • • • • • • • • • • • • • • • • • • • • • • • • • • •


"Happy Birthday" by Jennifer Larson
Supplies - cardstock: Stampin' Up!; patterned paper, stickers: Simple Stories; ink: Stampin' Up!; floss: DMC; other: buttons

1. I used the basic layout of the design, but the photos I had were mostly vertical in orientation. To avoid cutting anyone out of the photos, I didn't use any 2x2 photos and created another vertical print instead.

2. I deleted the actual stitching and chose a stiched sticker instead.

3. I added some embellishments - buttons and flourishes.

• • • • • • • • • • • • • • • • • • • • • • • • • • • • • •


"Making Grandma Laugh" by Noey Hunt
Products used - Patterned papers and stickers: Simple Stories; Letters: Authentique, Creative Memories, Making Memories; Cardstock: Bazzill

Variation #1: I left off the bottom right photo and replaced it with one of the calendar blocks from Simple Stories.

Variation #2: I wanted to anchor the left side of the banner so I added balloons and then repeated the balloons over the journaling block.

• • • • • • • • • • • • • • • • • • • • • • • • • • • • • •


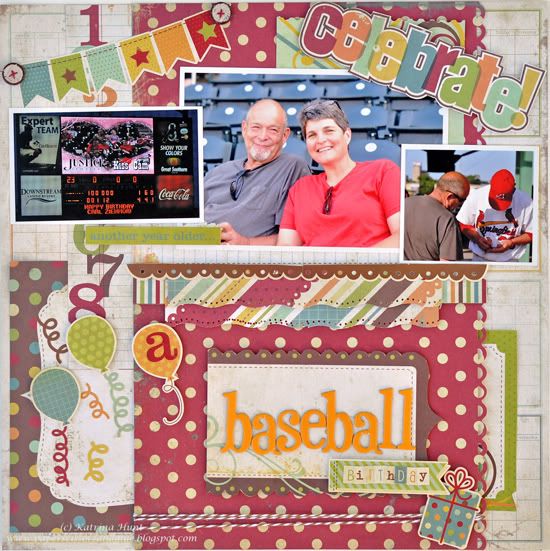
"A Baseball Birthday" by Katrina Hunt
Supplies - Patterned Paper: Simple Stories (Happy Day Collection); Adhesives: Scotch ATG, Fabri Tac and Scrapbook Adhesives; Buttons: Nikki Sivils, Scrapbooker; Twine: The Twinery Baker’s Twine; Punches: Ek Success, Fiskars; Stickers: Simple Stories (Happy Day Collection); Chipboard Letters: American Crafts Thickers

Variation 1 - Centered everything, instead of placing over to the left more.

Variation 2 - No picture at bottom and centered the three pictures on top.

Variation 3 - Added lots of layers where there were none before (under my centered pictures and at the sides).

Variation 4 - Title moved down.

• • • • • • • • • • • • • • • • • • • • • • • • • • • • • •


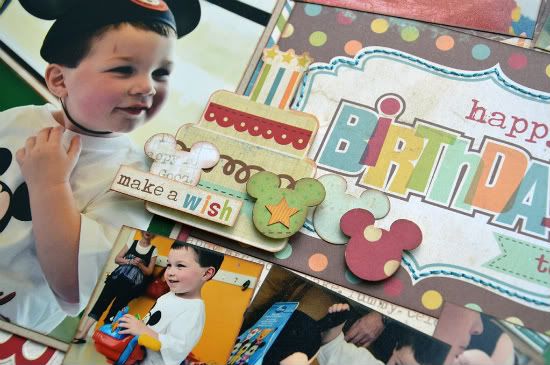
"Happy Birthday to You" by Allison Davis
Supplies - Cardstock: Bazzill; Patterned paper: Simple Stories; Stickers: Simple Stories; Mickey punch: EK Success

Variation #1 - I had so many pictures I wanted to include on this layout that I had no choice but to turn it into a two-page layout. I started by moving the design on the one-page sketch all the way to the right edge of the left page. For the rest of the layout I used my own design.

Variation #2 - I added a 4 x 6 photo to the left of the one-page sketch design.

Variation #3 - Instead of using the candles, as suggested on the sketch, I used a birthday cake and some Mickey ears to go with the theme of Jackson's birthday party.


Variation #4 - Because of my photo options and the design I wanted with the two-pages, I changed up the picture sizes a little. On the top I used a wallet size print, a 2 x 2, and a 2-1/2 x 2-1/2. On the bottom I used one 2 x 2 and then two 2-1/2 x 2-1/2.

• • • • • • • • • • • • • • • • • • • • • • • • • • • • • •


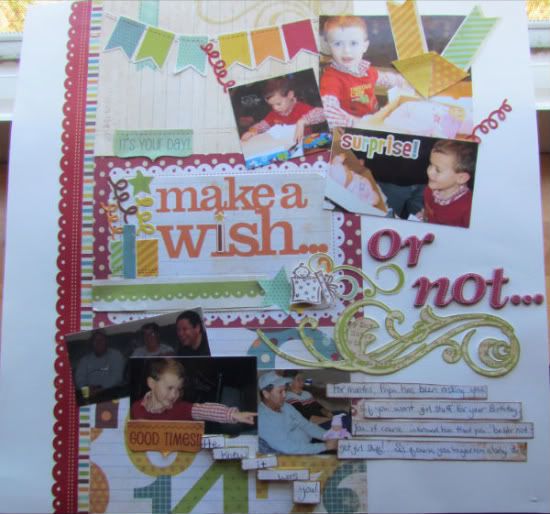
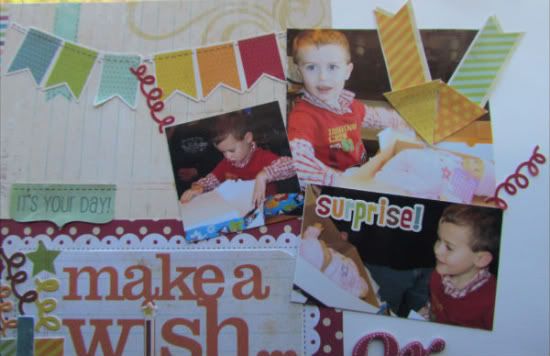
"Make a Wish...or Not..." by Amy Roller
Supplies - All products are Simple Stories unless listed below; Baby Stamp: Stampin UP!; Cardstock: Close to my Heart; Letters: American Crafts, Thickers

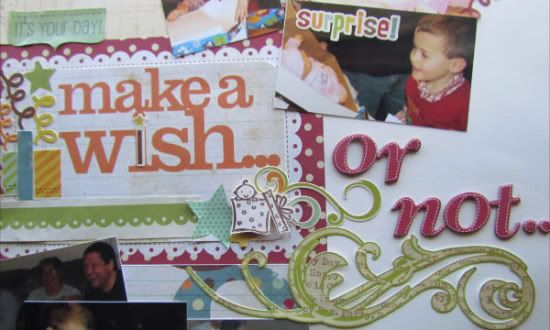
For this page, I used two of the 4 x 6 blocks from the Simple Stories line and put them down on my cardstock first. Then I cut a 4 x 6 block from pattern paper to make the bottom piece. I also cut out another block for the title "Make a Wish" which I layered over the middle tag.


I added some handcut birthday candles from the sticker sheet and added confetti streamers for my flames. I then added the green swirl and the rest of the title, "or not" along with a small stamped image.


Next I used the scalloped sticker strip and stripe that I had pieced together from another Tag sheet up the side of row of tags.

For the top tag, I added a banner sticker strip and moved my photos over to the right to be able to fit it all in. I had a larger photo I couldn't crop that small.


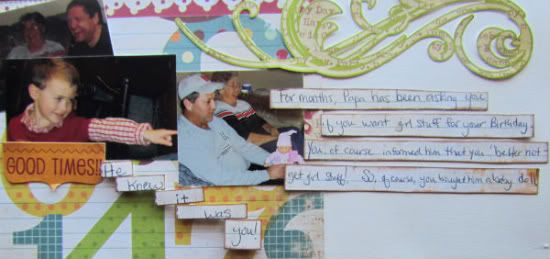
I also added some confetti around the photos and the word "surprise!" I made arrows to point to the focal point of the pictures, which was the baby doll. I did this by cutting a strip from a sticker and adding a triangle banner piece to the end of each strip.

Because I didn't have a large enough photo for the bottom tag, I used 3 smaller photos that played out the events of the day. The whole story behind the layout is added in the journaling strips beside and below the pictures.
•••••••••••••••••••