Showing posts with label Cherie Nymeyer. Show all posts

Friday, April 13, 2012

Two-page Week, Part 5 & a Blog Hop Tomorrow!

••••••••••••••••
Two-page Sketch #27


You can download and print this sketch by clicking on the two-page sketches link found under the "printable sketches" tab on the right sidebar.


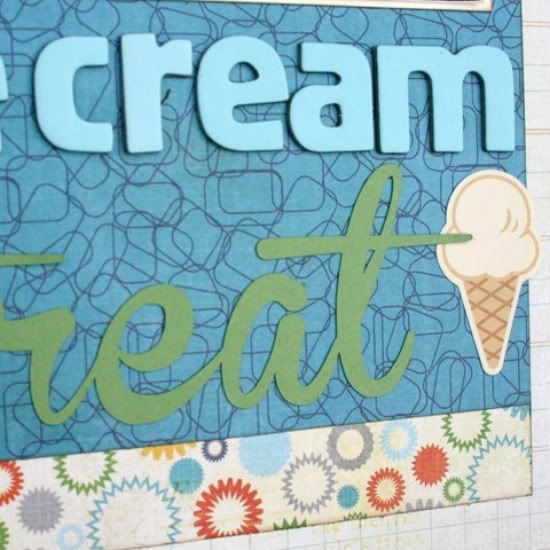
"Ice Cream Treat" by Cherie Nymeyer
Supplies - Cardstock: Stampin' Up!; Patterned Paper: Echo Park; Letter Stickers: American Crafts; Die Cut Title (Treat), Silhouette; Sticker: October Afternoon; Die Cut Tag: My Little Shoebox; Stamp: Unity Stamp Co; Ink: Stampin' Up!

Variation #1 - I made this sketch a single page layout instead of a two-page layout.

Variation #2 - On page one, I centered my patterned paper instead of bringing it right to the edge.

Variation #3 - I clustered my embellishments to the left of my small square photo instead of underneath it.
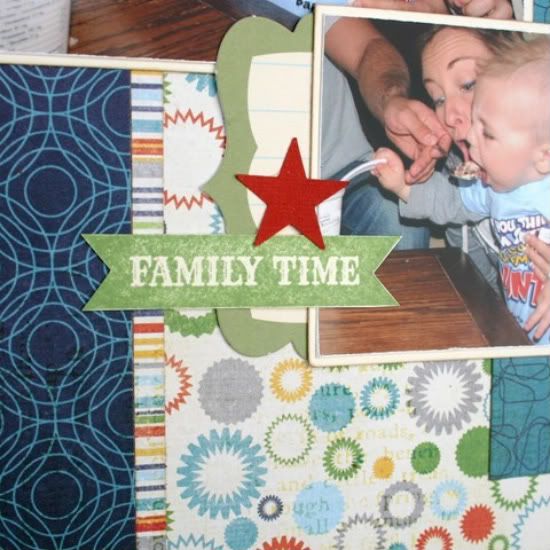

Variation #4 - I did a journal block instead of journal strips.

  • • • • • • • • • • • • • • • • • • • • • • • • • • • • • •
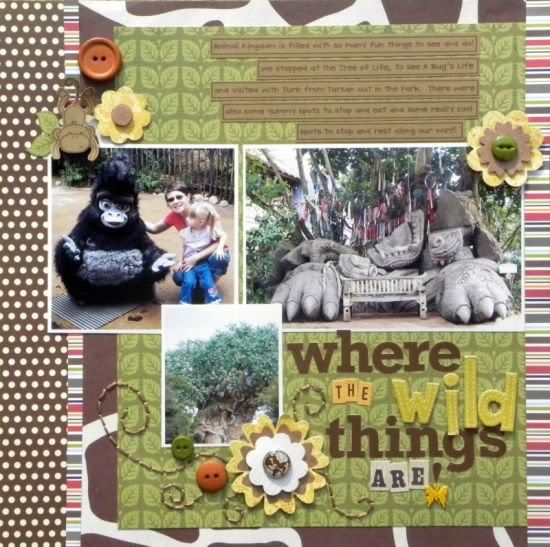

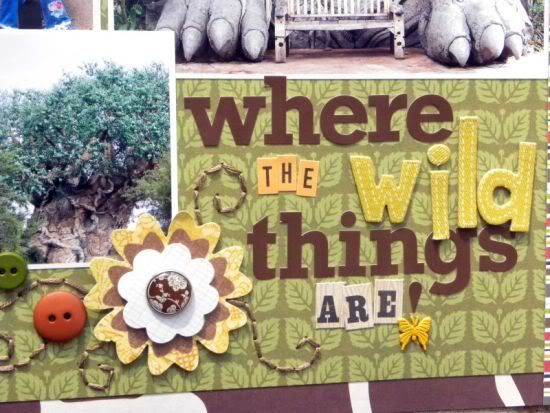
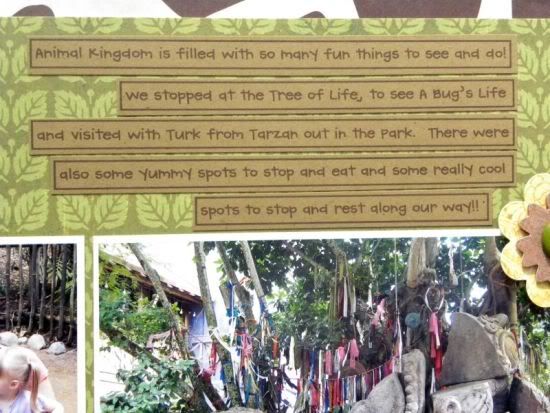
"Where the Wild Things Are!" by Ashley Horton
Supplies - Cardstock: The Paper Studio; Patterned Paper: Jillibean Soup, The Paper Studio, Crate Paper; Letter Stickers: Jillibean Soup and October Afternoon; Thickers: American Crafts; Font: CK Handprint; Ink: Memento; Layered Flowers: K&Company; Buttons: Blumenthal Lansing; Embroidery Floss: Janlynn; Other: Acrylic Stamp and Brads

Variation #1 - I used the left hand side of the sketch to create a one-page layout.

Variation #2 - I changed the size of the smaller 2.5x2.5 photo to 2.5x3.

Variation #3 - I added an embellishment cluster to the top left-hand corner of the layout.

Variation #4 - Since my page ended up being a one-pager, I added one of the thin striped pieces of paper to the far right-hand border of the page.

Here's a closer look at the details:


  • • • • • • • • • • • • • • • • • • • • • • • • • • • • • •


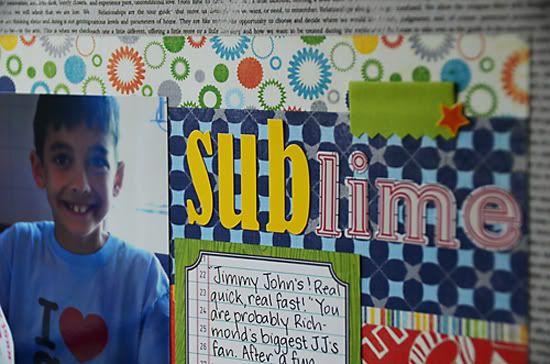
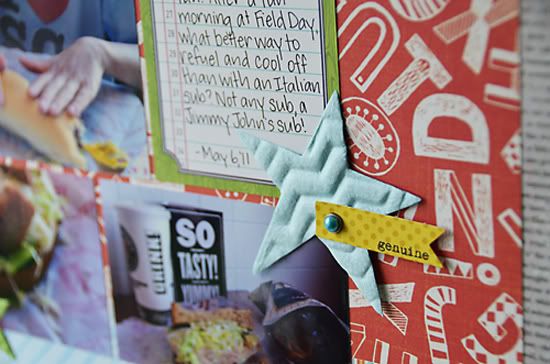
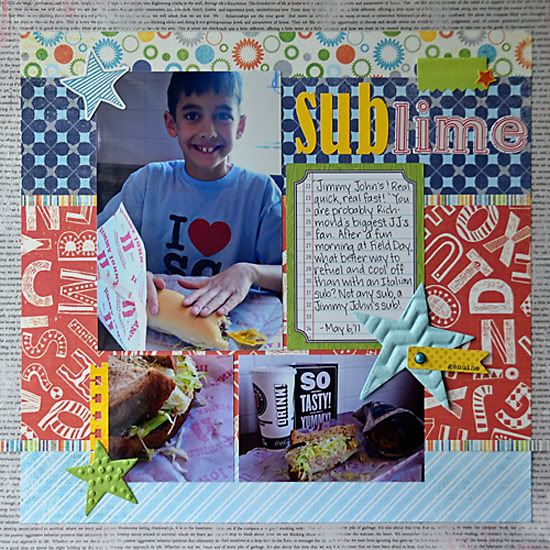
"Sub-limet" by Suzanna Lee
Supply List - Patterned paper: Authentique, Echo Park, Basic Grey, Jillibean Soup; Letter stickers: Jenni Bowlin, Bella Boulevard; Tabs: K&Co; Stars: Bazzill; Stickers: Echo Park

Variation 1 - I used the right hand side of the sketch and flipped it 90 degrees.

Variation 2: Instead of the three 2.5x2.5 squares, I used one square picture sized 2.5x2.5 and a longer picture of the same height.

Variation 3: The "background" piece that overlaps from the second page is omitted as there is enough movement in the different papers I used.

Variation 4: The addition of a title and embellishments not present in the sketch but necessary on a one pager.

Here's a closer look at the details:


  • • • • • • • • • • • • • • • • • • • • • • • • • • • • • •
Meet the Creative Team Blog Hop!

Be sure to check back tomorrow for our "Meet the Creative Team" Blog Hop. There will be a new sketch, lots of giveaways and you'll get a chance to hop around to each creative team member's blog to see how they used the new sketch! It's going to be a great time!
•••••••••••••••••••••••

Monday, April 2, 2012

Card Week, Part 1

•••••••••••••••••
Card Sketch #18


You can download and print this sketch by clicking on the card sketches link found under the "printable sketches" tab on the right sidebar.


"Happy Birthday" by Cherie Nymeyer
Supplies - Cardstock: Bazzill Basics; Patterned Paper: Jillibean Soup; Punch: Fiskars; Stamp: Papertrey Ink; Ink: Stampin' Up!

Variation #1 - I rounded the corners of the square piece of cardstock


Variation #2 - I chose to make the sentiment piece longer and thinner and not round the corners

Variation #3 - I used stars instead of butterflies.

  • • • • • • • • • • • • • • • • • • • • • • • • • • • • • •


"Me Right Now" by Jennifer Larson
Supply list - Cardstock: Bazzill; Patterned paper: October Afternoon, Pebbles, Crate Paper, Jillibean Soup; Stickers: October Afternoon, K'esi Art, American Crafts; Diecuts: October Afternoon, Russell & Hazel; Punch: EK Success; Buttons: October Afternoon; Mist: Studio Calico; Ink: Jenni Bowlin

Variation #1 - The sketch looked like an 8.5x11 piece of paper, so I turned it into a layout.

Variation #2 - I kept it basically the same, substituting the title for the sentiment and adding journaling next to the photo.

Variation #3 - I removed some of the embellishments, since the mix of papers was so eye catching.

  • • • • • • • • • • • • • • • • • • • • • • • • • • • • • •


"You Take the Cake" card by Melissa Bell
Supplies - Patterned Paper: DCWV; Ink: Colorbox Fluid Chalk Ink; Corner Rounder: We R Memory Keepers; Black Pen: Sharpie; Other: Pop dots


Variation #1 - I felt that my card was busy enough so I decided not to add the three embellishments.

Variation #2 - I decided to round the corners of my card.

Variation #3 - I pop dotted my message.
•••••••••••••••••

Wednesday, March 28, 2012

One-page Week, Part 3

••••••••••••••
One-page Sketch #19

You can download and print this sketch by clicking on the one-page sketches link found under the "printable sketches" tab on the right sidebar.


"Just Like Dad" by Cherie Nymeyer
Supplies - Cardstock: Bazzill Basics and American Crafts; Patterned Paper: October Afternoon; Die Cuts: Silhouette; Chipboard: Crate Paper; Stickers: Jillibean Soup, 7 Gypsies, and Sassafras Lass; Journaling Tag: Jenni Bowlin; Buttons: Unknown; Stitching Template: Stampin' Up!

Variation #1: I made my strips different sizes/lengths and different amounts of them.

Variation #2: Instead of flowers, I chose clusters of stickers and embellishments.


Variation #3: I put my journaling on top of the patterned paper instead of off to the side.


Variation #4: I moved my title to below my photo.

  • • • • • • • • • • • • • • • • • • • • • • • • • • • • • •


"Pirate Night" by Christy Arthur
Supply List - Cardstock: Bazzill; Patterned Paper: Crate Paper (Paper Heart Friendship, Delivery, Love Letter), October Afternoon (Sidewalks Marbles); Embellishments: Crate Paper (Paper Heart Border Stickers), October Afternoon (Farmhouse Wrap Trims). Americam Crafts (Chap, Dear Lizzy Fabric Paper Firefly), Bananafish Studios (Graphic Ledger Tags); Tools: Studio Calico Hero Arts (Alphabet Stamp), Jenni Bowlin (Weather Vane Ink), Bazzill In Stitch Floss; Mist: Studio Calico (Mister Huey Dewey)


Variation #1: I moved the embellishments to the right side of the layout and used stars instead of scallop circles.


Variation #2: I added another strip of paper on the right side of the layout.


Variation #3: I moved the journal tag to the bottom right instead of on the right side.


  • • • • • • • • • • • • • • • • • • • • • • • • • • • • • •


"Extreme Makeover" by Janette Kincaid
Supplies - Cardstock: Bazzill, Core’dinations; Patterned paper: Bo Bunny; Alphabet stickers: American Crafts; Rub-Ons: Bo Bunny; Embroidery floss: DMC; Scallop punch: Martha Stewart; Journal Pen: Zig; Adhesive: Glue Arts, Helmar; Unknown: buttons, sanding block

This sketch was an easy transition after doing the flags in last week’s sketch - the notched banners are almost the same just on a larger scale (and of course there’s no flag pole!)

Variation #1 - I stretched the One Page Sketch over two pages to create a double page layout.

Variation #2 – I increased the number of photos from just one on the sketch to six and adjusted the orientation of each.

Variation #3 – I limited the embellishment clusters to three since my paper and photos make the layout busier.


  • • • • • • • • • • • • • • • • • • • • • • • • • • • • • •


“Hi” by Andrea Friebus
Supply list - Cardstock: Amercian Crafts, Core’dinations; patterned paper: Basic Grey, Jillibean Soup, Crate Paper, Bo Bunny, Echo Park; ink: Clearsnap; journaling spot, bingo cards: Jenni Bowlin Studios; canvas sticker: American Crafts; embroidery floss: DMC; die cut machine: Slice, Making Memories; chipboard, buttons: unknown

Variation #1- My photo is still 4x6 but is vertical so I added the title directly on top of the photo.

Variation #2 - Since I wanted the subject of the photo looking in, I moved the journaling to the left and the photo and strips of paper to the right.

Variation #3 - I overlapped the background strips and cut some of them with only one point. These background strips were really busy so I matted the photo and journaling on solid patterned paper so they wouldn’t get lost.

Variation #4 - Rather than placing the buttons and flower embellishments in various places, I grouped them all together underneath the photo.


I omitted the stitching and added a canvas sticker and glittery chipboard flourish instead.
•••••••••••••••••••••

Wednesday, March 21, 2012

Add-on Week, Part 3

••••••••••••••••
Add-on Sketch #15


You can download and print this sketch by clicking on the add-on sketches link found under the "printable sketches" tab on the right sidebar.


"It's a Boy" card by Jill Sarginson
Supplies Used - Patterned Paper: Pink Paislee; Ribbon: Studio G, Forever In Time; Tools: Creative Memories circle punch, star punch; Other: button, dowels, jean material; Ink: Vibrance, Distress

Variations

• I used three flags on my card.

• The flags are made with ribbon, with one of them stitched.

• I used dowels (from my husband's tool box).

  • • • • • • • • • • • • • • • • • • • • • • • • • • • • • •


"My Boys" by Cherie Nymeyer
Supplies - Cardstock: Crate Paper; Patterned Paper: Simple Stories; Letter Stickers: October Afternoon; Stickers and Diecuts: Jillibean Soup


Variation #1: I only used four flags on my page.


Variation #2: I cut the tags at random sizes instead of measuring them exactly.

Variation #3: I cut out the flag poles from patterned paper.
••••••••••••

Monday, February 20, 2012

One-page Week, Part 1

•••••••••••••••••
One-page Sketch #18


You can download and print this sketch by clicking on the one-page sketches link found under the "printable sketches" tab on the right sidebar.


"Just the 2 of Us" by Lynette Jacobs
Supply list - Cardstock: Bazzill; Printed Papers: Creative Imaginations (Devotions by IOD), Teresa Collins (Notations); Alphabet: American Craft (Doll), My little shoebox mini alphabet stickers; Die: Quickutz nesting hearts; Punch: Martha Stewart heart

Variation #1: I cut out the big heart and then stuck it to green bazzill. Other than that I stuck to the sketch.

  • • • • • • • • • • • • • • • • • • • • • • • • • • • • • •


"Bailey" by Christine Chain
Supplies – patterned paper: Bo Bunny, My Mind’s Eye, Bella Blvd; buttons: Basic Grey; corrugated letters: Jillibean Soup; word stickers: Authentique; ink: Tsukineko; other: embroidery floss

Variation #1: I used buttons instead of the smallest hearts. I wanted this layout to be about how much my kids love my parents' dog, but not overly "lovey" with tons of hearts. Bailey was a boy, after all.


Variation #2: I omitted the stitching and some of the hearts at the bottom. I ended up liking how it looked just like this (even though I had cut out other hearts and had more buttons). Once I added the word stickers it just felt done.


  • • • • • • • • • • • • • • • • • • • • • • • • • • • • • •


"9 Years" by Cherie Nymeyer
Supplies - Cardstock: Bazzill Basics; Patterned Paper: Echo Park; Chipboard Letters: American Crafts; Pen: American Crafts; Die Cuts: Silhouette

Variation #1: I excluded the journaling block on the left hand side for journaling strips.


Variation #2: I replaced the top right photo with journaling strips.


Variation #3: I used less heart embellishments.


••••••••••••••••••••••••••

Friday, February 10, 2012

Two-page Week, Part 5

••••••••••••••••••••••
Two-page Sketch #25


You can download and print this sketch by clicking on the two-page sketches link found under the "printable sketches" tab on the right sidebar.


"Love is the Tie That Binds Us Together" by Virginia Nebel
Supply list - Cardstock: Doodlebug; Patterned paper: Authentique; Alphabets: American Crafts; Diecuts: Sizzix


Variation #1 - I squeezed in the two-page sketch to make it into a single page layout.

Variation #2 - I kept the proportion of the photo blocks on the left side of the sketch. I replaced the 2 x 2 photo placement with a pattern paper accent.

Variation #3 - To create a long title I used a pre-made tag element and added a few words to elongate the title.


Variation #4 - Instead of placing journaling below the title I created a hidden journal element tucked under the photo block.


• • • • • • • • • • • • • • • • • • • • • • • • • • • • • • 


"Tinker" by Suzanna Lee
Supply List - Cardstock: Bazzill Basics, Coredinations; Patterned Paper: American Crafts; Brads, Buttons and Stickers: Crate Paper; Tags: American Crafts, Maya Road, Elle's Studio; Corrugated Alpha: Little Yellow Bicycle; Twine: The Twinery; Chipboard: Bella Boulevard; Journal Spot: Ormolu; Punch: EK Success


Variation #1: I created a single page layout using only the left hand side of the sketch.

Variation #2: Instead of the journal strips, I stacked a bunch of tags if varying sizes and textures.


Variation #3: There are a few extra embellishments, all round, to draw your eye to the pictures.

• • • • • • • • • • • • • • • • • • • • • • • • • • • • • • 


"Little Rebel" by Cherie Nymeyer
Supplies - Cardstock: Bazzill Basics; Patterned Paper: Bella Blvd; Letter Stickers: Basic Grey; Die Cut Letters: Cricut; Stamps: Kaiser Craft and Papertrey Ink; Flower: Sassafras Lass; Tag Sticker: Jillibean Soup; Punch: Fiskars

Variation #1: I only used the left hand side of the sketch.

Variation #2: I moved the title to underneath the photo block.


Variation #3: Instead of two small photos on the lower left side, I chose to use a photo the same size as the one on the right.

 ••••••••••••••••••

Monday, January 16, 2012

Add-on Week, Part 1

••••••••••••••
Add-on Sketch #13

You can download and print this sketch by clicking on the add-on sketches link found under the "printable sketches" tab on the right sidebar.


"Snow Angel" by Cherie Nymeyer
Supplies - Cardstock: Bazzill Basics; Patterned Paper: October Afternoon and Jillibean Soup; Snowflake: Unknown; Glitter Candy: Pebbles Inc.; Alphabet Stickers: American Crafts

Variation #1: I didn't put a mouth on my snowman (actually I did but it didn't work so I planned to do something else and then I forgot, oops!)

Variation #2: I used a piece of ribbon for the snowman's scarf.

Variation #3: I added glitter dots to the snowman's buttons.

 • • • • • • • • • • • • • • • • • • • • • • • • • • • • • •


"Mark St., London" by Janette Kincaid
Supply List - Patterned Paper: Echo Park (Winter Park), We R Memory Keepers (White Out); Cardstock: Bazzill; Letter Stickers: Basic Grey, My Mind’s Eye; Rhinestone Bling: Kaiser Crafts; Chipboard Heart: Heidi Swapp; Brads, Ribbon: unknown

This little snowman makes me so happy, I can hardly stand it!! I knew I wanted him to look ‘real’ just like Frosty so I added as much depth and dimension as I could.

Variation #1 - I folded my length of ribbon in half (width ways) and tied it around the snowman’s neck just like you if he was made of snow.

Variation #2 – I made his hat round by bending and shaping the black cardstock and rolled the bottom edge to look like the brim.


Variation #3 – For arms I cut a piece of brown cardstock into a branch shape and then rolled and twisted the paper. If you dampen the paper before rolling, it will hold its shape and stay twisted once it’s dry.
••••••••••••••••••••••••