
The three layouts today all show some great variations of the sketch and how you can add special details to make it fit your theme. Plus there are some great ideas for making this sketch work with the pictures and elements you want to use.
One-page Sketch #5
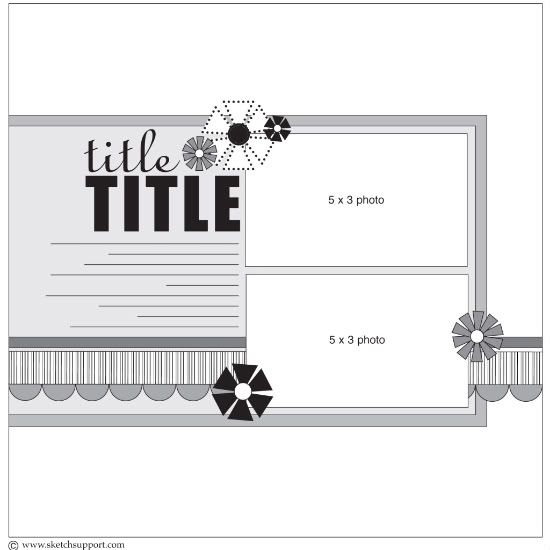
You can download and print this sketch by clicking on the one-page sketches link found under the "printable sketches" tab on the right sidebar.
Supplies - Patterned Paper: Cosmo Cricket (Joy Ride collection); Cardstock: Bazzill Basics; Tools: Creative Memories circle cutting system, Close To My Heart edge distresser, Fiskars Scallop Sentiment border punch; Ink: Vibrance; Font: Computer-generated (Ariel); Alphabet: American Crafts, Thickers; Pen: Zig Writer; Adhesive: Pop dots, two-sided tape, Tombo glue
I kept pretty close to the sketch for this one. One small tip - when putting together a layout with several small embellishment clusters, consider mounting them on a circle cut out of cardstock or matching pattern paper. This unifies the clusters and makes your layout more cohesive! Also, if you mount some of your cluster with pop-dots, it adds some dimension.
• • • • • • • • • • • • • • • • • • • • • • • • • • • • • • • • • • • • • • • • • • • • •
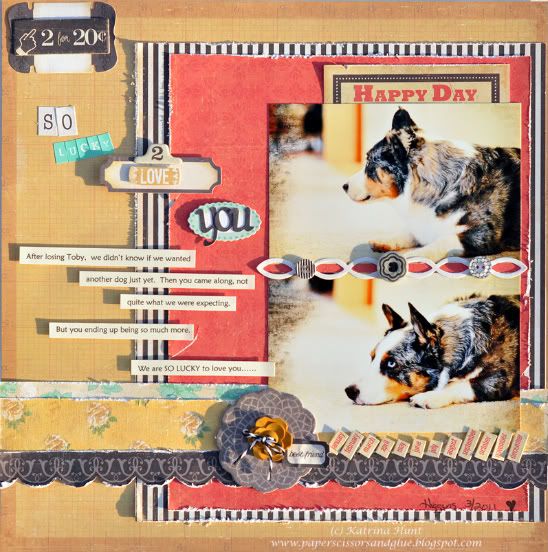
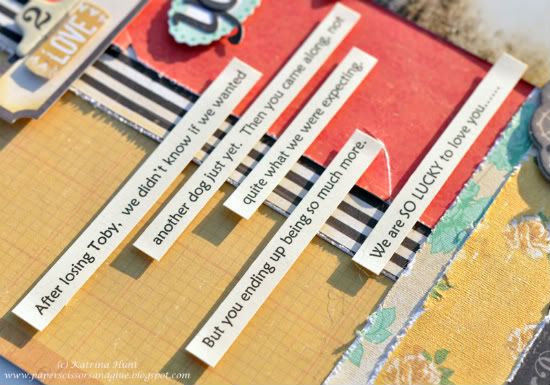
"So Lucky 2 Love You" by Katrina Hunt
Supplies - All paper, buttons, chipboard: Crate Paper (Portrait collection); Stickers: Crate Paper (Portrait collection) and My Little Shoebox (letters for lucky); Twine: The Twinery Baker’s Twine; Adhesive: Scotch ATG, Fabri-Tac, Scrapbook Adhesives pop dots
I had to make the sketch work with the way my pictures were facing so I had to move my pictures over to the other side of the page.
Variation 1: Moved pictures to opposite side.
Variation 2: Flipped the two smaller background papers up and down on the page
Variation 3: Added some embellishments that were on the sketch between and below the pictures and also in the top corner.
• • • • • • • • • • • • • • • • • • • • • • • • • • • • • • • • • • • • • • • • • • • • •
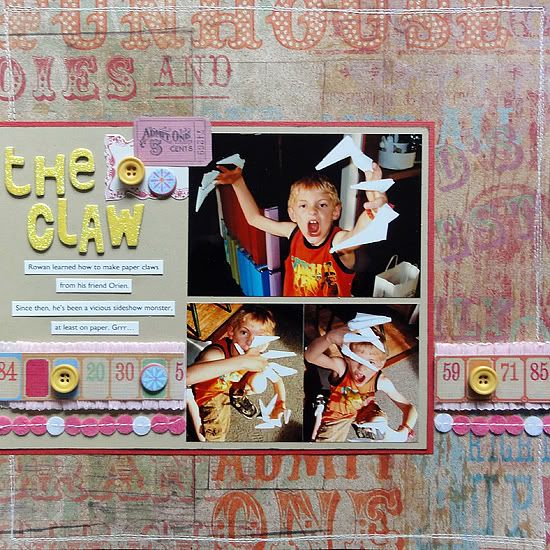
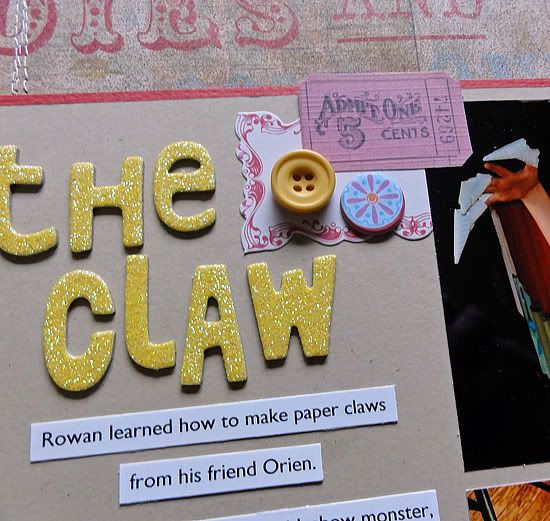
"The Claw" by Jennifer Larson
Supplies - Cardstock: The Paper Company, Bazzill; Patterned paper, ribbon, journaling tag, chipboard: GCD Studios; Chipboard letters: American Crafts; Ink: Stampin' Up!; Buttons: My Mind's Eye; Font: Gill Sans; Mist: Studio Calico; Other: thread
1. I had a few photos of my son, the origami lover, after he made paper claws: one 4x6 photo and two 3x3. I trimmed them all so that they were 5 inches wide to use them all with this sketch instead of two 3x5 photos.
2. Since he was performing in these photos, I thought of him as a sideshow attraction, so I pulled out this carnival themed paper called Funhouse to use. To tone down the pinks in the paper, I misted it in brown.
3. Rather than striped paper and scallops, I used a ruffled ribbon and a numbered patterned paper to strip to go with the carnival theme.

4. Along those lines, I swapped out the flowers for a tickets and some carnival bling.
6 comments:
These layouts look great, love all variety of themes today. It's a great sketch for playing with embellishments, doesn't overcrowd the layout just adds more fun to it. Great job ladies.
I love the variety of picture sizes today. Great job.
What fun layouts today!
Nice job ladies!
I like the GROUND COMMON ELEMENTS ON A CIRCLE tip. Thanks!
Awesome layouts. Love all the layers!
Post a Comment