
••••••••••••••
One-page Sketch #15
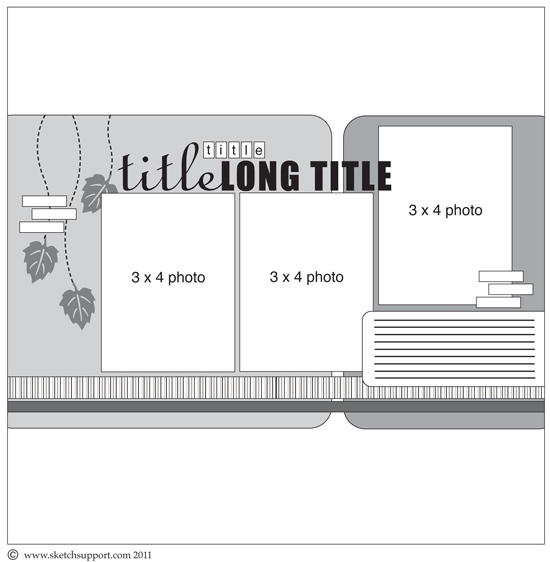
You can download and print this sketch by clicking on the one-page sketches link found under the "printable sketches" tab on the right sidebar.
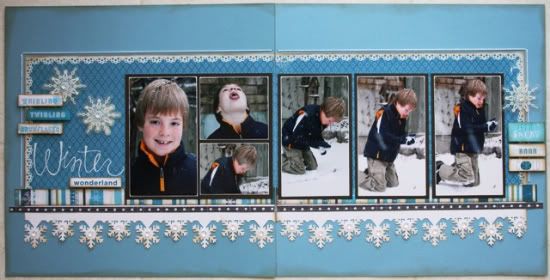
"Winter Wonderland" by Carolyn Wolff
Supply List - Cardstock: Cordinations and Bazzill; Patterned Paper and Stickers: Little Yellow Bicycle (Winter Twig Collection); Snowflakes: Maya Road; Floss: We R Memory Keepers; Ink: Ranger Distress Ink; Border Punch: EK Success; Rub-On: Making Memories
Variation #1 – I turned the one-page sketch into a two-page layout. I stretched the background across two pages and decided to use one paper instead of two different ones, like it was shown on the sketch.
Variation #2 – I used all vertical photos except for the two smaller ones on the left page. All my larger photos measure 3 x 5 ¼ inches and I matted them with brown cardstock. I also sanded the edges of my photos to make them stand out against the darker mat.
Variation #3 – I created the borders along the bottom of my layout slightly different than was shown on the sketch.
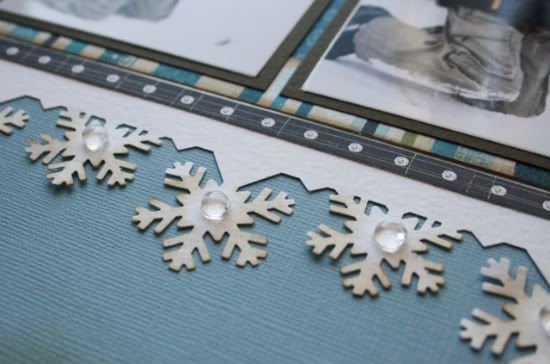
I created a snowflake border using a punch and added it to the bottom of the pattern paper on my layout. I layered the striped strip and the thin brown dot strip on top of my snowflake border.
Variation #4 – I moved my title to the left of my page rather than across the top as shown.
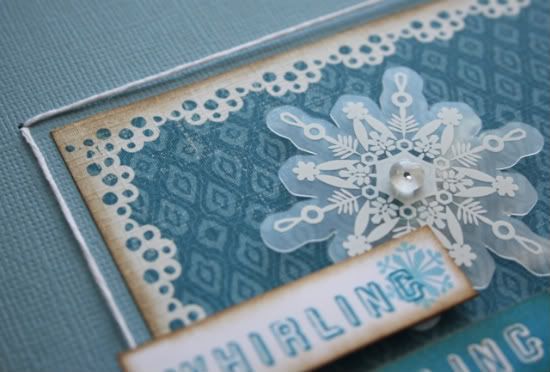
Variation #5 – I used snowflakes as the accent on my layout and decided to leave out the stitching that is shown on the sketch. I added a stitched border around the top of my layout instead.
• • • • • • • • • • • • • • • • • • • • • • • • • • • • • •

"Nature Center Walks" by Allison Davis
Supplies - Cardstock: Bazzill; Patterned paper: Little Yellow Bicycle; Embellishments: Little Yellow Bicycle; Alphabets: American Crafts and KaiserCraft; Word stickers: American Crafts and October Afternoon; Corner Rounder: Fiskars; Ink: Colorbox Fluid Chalk Ink and Staz On
Variation #1 - I really like the falling leaves on the sketch but every group of photos I had to fit that theme wasn't going to fit on a one-page layout. To make it work, I stretched the design on the one-page sketch to fit a two-page layout.
I kept the left background piece width as the sketch suggests and then stretched the right piece across the rest of the layout.
Variation #2 - Since most of the photos that I wanted to use were vertical and I needed the height, I cut them to 3 x 5 instead of 3 x 4.
In place of the 3 x 4 on the right of the sketch I used three wallet size photos. Together they had more height than the photo on the sketch but it worked out perfectly for my journaling. I hardly ever split my journaling across two-pages so I moved it over to the right page and the third wallet size photo filled the spot where the journaling was suggested to be.
Variation #3 - I extended the height of the background papers to 8" since I had an extra inch of height on my photos.
Variation #4 - I still used the idea of falling leaves but constructed it a little different than on the sketch.
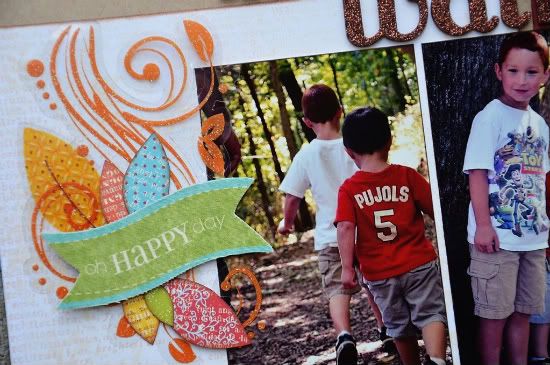
I used a flourish transparency from Little Yellow Bicycle and added a leaf cluster on top of that. I used similar clusters of leaves for the other embellishments on the layout.
Variation #5 - I added more strips across the bottom. I really wanted to get more colors into the layout and this was an easy way to do it, especially since none of the strips interfere with the overall design.
• • • • • • • • • • • • • • • • • • • • • • • • • • • • • •

"Riding the Christmas Train" by Shari Thurman
Supplies - Patterned paper, Alphabets and die cuts: Authentique; Paper Punches: EK Success and Stampin' Up; Adhesive: ATG by Scotch; 3D foam adhesive: Thermoweb; Ink: Colorbox Chalk Ink (Dark Brown); Glitter Glue: Stickles; Memory Thread: DMC
Variation #1: I stretched the sketch to create a two-page layout. I just created a mirror image of the background papers.
Variation #2: I changed the size of the photos and double matted the photo of the train.
Variation #3: I changed the embellishments to Christmas ornaments.
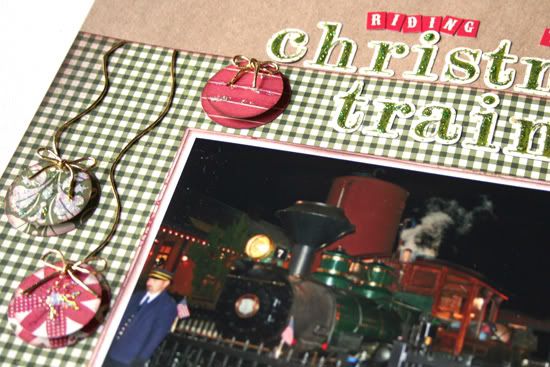
Variation#4: I moved my journaling and replaced it with a die cut title.
Variation #5: I omitted the small journal words.
••••••••••••••••••••••••••
3 comments:
Love all these double pages!
Allison - Amazing as always. I really love this collection. All your accents are awesome.
Shari - Great Christmas layout. Looks like fun was had by everyone. The kraft background is perfect. Great job.
I love how you ladies made this into double page spreads! I'm sitting here saying to myself, duh! You could do that too!! Amazing!!
Carolyn, your layout is subtle and beautiful and so appropriate for your photos. Allison, I love your little embellishment clusters and how you extended your photos down to balance out your journaling spot. Shari, I really like the three distinct patterned paper sections you created and the way your patterns work with your darling photos.
Post a Comment