
••••••••••••••••••••••••••
While this umbrella sketch might not keep you dry on a rainy day, it sure does make a cute embellishment on a rainy theme card or layout! And, as you'll see below, it adds an adorable touch to a baby theme too.
Today, we've got two cards and a layout that show different ways you can construct and add detail to this sketch to make if fit the project you are using it on. There are a lot of possibilities with this one!
Add-on Sketch #4

You can download and print this sketch by clicking on the add-on sketches link found under the "printable sketches" tab on the right sidebar.
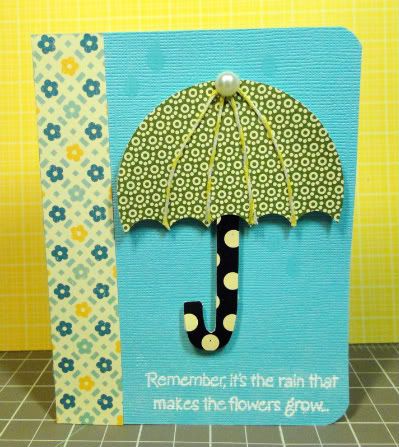
"Remember" card by Melissa Elsner
Supplies - Patterned Paper: October Afternoon; Cardstock: Core'dinations; Bakers Twine: Jillibean Soup; Pearl: Jolee's (EK Success); Stamp Ink: Hampton Art; Embossing Powder: Stampendous; Circle Punch: EK Success; Stamp: My Favorite Things; Other: Glossy Accents (Ranger Industries)
I used my Silhouette to cut out a 3" circle from the October Afternoon paper and then took my 5/8" circle punch to do the scallop. After mulling over a way to add dimension and detail to the umbrella, I decided to lay down some of the bakers twine using some Glossy Accents. The handle of the umbrella was hand sketched and cut out. The perfectionist in me had a hard time with that but I have ended up enjoying the imperfection of the shape. Because I wanted the umbrella to be the focus, I used some pop dots to make it stick out.
One other element is that I wanted to add some raindrops.
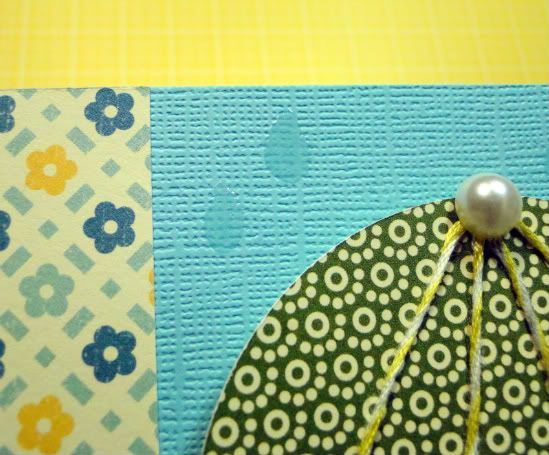
I used my Glossy Accents and drew some little drops onto the card.
• • • • • • • • • • • • • • • • • • • • • • • • • • • • • • • • • • • • • • • • • • • • •
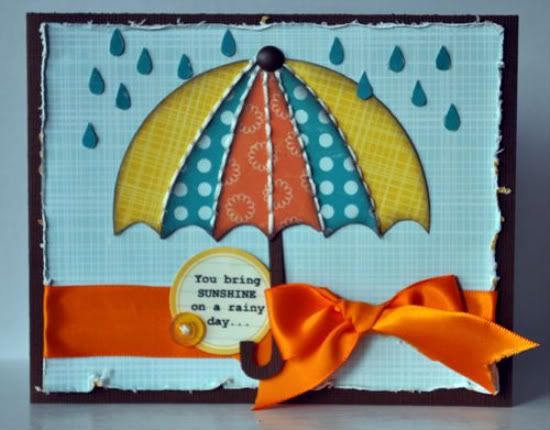
"You Bring Sunshine on a Rainy Day" card by Jill Sarginson
Supplies - Patterned Paper: Echo Park (Walk in the Park collection); Cardstock: Bazzill Basics; Tools: Creative Memories circle cutting system, Close To My Heart edge distresser; Ink: Vibrance; Journal Tag: October Afternoon; Font: Computer-generated (Courier); Thread: Anchor; Ribbon, Button, Brad: unknown
How I made the umbrella:
My umbrella was made using three layered pieces of patterned paper - yellow (bottom), blue (middle), orange (top).
Step One: I cut a circle out of a piece of scrap cardstock. I then placed a scalloped ruler upside down on the cardstock (about halfway down), traced the scallops and then cut them out. This was used as my template for the rest of the layers for the umbrella. As a final touch, I punched holes along the umbrella where I wanted the stitching to go. These holes line up with each scallop.
Step Two: I cut out three circles from each piece of pattern paper (all the same size as the template) - yellow, blue, orange.
Step Three (Making Each Layer): The yellow piece is my base layer and thus is the exact same size as my template. Since it was the same size, I only had to trace the scallop edge along the bottom and cut out. The next layer was blue and was smaller - for this layer, I placed the circle template on top of the blue piece of pattern paper and using the holes for the stitching, I re-pierced the template in the same spot (making the same stitch holes in the blue paper that was underneath). This allowed me to see where I needed to cut. I cut along those lines and had my layer of blue. I placed that on top of my yellow piece of pattern paper. The same process was repeated for the top layer (orange) - I used the piercing holes in the template to pierce the orange piece of paper which served as a guideline of where to cut the orange paper. Once cut, I had the top and final layer.
Step Four: I glued each layer together, re-pierced all the stitching holes and stitched the lines. I then added a brad as a finishing touch.
Other: The tag is a sticker from October Afternoon and I printed my sentiment on it. In order to do this, you must figure out the size of the tag. Using a ruler, I figured out the tag was roughly 1.25 inches by 1.25 inches. I then opened Photoshop Elements and made a circle in a grid of 1.25x1.25. I added my sentiment and then printed it on a piece of plain white paper. I then adhered my sticker onto the printed sentiment and re-printed the sheet. The result is the tag with a perfectly placed sentiment.
• • • • • • • • • • • • • • • • • • • • • • • • • • • • • • • • • • • • • • • • • • • • •
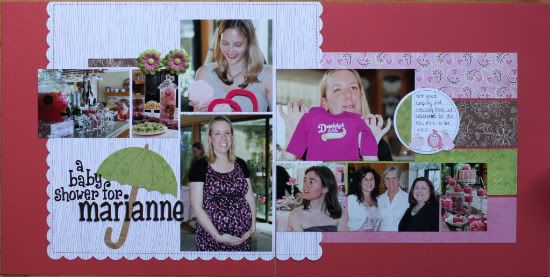
"A Baby Shower for Marianne" by Noey Hunt
Products used - Patterned paper: American Crafts (die cut), Basic Grey (pink hearts), Flair Designs (brown), My Mind's Eye (green branches), Cloud 9 Design (green hearts), Creative Imaginations (wood - umbrella handle); Journaling block: jillibean soup; Birds: 3 Bugs in a Rug (cut from patterned
paper); Letter Stickers: American Crafts, Creative Memories; Sketch: Sketches for Scrapbooking Volume 7
I used the sketch literally and cut the main part out of patterned paper. Then I realized this was the perfect use for the real wood paper I had sitting around. It made a great handle.
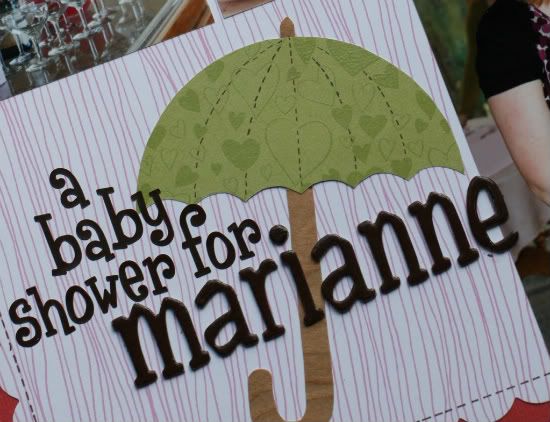
I wanted a coordinating colorful journaling block but didn't have the right thing pre-made. So I took a Jillibean Soup journaling block that was simple and accented it with the same patterned paper from the umbrella. I also added some whimsy by cutting out birds from another patterned paper. The arrangement for this layout is based off a sketch from Allison's Sketches for Scrapbooking Volume 7.
••••••••••••••••••••••••••••••••
5 comments:
I love this add-on for the cards and layout ideas. The twine and the stitching look great on the cards. The layout is so cute. We have been getting rain and more rain is coming this week while we are on Spring Break. I need one of these cute umbrella's to cheer me up now.
Squeal I love it! I am SO into umbrellas, rain clouds, clouds, rainboots, drops, rainbows etc right now I LOVE IT!
These are all adorable! I love the layered umbrella, thanks for the tutorial!! Great job ladies!
Great job on the layout and cards ladies. The umbrellas are so adorable. Thanks for sharing!
love the idea's with the umbrella especially the layering and stitching.
Post a Comment