
Let the one-page week of fun begin! Today, we've are sharing three layouts that all follow the sketch with some minor adjustments and added details. That's what makes sketches so much fun! You can follow the general design and then totally make it your own with the special touches that follow your style.
One-page Sketch #5
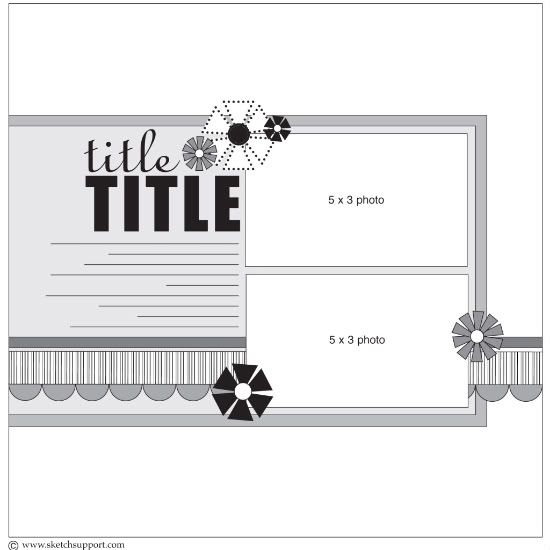
You can download and print this sketch by clicking on the one-page sketches link found under the "printable sketches" tab on the right sidebar.

"Spring Sun" by Mireille Divjak
Supply list - Cardstock: kraft; Patterned paper: Canvas Corp (red: big stripe, mini dots, ribbon stripe);
chrochet doilie: Kaisercraft; wood flourishes: Kaisercraft (Twin Lamp post); Alphabets: My Mind's Eye (lush); pens: American Craft and Sakura; Flowers: Petaloo (darjeeling collection and chantilly collection) butterfly punch, lace: misc.; gold rub: Make Me
Journaling (translated from dutch):
Together in the first rays of spring sunshine on a bench in Disneyland waiting for the Buzz Lightyear laser blast attraction. It's been a long time since you let me take pictures of the two of you together. You look so super sweet.
• • • • • • • • • • • • • • • • • • • • • • • • • • • • • • • • • • • • • • • • • • • • •
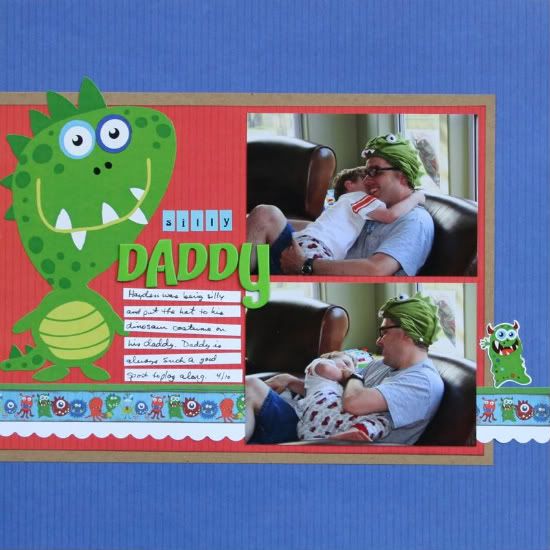
"Silly Daddy" by Shari Thurman
Supply List - Pattern Paper and Icon Stickers: Remininisce; Alphabet stickers: American Crafts and My Little Shoebox; Tools: Fiskars border punch; Ink: Colorbox Chalk Ink; Other: Cardstock
This sketch worked perfectly with these photos of my husband and son being silly. I was excited to create this layout with these fun papers from Remininisce.
I only made subtle changes to the original sketch. I adjusted my photo size to 3.5 x 5", which caused me to adjust my background by 1 inch. I substituted a strip of monsters for the striped paper. Then I added my monster to the left side of the layout, added journal strips and my title. The only other embellishment I added was a little monster to the lower right.
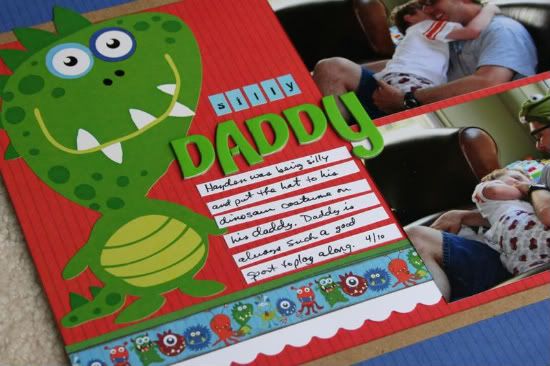
Secret Tip: I'm getting ready to tell on myself. I like to call it being resourceful. Notice the word "DADDY". I ran out of the letter "A", so I used an upside down "V" instead. I then pieced it with a comma. I sometimes do this when my favorite sets of alphabets are almost gone.
• • • • • • • • • • • • • • • • • • • • • • • • • • • • • • • • • • • • • • • • • • • • •
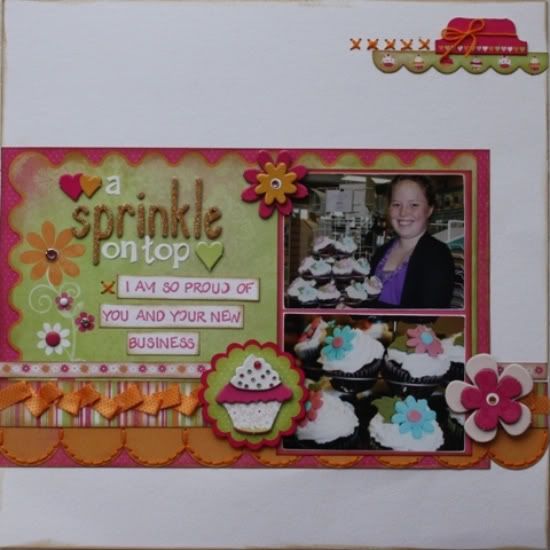
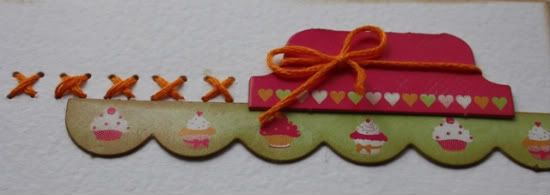
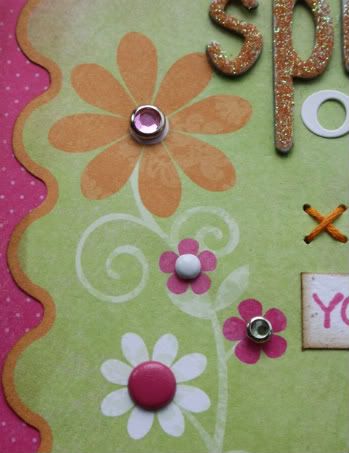
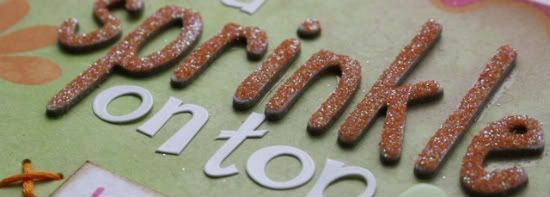
"A Sprinkle on Top" by Carolyn Wolff
Supply List - Patterned Paper & Accents: Kaisercraft; Cardstock: Bazzill; Alphabet Stickers: Karen Foster; Chipboard Alphabet: Maya Road; Brads & Ribbon: unknown; Ink: Ranger Distress Ink, Vintage Photo, Memento; Alphabet Stamps: Hero Arts; Punch: EK Success; Floss: We R Memory Keepers; Glitter: Martha Stewart; Special Adhesive: Glossy Accents, Terrifically Tacky Tape
I had a lot of fun doing the layout for this sketch! I have been wanting to do a layout to celebrate my daughters cupcake business and this sketch was perfect.
Variation #1 –I added a border strip to the top right corner of the layout. I used a couple of embellishments that came on a die-cut sheet that complimented my papers. I added a row of stitched x’s and tied some floss around the tab. I love that the scalloped strip had little cupcakes on it.
Variation #2 – I incorporated a scalloped piece of patterned paper as one of the layers to create the background. This paper also had a floral print along the left edge so I made it into an embellishment for my layout. I added different brads to the center of the flowers to create dimension.
Variation #3 – I created the scalloped border by punching out circles and overlapping them slightly and tucking them under the striped pattern paper. I added some stitching (because I just couldn’t resist). I also added some ribbon on top of the striped paper to create another layer.

Variation #4 – For me, the title is my favourite part. My daughter’s business is called ‘A Sprinkle On Top’ and I wanted to make the word ‘sprinkle’ stand out. I am not really a glitter girl, but I pulled it out of my stash for this! I applied Glossy Accents to the chipboard letters and then sprinkled them with the glitter. I let them dry and then adhered them to my page.
• • • • • • • • • • • • • • • • • • • • • • • • • • • • • • • • • • • • • • • • • • • • •
Unibind PhotoBook Creator giveaway winner
The lucky winner is...
reen said...
Love that Rainy Day album you made, and all the stitching you've been doing lately, it adds so much.
You can email me at allison@scrapbookgeneration.com with your shipping information and we'll get that PhotoBook Creator on it's way to you!
•••••••••••••••••••••••••••••••
7 comments:
Congrats to Reen, enjoy your prize.
The one page sketch is a easy and cute one. I enjoyed all 3 of them. I'm sure Allison loved the cupcake one. Great job on these ladies.
Love this sketch...quick and easy! The pages are lovely!
Love the cupcake page. I really need to try stitching!
What great layouts! Love the stitching on the last one! :-)
Loving this sketch. Hope to put it to use soon.
Yay! I so excited!
And I like the simple sketch. I've gotten in the habit lately of using tons of photos in layouts, to do one with 2 pictures would be a nice change of pace.
I just had to try this sketch. I flipped it to fit my vertical photos.
http://brendasscrappyblog.blogspot.com/2011/04/sketch-support-just-2-cute.html
I love the way you show so many different versions of each sketch!
Post a Comment