Showing posts with label Mireille Divjak. Show all posts

Thursday, December 29, 2011

One-page Week, Part 4

••••••••••••••••
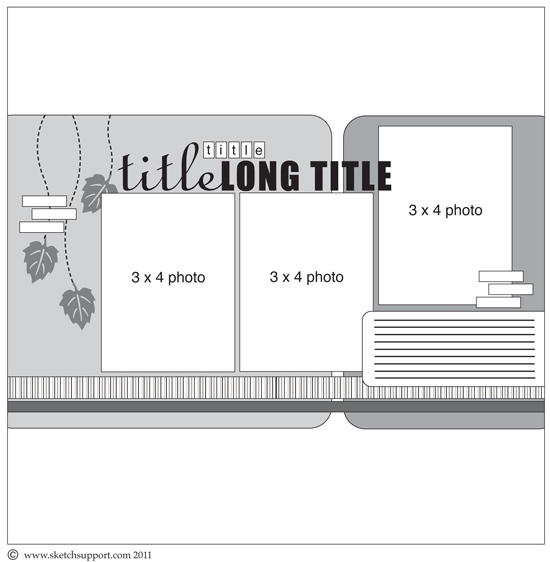
One-page Sketch #16


You can download and print this sketch by clicking on the one-page sketches link found under the "printable sketches" tab on the right sidebar.

Both of the layouts today from Mireille are "Year in Review" layouts of her kids (so perfect for at the end of 2011!) She used a photo from each month of the year so you could see them "grow" along the layouts and then used their 2011 highlights for the journaling.


"Noah 2011" by Mireille Divjak
Supply list - Cardstock: Bo Bunny (Double Dot Showdow dot); Patterned Paper: Authentique (Journey Collection); Die Cuts: Authentique (Journey Collection); Jewels: Teresa Collins (Blingage); Alpha's: American Crafts (Thickers); Pens: American Crafts and Sakura; Ink: Colorbox; Sew Easy: We R Memory Keepers

Variation #1: Instead of a single page I mirrored the second page and turned this sketch into a two-page layout.

Variation #2: I used text die cuts instead of Christmas ornaments.

  • • • • • • • • • • • • • • • • • • • • • • • • • • • • • •


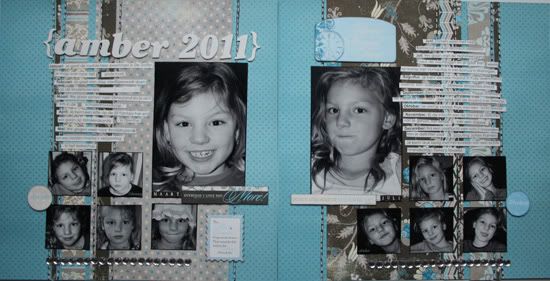
"Amber 2011" by Mireille Divjak
Supply list - Cardstock: Bo Bunny (Double Dot Ocean dot); Patterned Paper: Authentique (Journey Collection); Die Cuts: Authentique (Journey Collection); Jewels: Teresa Collins (Blingage); Alpha's: American Craft (Thickers); Pens: American Crafts and Sakura; Ink: Colorbox; Sew Easy: We R Memory Keepers

Variation #1: Instead of a single page I mirrored the second page and turned this sketch into a two-page layout. I switched the left and right side.

Variation #2: I used text die cuts in stead of Christmas ornaments.
••••••••••••••••••••

Wednesday, November 23, 2011

One-page Week, Part 3

••••••••••••••
One-page Sketch #15


You can download and print this sketch by clicking on the one-page sketches link found under the "printable sketches" tab on the right sidebar.


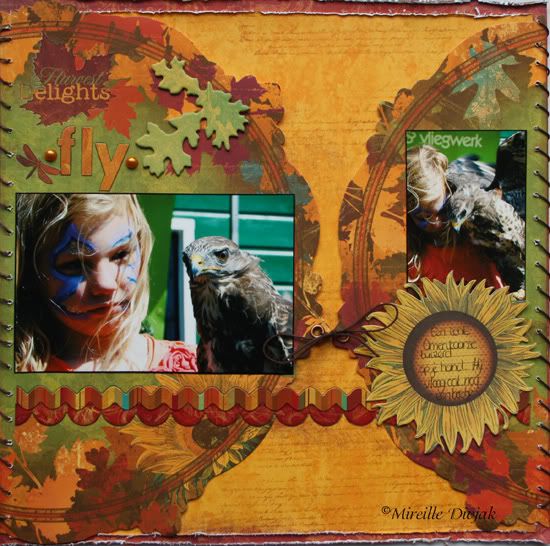
"Fly" by Mireille Divjak
Supply list - Patterned Paper: Bo Bunny (Forever Fall Collection); Chipboard: Bo Bunny (Forever Fall Collection); Noteworthy: Bo Bunny (Forever Fall Collection); Jewels: Bo Bunny (Forever Fall Collection); combo stickers: Bo Bunny (Forever Fall Collection); Alpha's: Bo Bunny (Forever Fall Collection); Pens: American Crafts and Sakura; Ink: Colorbox; Sew Easy: We R Memory Keepers; Waxed Cord: Blue Bird

Variation #1: Instead of two smaller photos I used one large photo.

Variation #2: I used a circle die cut patterned paper for the background.

  • • • • • • • • • • • • • • • • • • • • • • • • • • • • • •


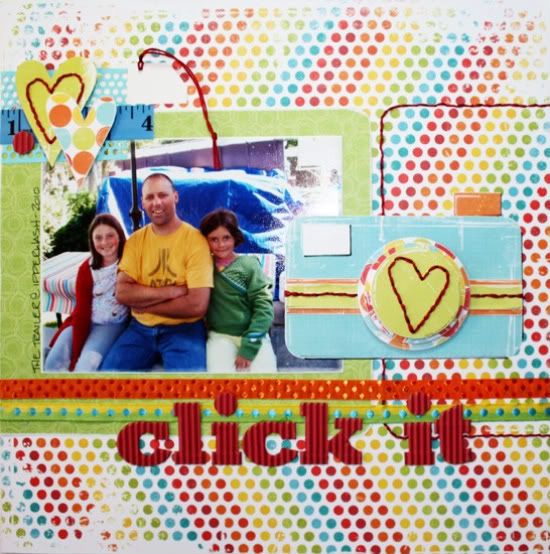
"Click It" by Janette Kincaid
SuppliesPatterned paper: We R Memory Keepers and Chatter Box; corrugated alpha: JillyBean Soup; embroidery floss: DMC; ribbon, tape measure, white tag: unknown

I took quite a few creative liberties with the sketch this week and I love the results. It just goes to show how versatile Alison’s sketches can be – how they can inspire and take you in a direction you didn’t even think about when you start.

Variation #1 – I replaced the three 3x4 photos with one enlarged 5x7 photo.

Variation #2 – I moved the title from the top to the bottom of the layout.

Variation #3 – I replaced the journal block with the camera. You might recognize the camera from the Add-on Sketch from a few weeks ago. I just LOVED Alison’s take of this sketch with the stitched heart on the lens – I knew I had to scraplift it. I did scale my version of the camera up a bit; the blue base is 3x5 in size.

Note: I added my journaling to a white tag that is tucked into a slot at the top of the page – behind the hearts and strung with red floss.

Variation #4 – I changed the embellishment cluster at the top left of the page and replaced the leaves with a repeat of hearts like in the camera.

Variation #5 – I love the colourful poka-dots in this patterned paper. I didn’t want to cover any more of the background than I already had so I mirrored the shape of the left with some red stitching instead.

  • • • • • • • • • • • • • • • • • • • • • • • • • • • • • •


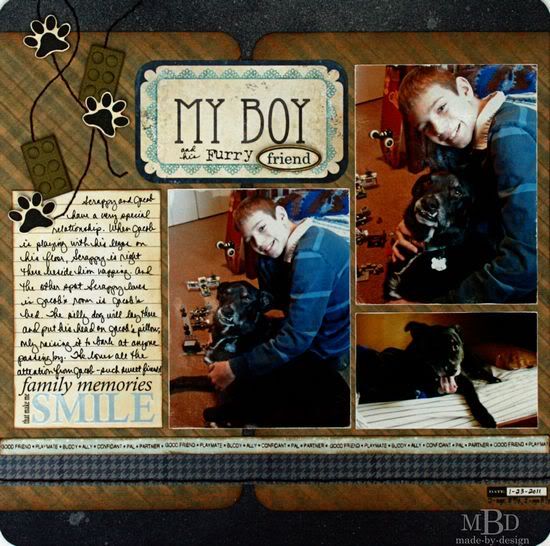
“My Boy and His Furry Friend” by Megan Bickers
Supplies Used - Cardstock: ANW Crestwood (Deep Sea), Close To My Heart (White); Patterned Paper: My Mind’s Eye (Life Stories: Blue Plaid, “Be Merry” Polka Dot/Cream), Memories in the Making (Window Check Navy); Inks: Ranger Distress (Gathered Twig), Ranger Distress Stain (Antique Linen), October Afternoon Color Mist (Buttermilk), Marvy Uchida (Black Marvy Matchables); Stamps: Technique Tuesday (Borderline: Family Ties), Stampabilities (Pawprint), EK Success (Antique Typewriter Alphas, “Friend” word stamp); Stickers: 7 Gypsies (Date Mini Label: Black), My Mind’s Eye (“Hattie” Boy Title), Deja Views (Family Journal Card); Pens: EK Success (Zig Black Writer); Tools: WeR Memory Keepers (Corner Chomper), Ranger (Foam Blending Tool), Making Memories (Paper Piercer); Other: Office Hole Punch, Sandpaper, Brown Crochet Thread, Foam Squares.

Variation #1: I substituted a photo in place of the journaling section on the layout; I just rearranged the layout to add my journaling in place of the left photo. I used two 4 x 5 ¼” photos and one 2 ½ x 4” photo.

Variation #2: Instead of using a long title, I used a pre-printed title card that said “My Boy” and I stamped the words “Furry” and “Friend”. The other words were handwritten.

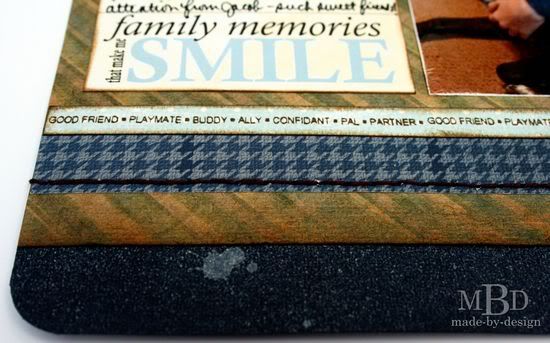
Variation #3: I omitted the small journaling strips on the layout and just added a date sticker on the lower right corner.

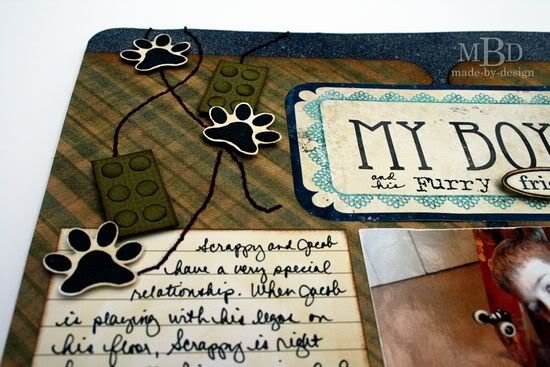
Variation #4: For the leaf accents that were included on the sketch, I substituted some homemade legos and stamped pawprints to go with my page theme.


I created some hand stitched swirls to pull them all together. I also added some stitching along one of the thin strips below my photos. Along the other strip of paper, I added some stamped word borders.

 ••••••••••••••••••••••

Wednesday, November 9, 2011

Two-page Week, Part 3

•••••••••••••••••••
Two-page Sketch #22


You can download and print this sketch by clicking on the two-page sketches link found under the "printable sketches" tab on the right sidebar.


"My do it Myself" by Lynette Jacobs
Supplies used - Cardstock: Bazzill; Printed papers: Crate Paper, Echo Park(Life is Good); Stickers: Echo Park; Buttons: Basic Grey; Flowers: Petaloo; Punch: Martha Stewart.

Variation #1: I punched the background block.

Variation #2: I used 4x6 photos.

Variation #3: I cut the pattern paper strips 9 inches long.

Variation #4: I added trim below the photos.

  • • • • • • • • • • • • • • • • • • • • • • • • • • • • • •


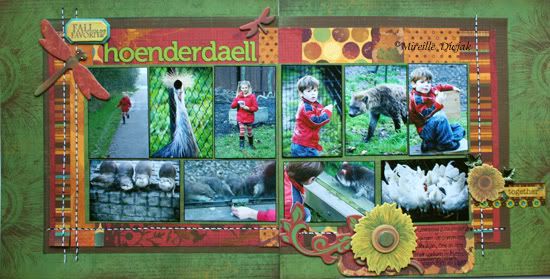
"Hoenderdaell" by Mireille Divjak
Supply list - Patterned Paper: Bo Bunny (Forever Fall Collection); Chipboard: Bo Bunny (Forever Fall Collection); Noteworthy: Bo Bunny (Forever Fall Collection); Jewels: Bo Bunny (Forever Fall Collection); cardstock stickers: Bo Bunny (Forever Fall Collection); Dimensional Stickers: Bo Bunny (Forever Fall Collection); Alpha's: Pink Paislee; Pens: American Crafts and Sakura; Ink: Colorbox; Sew Easy: We R Memory Keepers

Variation #1: Instead of four photos I used 10 different size photos. I tried to keep as close as possible to the square shape

Variation #2: I matted my photos.

Variation #3: Instead of the flower shaped embellishments on the left page I used dragonflies.

  • • • • • • • • • • • • • • • • • • • • • • • • • • • • • •


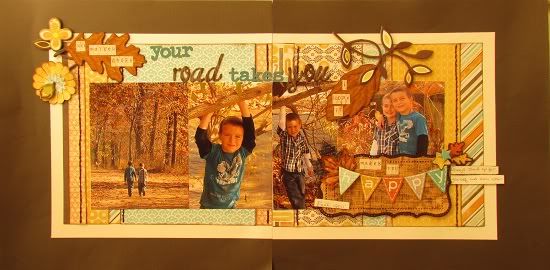
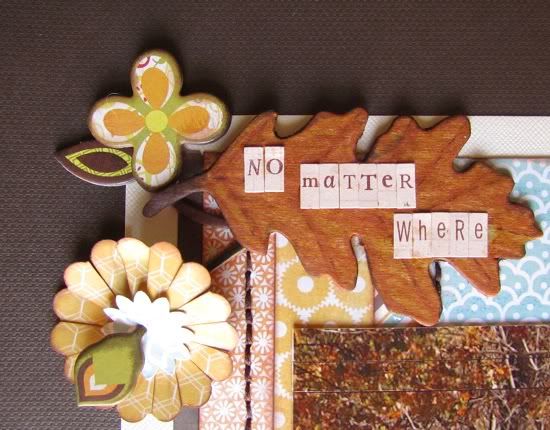
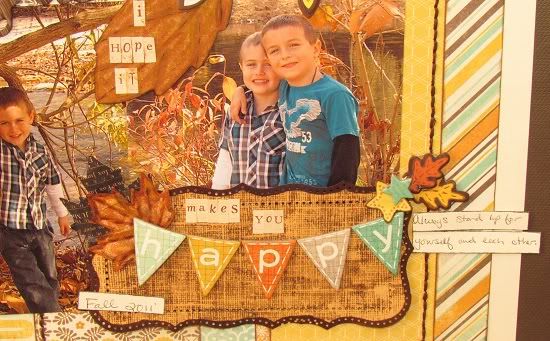
"No Matter Where Your Road Takes You..." by Amy Roller
Supplies - Cardstock: DCWV, Bazzill; Patterned paper: My Minds Eye; Chipboard embellishments: Basic Grey, My Mind's Eye, unknown; Thread, Letters: American Crafts, unknown, Prima;

Variation #1: I used the same space for pictures, but didn't use 4 x 4 pictures. I didn't want to crop the picture of the boys going down the road so I left it 4 x 6 and just fit the rest in the same size vertically but a few were different in width.

Variation #2: I ran the top title all the way across both pages and carried it down to the journaling box.


Variation #3: I didn't use exactly the same embellishments as the sketch, I just mixed it up and added most in the general area that they were on the sketch.

 •••••••••••

Friday, October 28, 2011

One-page Week, Part 5 - Simple Stories Product Challenge

It's time for the Simple Stories product challenge! We're sharing another round of projects from the challenge today.

If you missed the product challenge for Card Week, Two-page Week, or Add-on Week, Simple Stories has provided a kit of the same materials for each member of the Sketch Support Creative Team. Together with the October sketches we have been showing you how using the same products and even the same sketches can produce so many different results.

Since it is One-page Week all of the projects (and we've got a lot of them!) we are posting today are based on One-page Sketch #14.
One-page Sketch #14


You can download and print this sketch by clicking on the one-page sketches link found under the "printable sketches" tab on the right sidebar.


"Celebrate" by Jill Sarginson
Supplies Used - Patterned Paper: Simple Stories; Ink: Vibrance; Stickers: Simple Stories; Adhesive: Pop dots; Miscellaneous: Dymo Gun

As per usual, I stuck closely to the sketch here, I think I even kept my photos the same size! This page was very easy to create because Simple Stories kits are jammed packed with stickers and all sorts of fun designs you can cut out and adhere to your page!

• • • • • • • • • • • • • • • • • • • • • • • • • • • • • •


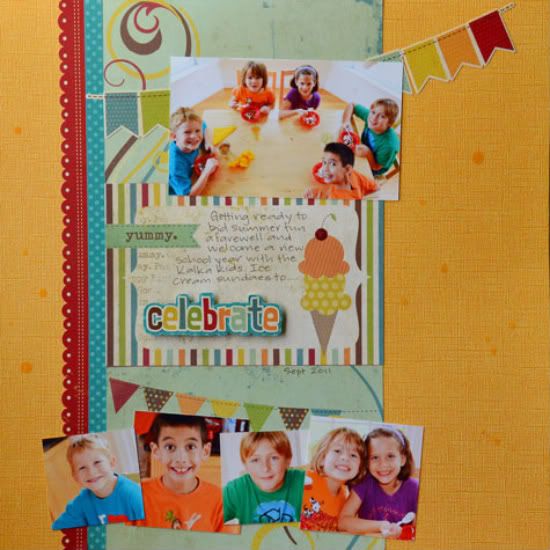
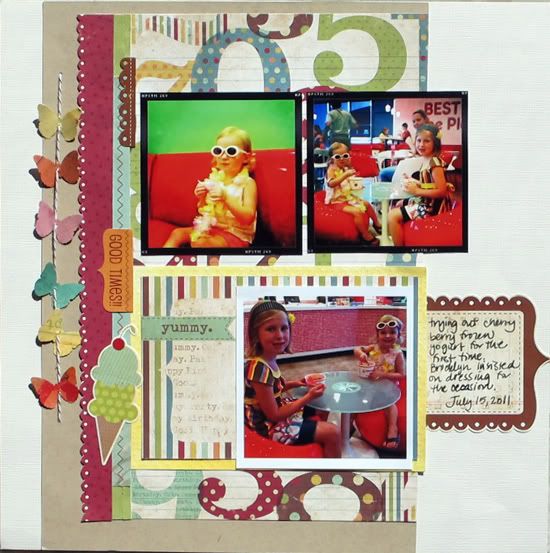
"Yummy" by Christy Arthur
Products - Cardstock: Bazzill; Patterned Paper: Simple Stories (Happy Day Make A Wish, It's Your Day; 100 Days of Summer Flash Cards); Mist: Studio Calico (Mister Huey Lemonade, Piglet, Orchard and Bluegrass); Stickers: Simple Stories (Happy Day Fundamental Cardstock); Punch: Martha Stewart (Classic Butterfly); Floss: Brown Twine

Variation #1: Instead of the flag banner at the top, I moved the banner to the left side and used butterflies.


Variation #2: I used less photos than are shown in the sketch. I simplified and used two smaller photos at the top, similar to the sketch, and one larger photo below.

Variation #3: I moved the larger photo up on my layout, even with the title.

Variation #4: I moved the journaling to the right side, instead of below the title.


Variation #5: I did not add stitching along the borders of my layout.

• • • • • • • • • • • • • • • • • • • • • • • • • • • • • •


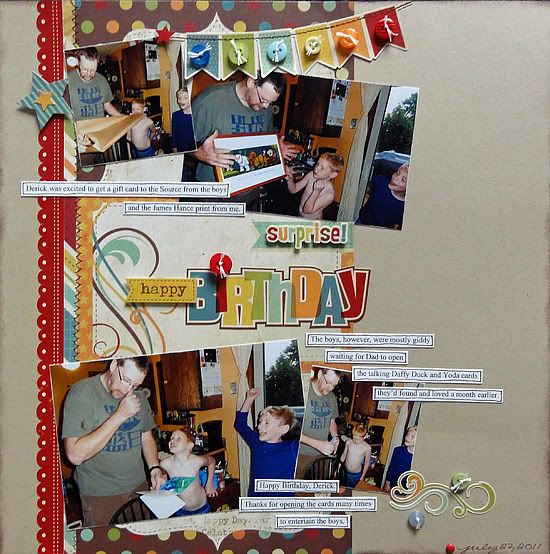
"Happy Birthday" by Melissa Bell
Supplies - Cardstock: American Crafts; Patterned paper: Simple Stories; Stickers: Simple Stories; Pop Dots: EK Success; Floss: DMC

Variation #1 - I used a cardstock border sticker instead of patterned paper for the far left vertical strip.

Variation #2 - I hand stitched across the top of the banner.

Variation #3 - I didn't stitch around the center 6x4 rectangle and embellished it differently.

• • • • • • • • • • • • • • • • • • • • • • • • • • • • • •


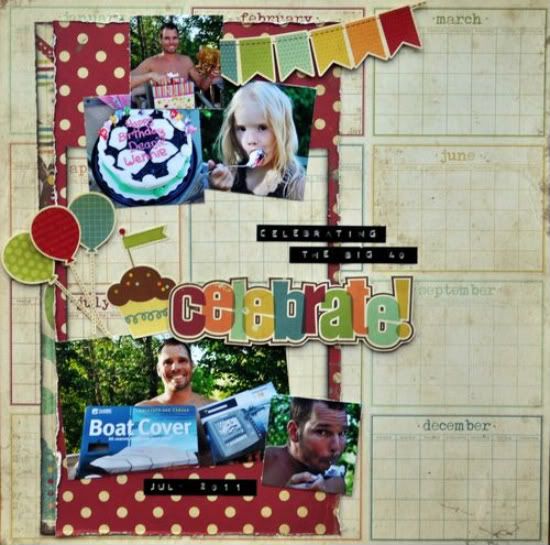
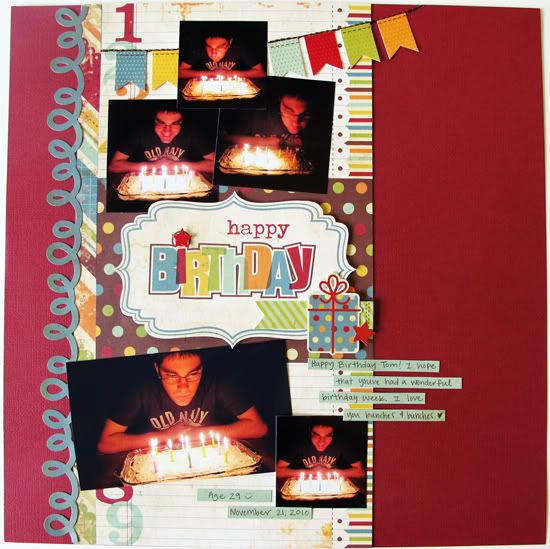
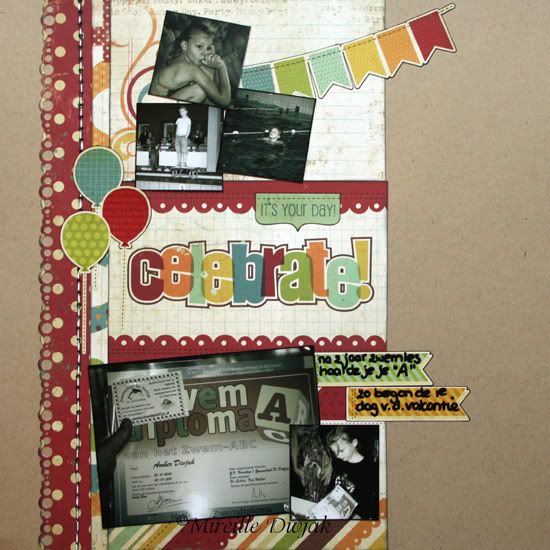
"Celebrate" by Mireille Divjak
Supply list - Cardstock: Canvas Corps (kraft); Patterned Paper: Simple Stories (Happy Day collection); Ink: Colorbox cat eyes (Black); Adhesives: Aleene's (tacky glue); Borderpunch: EK Success; Stickers: Simple Stories; Pens: American Crafts and Sakura

Variation #1: I used balloons instead of candle.

• • • • • • • • • • • • • • • • • • • • • • • • • • • • • •


"Celebrate" by Suzanna Lee
Supplies used - cardstock: Coredinations, Bo Bunny Press; patterned paper: Simple Stories; mist: Maya Road; stickers: Simple Stories

Variation 1: I flipped the picture placement with my larger picture up top and a row of smaller pictures at the bottom.

Variation 2: Title is still in the box per the sketch but my journaling is there as well. I omitted the journaling strips as a result.

• • • • • • • • • • • • • • • • • • • • • • • • • • • • • •


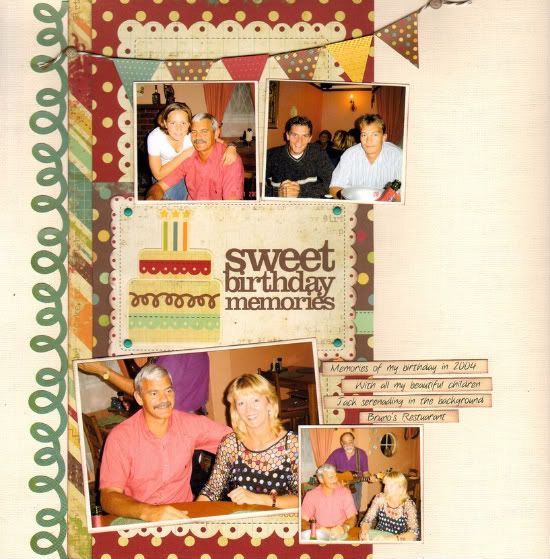
"Sweet Birthday Memories" by Lynette Jacobs
Supply List - cardstock: bazzill; patterned paper: Simple Stories; banner stickers: Simple stories; ink: Versa Magic; brads: Upikit, doodlebug.

Variation 1: I replaced the photos with different size photos.

Variation 2: I replaced the solid strip of paper with the doodle border.

Variation 3: I added the brads to the title block.

• • • • • • • • • • • • • • • • • • • • • • • • • • • • • •


"Happy Birthday" by Jennifer Larson
Supplies - cardstock: Stampin' Up!; patterned paper, stickers: Simple Stories; ink: Stampin' Up!; floss: DMC; other: buttons

1. I used the basic layout of the design, but the photos I had were mostly vertical in orientation. To avoid cutting anyone out of the photos, I didn't use any 2x2 photos and created another vertical print instead.

2. I deleted the actual stitching and chose a stiched sticker instead.

3. I added some embellishments - buttons and flourishes.

• • • • • • • • • • • • • • • • • • • • • • • • • • • • • •


"Making Grandma Laugh" by Noey Hunt
Products used - Patterned papers and stickers: Simple Stories; Letters: Authentique, Creative Memories, Making Memories; Cardstock: Bazzill

Variation #1: I left off the bottom right photo and replaced it with one of the calendar blocks from Simple Stories.

Variation #2: I wanted to anchor the left side of the banner so I added balloons and then repeated the balloons over the journaling block.

• • • • • • • • • • • • • • • • • • • • • • • • • • • • • •


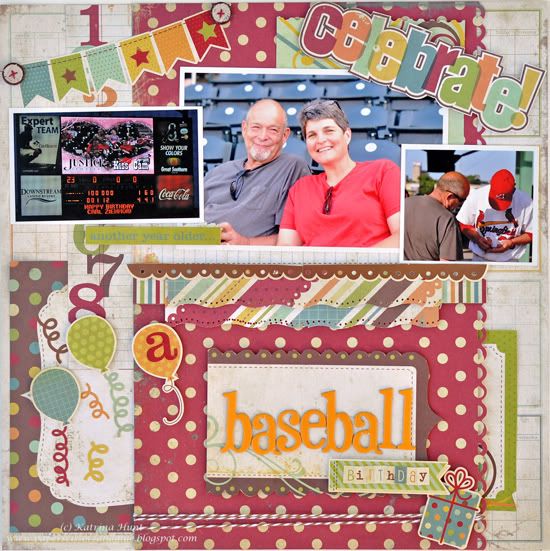
"A Baseball Birthday" by Katrina Hunt
Supplies - Patterned Paper: Simple Stories (Happy Day Collection); Adhesives: Scotch ATG, Fabri Tac and Scrapbook Adhesives; Buttons: Nikki Sivils, Scrapbooker; Twine: The Twinery Baker’s Twine; Punches: Ek Success, Fiskars; Stickers: Simple Stories (Happy Day Collection); Chipboard Letters: American Crafts Thickers

Variation 1 - Centered everything, instead of placing over to the left more.

Variation 2 - No picture at bottom and centered the three pictures on top.

Variation 3 - Added lots of layers where there were none before (under my centered pictures and at the sides).

Variation 4 - Title moved down.

• • • • • • • • • • • • • • • • • • • • • • • • • • • • • •


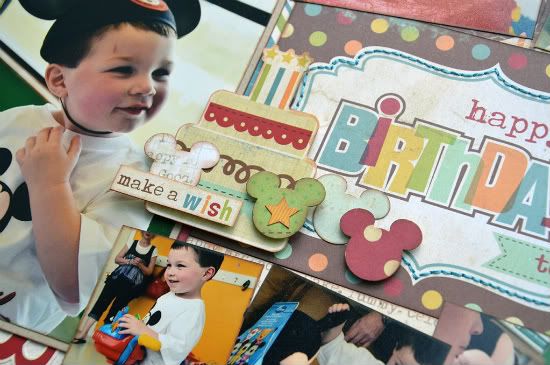
"Happy Birthday to You" by Allison Davis
Supplies - Cardstock: Bazzill; Patterned paper: Simple Stories; Stickers: Simple Stories; Mickey punch: EK Success

Variation #1 - I had so many pictures I wanted to include on this layout that I had no choice but to turn it into a two-page layout. I started by moving the design on the one-page sketch all the way to the right edge of the left page. For the rest of the layout I used my own design.

Variation #2 - I added a 4 x 6 photo to the left of the one-page sketch design.

Variation #3 - Instead of using the candles, as suggested on the sketch, I used a birthday cake and some Mickey ears to go with the theme of Jackson's birthday party.


Variation #4 - Because of my photo options and the design I wanted with the two-pages, I changed up the picture sizes a little. On the top I used a wallet size print, a 2 x 2, and a 2-1/2 x 2-1/2. On the bottom I used one 2 x 2 and then two 2-1/2 x 2-1/2.

• • • • • • • • • • • • • • • • • • • • • • • • • • • • • •


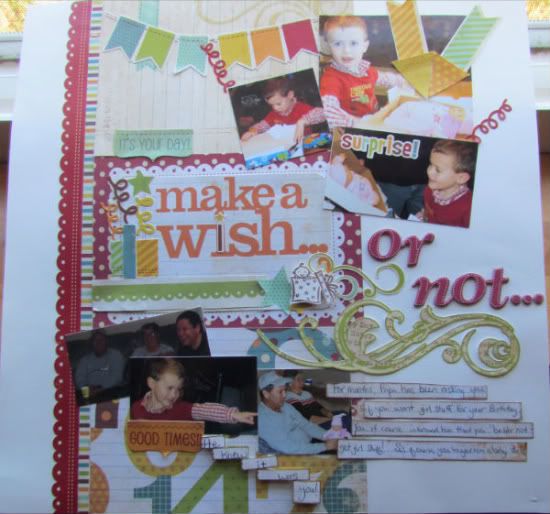
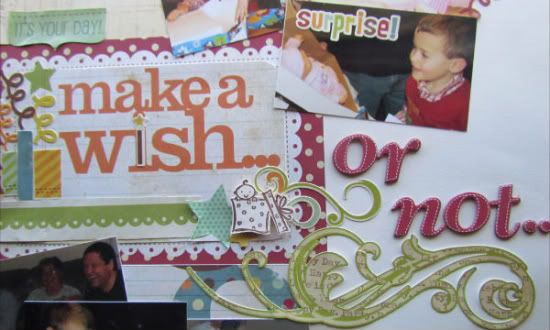
"Make a Wish...or Not..." by Amy Roller
Supplies - All products are Simple Stories unless listed below; Baby Stamp: Stampin UP!; Cardstock: Close to my Heart; Letters: American Crafts, Thickers

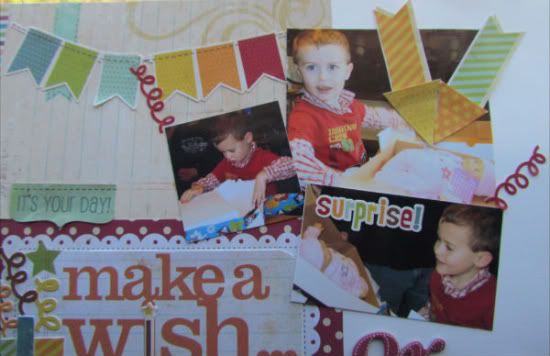
For this page, I used two of the 4 x 6 blocks from the Simple Stories line and put them down on my cardstock first. Then I cut a 4 x 6 block from pattern paper to make the bottom piece. I also cut out another block for the title "Make a Wish" which I layered over the middle tag.


I added some handcut birthday candles from the sticker sheet and added confetti streamers for my flames. I then added the green swirl and the rest of the title, "or not" along with a small stamped image.


Next I used the scalloped sticker strip and stripe that I had pieced together from another Tag sheet up the side of row of tags.

For the top tag, I added a banner sticker strip and moved my photos over to the right to be able to fit it all in. I had a larger photo I couldn't crop that small.


I also added some confetti around the photos and the word "surprise!" I made arrows to point to the focal point of the pictures, which was the baby doll. I did this by cutting a strip from a sticker and adding a triangle banner piece to the end of each strip.

Because I didn't have a large enough photo for the bottom tag, I used 3 smaller photos that played out the events of the day. The whole story behind the layout is added in the journaling strips beside and below the pictures.
•••••••••••••••••••

Monday, October 17, 2011

Add-on Week, Part 1

••••••••••••••••

Add-on Sketch #10

You can download and print this sketch by clicking on the add-on sketches link found under the "printable sketches" tab on the right sidebar.


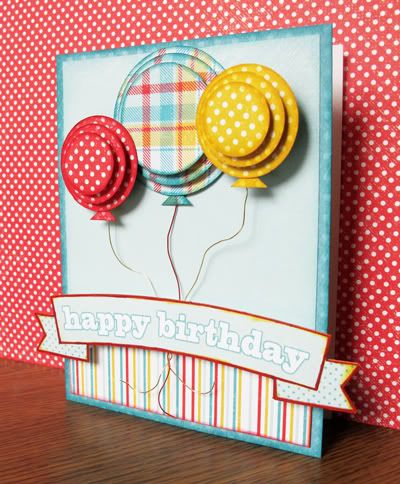
"Happy Birthday" card by Melissa Bell
Supplies - Patterned paper: My Mind's Eye, BoBunny; Chalk Ink: ColorBox; Pop Dots: Recollections; Beading Wire: Cousin; Floss: DMC; Circle Cutters: Creative Memories, EK Success

This add-on sketch is so much fun! I loved making the balloons for my birthday card. I followed all of the measurements given for the sketch.

Variation #1 - I used beading wire for my balloon strings instead of hand stitching the string.

• • • • • • • • • • • • • • • • • • • • • • • • • • • • • •   


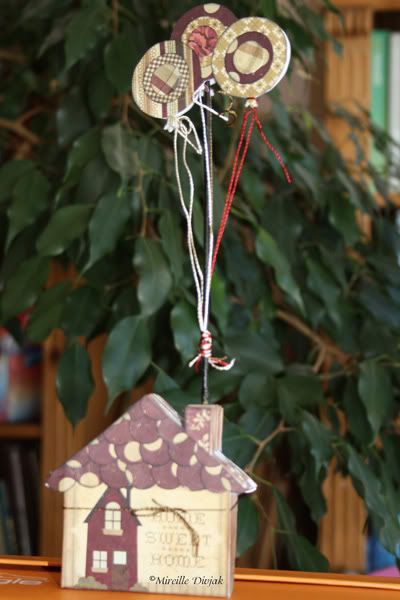
"Home Sweet Home" mini-album by Mireille Divjak
Supply list - Mini Album: Creative Imaginations (Petey Mini Book); Patterned Paper: Simple Stories (Generations 6x6 mini pad); Ink: Colorbox cat eyes (Black and ); Adhesives: Aleene's (tacky glue); Punches: Make Me! (Circles); Floss: DMC

Variation #1: I used the balloons literally as "add-on" for my mini Album. (Totally "Up!" - inspired)
••••••••••••••••••

Friday, September 30, 2011

One-page Week, Part 5

••••••••••••

One-page Sketch #13


You can download and print this sketch by clicking on the one-page sketches link found under the "printable sketches" tab on the right sidebar.


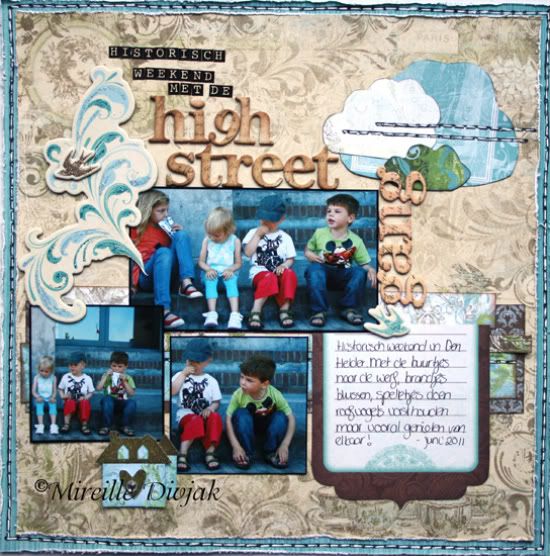
"Historisch Weekend Met de Highstreet Gang" by Mireille Divjak
Supply list - Cardstock: Bo Bunny (Double Dot Ocean Stripe); Patterned Paper: Bo Bunny (Welcome Home line); Noteworthy: Bo Bunny (Welcome Home); Chipboard Swirls and Birds: Bo Bunny (Welcome Home); Chipboard Alpha's: Bo Bunny (Et Cetera); Mini Letter stickers: Bo Bunny (Et Cetera); Stickles: Ranger (Waterfall, turquoise and gold); Ink: Colorbox (Black and cocoa); Pens: American Craft and Sakura

Story: We've got several kids in the street approximately the same age. They get along real well and we love to do stuff together, go to events together. The photos on this layout were taken during the Historical Weekend. The little ones sat on the steps drinking and eating cookies when another passed and said, "Oh my.. look at that.. it's the Highstreet Gang". (Our street is called Highstreet) Thought it was too cute. I had to use it as a title in the layout.

  • • • • • • • • • • • • • • • • • • • • • • • • • • • • • •


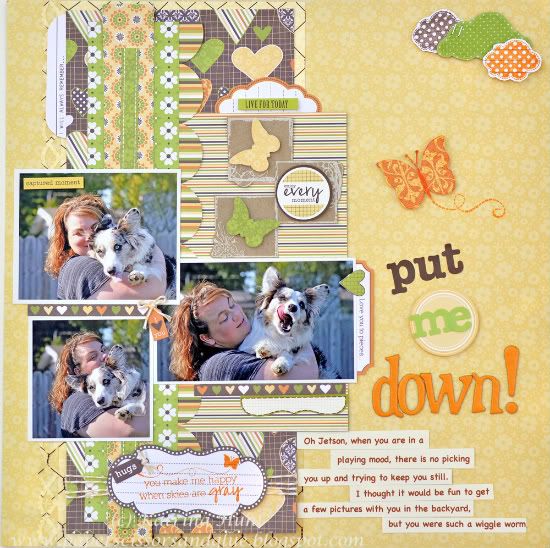
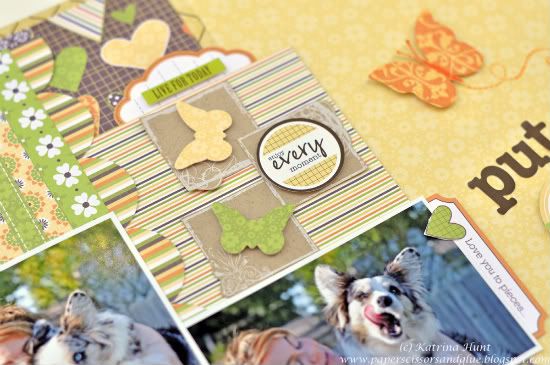
"Put me Down" by Katrina Hunt
Supplies - Patterned Paper: Jillibean Soup (Dutch Mustard Collection); Transparency: Hambly Studios; Kraft Elements: Hambly Studios; Ink: Jenni Bowlin Ink; Stamps: Unity Stamp Co-Jillibean Soup (Blossom Soup Collection); Adhesives: Scotch ATG, Fabri Tac and Scrapbook Adhesives; Twine: The Twinery Baker’s Twine (Buttercup); Letter Stickers: Jillibean Soup (Dutch Mustard Collection); Chipboard Letters: American Crafts Thickers

I loved this sketch when I first saw it. I started to do it exactly like the sketch, but then decided to mix it up a bit. I flipped it, did my pictures a little differently and added here and there.


Variation 1 - I flipped the back part of the sketch where the strips are.

Variation 2 - I moved the clouds to work with what I had done.

Variation 3 - My pictures are almost the same, but I had to turn one the bigger one to make it work with the sketch. And my sizes are slightly bigger than what the sketch called for.

Variation 4 - Moved my journaling and added extra embellishments to the clean areas of the sketch.

  • • • • • • • • • • • • • • • • • • • • • • • • • • • • • •


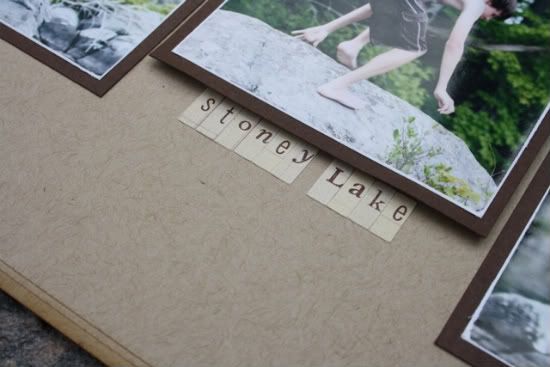
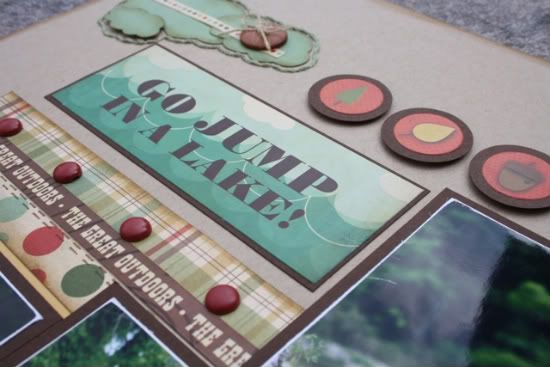
"Go Jump in a Lake" by Carolyn Wolff
Supply List - Patterned Paper and Stickers: Cosmo Cricket; Cardstock: Bazzill; Alpha Stickers: Making Memories; Brads: Basic Grey; Ink: Ranger Distress Ink (Vintage Photo); Floss: Bazzill; Cloud Die: My Favourite Things; Sanding Tool: Basic Grey; Marker: American Crafts; Buttons: unknown

Love this sketch! I just had to turn it into a double page for my photos.

Variation #1 – The most obvious variation is that I turned the sketch into a two-page layout. I loved this sketch but I had too many photos that I wanted to use. I just stretched out the basic design and added a second page.

Variation #2 – I used the sketch and started making my layout from the middle out. You can see the horizontal photo is in the middle of my layout. I added a vertical photo to the right and added extra smaller photos along the bottom. I filled in with stickers and other embellishments.


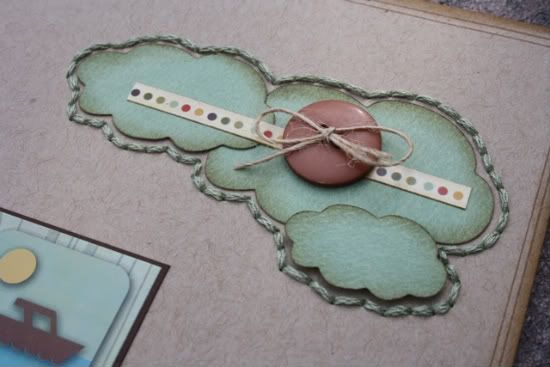
Variation #3 – I created two sets of the cloud embellishments and added stitching around them instead of through them. I embellished with a sticker and button.


Variation #4 – I eliminated the flags that were shown on the sketch and kept my title fairly simple. I played around with some letter stickers too, but I just couldn’t get it to work like I wanted.


  • • • • • • • • • • • • • • • • • • • • • • • • • • • • • •


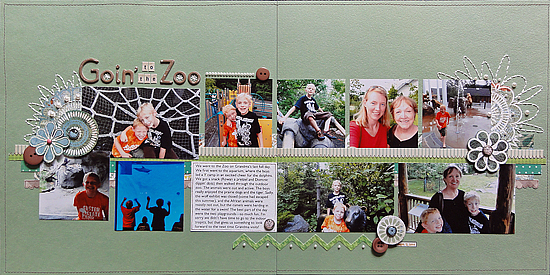
"Goin' to the Zoo" by Jennifer Larson
Supplies - Cardstock: Bazzill; Patterned paper: Cosmo Cricket, Studio Calico, Basic Grey, My Mind's Eye; Chipboard letters: Studio Calico; Stickers: Basic Grey (letters), 7gypsies (date), My Mind's Eye (Zig Zag); Brads: Basic Grey; Punches: EK Success; Pearls, buttons: Stampin' Up!; Floss: DMC; Pens: Zig, American Crafts; Other: Machine Thread.

1. I loved the sketch but wanted to fit more photos from our zoo trip, so I made a two page layout. The left side fits the sketch almost exactly; to do the right side, I flipped the sketch, putting the bigger photos on the bottom and the smaller photos on top.

2. I didn't have many embellishments left from an old kit, so I cut out flowers from patterned paper and used them as embellishments.


3. For added interest, I hand drew more flower petals and stitched them. I also stitched an Algerian eye in the O's of the title, which you can see in one of the detail shots.

••••••••••••••••••••••
Friday, September 23, 2011

Add-on Week, Part 5

••••••••••••••
Add-on Sketch #9

You can download and print this sketch by clicking on the add-on sketches link found under the "printable sketches" tab on the right sidebar.


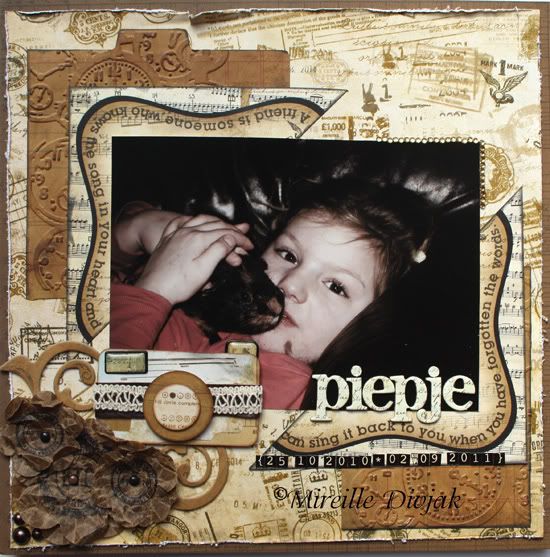
"Piepje" by Mireille Divjak
Supply list - Cardstock: Bo Bunny (Chocolate journal); Patterned Paper: Bo Bunny (Et- cetera line: ledger, Cut outs, odds & ends, stamped); Combo stickers, jewels, brads stamps, wraps chipboard, noteworthy: Bo Bunny (Et-Cetera); Kraft Glassine: Tim Holtz; Ink: archival and colorbox; Embossing Folder: Tim Holtz (Alterations - Texture Fades); Die: Filetabs, Tim Holtz Alterations for Sizzix; Punches: Make Me

Story: Amber got her first pet Piepje (little peep) for her 6th birthday after asking for a pet for two years non stop, day in, day out. Piep was loved from day. She claimed she didn't choose Piep, he choose her. (when she went into the pet store and looked at the guinea pigs it came towards her and really said "peep". A very, very magical moment)

Whenever she was sad, needed a friend, or happy moments, Piepje was there. He got hugged lots and lots. Unfortunately he got sick and died recently. I had to create this page.

  • • • • • • • • • • • • • • • • • • • • • • • • • • • • • •


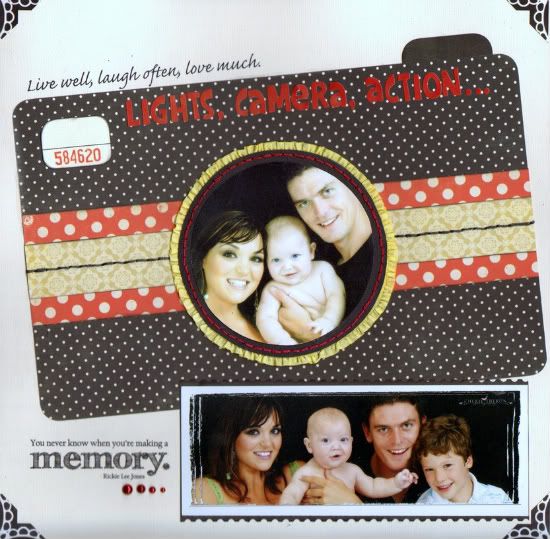
"Lights, Camera, Action..." by Lynette Jacobs
Supply List - Cardstock: Bazzill; Printed Paper: Echo Park (For the Record); Ribbon: Maya Road; Alpha: Paper Trunk Bennie; Rub Ons: Kaisercraft; Pearls: Kaisercraft; Thread: DMC Embroidery thread

• I cut the camera body 7 inches by 11 inches.

• The horizontal stripes are 2.5 inches wide and 1.25 inches.

• I hand stitched down the length of the narrowest strip.

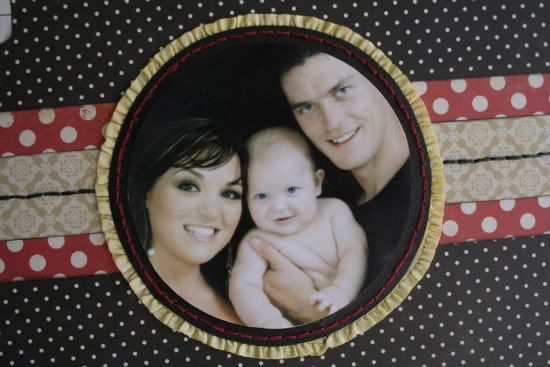
• My circle photo is 4 inches in diameter.


• I pasted my circle photo onto black bazzill 4.5 inches in diameter.

• I hand stitched around the photo with red thread.

• I added some yellow Maya Road ribbon around the bazzill.

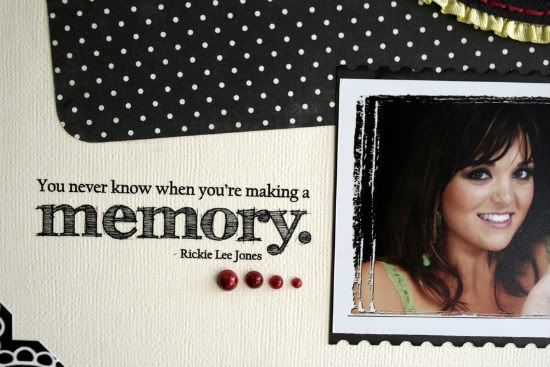
• It looked a little bare so I added the narrow photo to the bottom of the layout.


• I finished it off with the sticker corners and the rub ons.
•••••••••••••••••••••