Showing posts with label bonus downloads. Show all posts

Friday, May 27, 2011

One-Page Week, Part 5 and more bonus sketches

••••••••••••••••••••••••••••••••••••••••••
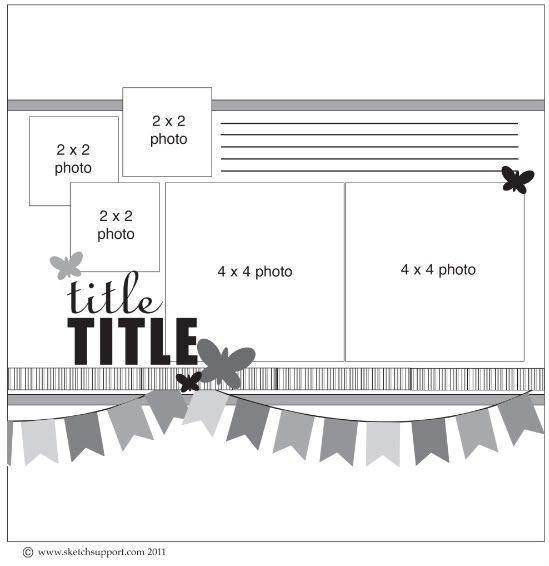
One-Page Sketch #9


 You can download and print this sketch by clicking on the one-page sketches link found under the "printable sketches" tab on the right sidebar.


"My Sweet Little Dreamer" by Amy Roller
Supplies - Cardstock: Bazzill, Stampin Up!; Pattern paper: Pebbles; Stamps: Papertrey Ink; Ink: Stampin UP!; Letters: Making Memories, Prima, Basic Grey; Chipboard: Maya Road; Metal embellishments: Lil' Davis Designs, unknown; Thread, Rhinestones: Close To My Heart; Border punch: Martha Stewart; Circle border: We R Memory Keepers; Cross stitch: made by Alma Benfield

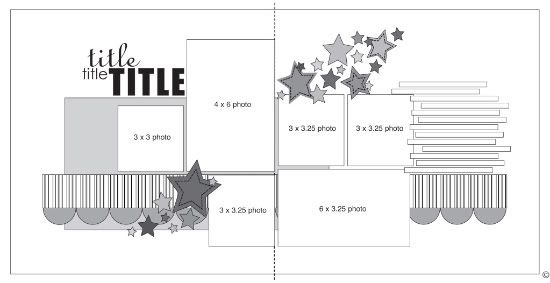
I decided to make the one-page sketch into a two-page layout this time around. I followed the sketch pretty close, I just continued the wavy line, and strips across the page. I did add an extra strip of a glittered circle border across the page.


 I added 1" cardstock circles behind it of the same color as the border strip across the top of the page to tie the two together. The strip across the top was made wider than the sketch because I used a border punch across it and then stitched part of the strip to help bring a touch of white to the top as well. It felt more balanced to me.


I used different sizes of pictures and had more due to changing from 1 to 2 pages but I kept them along the same placements and also added a cross stitch my grandma did for him. It was a good way to preserve it.


I also added several more embellishments up the right side to help fill in the area.


I made the title out of chipboard letters and had it stretch across both pages and added a cluster of embellishments and words at the end.


The letters I used were the wrong color so I inked them to make them match and then drew a line around the edges to make them standout. Because I used a larger title, I moved my journaling up next to one of the photos which helped fill in the white space on the photograph as well.

  • • • • • • • • • • • • • • • • • • • • • • • • • • • • • •


"Sweet Boys" by Shari Thurman
Supply List - Pattern Paper: Crate; Foam Alphabets: American Crafts; 3D adhesive: Thermoweb; Tools: punches by EK success and Creative Memories; Other: buttons, cardstock, pens, machine stitching

The most noticeable of all the changes I made to this weeks sketch was stretching it to a two-page layout. I extended the curve and stretched the background.

I then relocated the title to the top left, detailing the letters with a pen creating faux stitching .


I moved my photos down a bit and matted them on a coordinating color of cardstock and zigzag stitched around them for interest.


For my embellishments, I created stitched stars as shown on the sketch. I inked and layered 3 cirles, a stitched star and a button threaded with twine. I used 3D adhesive between them for dimension.


To finish the layout, I added my journaling strips to the page on the right and added extra stitching around the layout.

"The boys had fun crawling around on the hay bales at my parents farm for these fall pictures. I love the pretty sky full of clouds. I'm so glad my sweet boys can experience being on a farm, even if it's just for a visit. Fall 2010"

  • • • • • • • • • • • • • • • • • • • • • • • • • • • • • •


"Flying High" by Allison Davis
Supplies - Cardstock: Bazzill; Patterned paper: My Mind's Eye; Alphabets: Prima (flying) and American Crafts (high); Stickers: My Mind's Eye; Memory Thread: DMC

Variation #1 - A lot of times using a one-page sketch for a two-page layout is a breeze because you can just continue the design onto the second page. With this sketch, while you can continue or "stretch" the design of the papers across the page the photos might not exactly work that way. Because the title and journaling are below the photos on the left page, chances are those two elements aren't going to stretch across to the right page. (Of course it can, especially if you have a need for more journaling space.) The problem with the title and journaling absent from the right page is it will leave you with a gap on between the photos and the striped strip. This is one of those that you might have to come up with your own photo design to help fill in that gap.

It's not a big hurdle at all, it's just finding a way to make the photos you want to use work with the design of the papers. I went for a super easy, (one of my favorite no fail solutions) and created a rectangle grouping of photos.

Variation #2 - Since a lot of the photos I wanted to use were vertical I decided to use a mix of wallet size photos ( 2 1/2 x 3 1/2) and then cropped my horizontal 4 x 6 photos to the same 3 1/2 height for the top row of pictures. On the bottom row (right page) I used an uncropped 4 x 6 and a 3 x 4 photo.

Variation #3 - I added stars across the wavy line on the bottom and then added a line of hand stitching across the top of them.

  • • • • • • • • • • • • • • • • • • • • • • • • • • • • • •

 Bonus Sketches

Card Sketch #7 - based on One-page Sketch #9


You can download and print this sketch by clicking on the card sketches link found under the "printable sketches" tab on the right sidebar.

Two-page Sketch #15 - based on One-page Sketch #9
 
 
You can download and print this sketch by clicking on the two-page sketches link found under the "printable sketches" tab on the right sidebar.
••••••••••••••••••••••••••••
Friday, May 20, 2011

Add-on Week, Part 5 and a bonus sketch

••••••••••••••••••••••••••••••

Add-on Sketch #5


You can download and print this sketch by clicking on the add-on sketches link found under the "printable sketches" tab on the right sidebar.


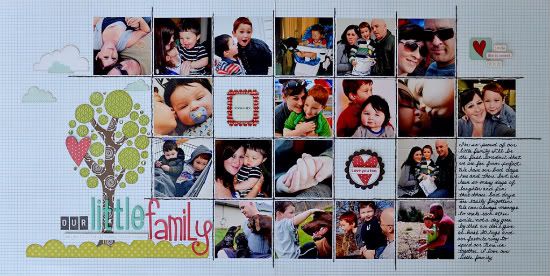
"Our Little Family" by Allison Davis
Supplies - Patterned paper: Bella Blvd and American Crafts (clouds); Alphabets: BasicGrey (our), American Crafts (little), and Bella Blvd (family); Rubon: unknown; Stickers: Cosmo Cricket and Bella Blvd; Jewels: Kaisercraft

I thought the tree would be a fun way to embellish a page about my family. When I saw a super cute chipboard piece by Bella Blvd. that had a tree with a heart on one branch I decided to combine it with the add-on sketch for my layout.

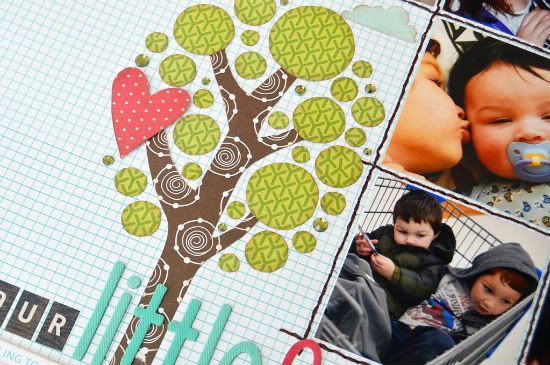
Variation #1 - Instead of the trunk going behind the circles I added branches and kept mine in sight.

Variation #2 - Because I wanted the branches to show I didn't layer my circles on top of each other and instead have them spaced apart. I tried to keep the same overall circle look to my tree as the sketch.


Variation #3 - I add a red heart to one branch. I loved the thought that it kind of represented our own little branch in our family tree.

Variation #4 - I used green jewels to help fill in the really small spaces.

  • • • • • • • • • • • • • • • • • • • • • • • • • • • • • •

Bonus Sketch
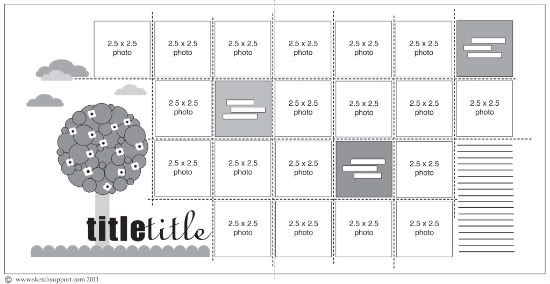
Two-page Sketch #14 - based on Add-on Sketch #5
•••••••••••••••
••••••••••••••••••••
You can download and print this sketch by clicking on the two-page sketches link found under the "printable sketches" tab on the right sidebar. 

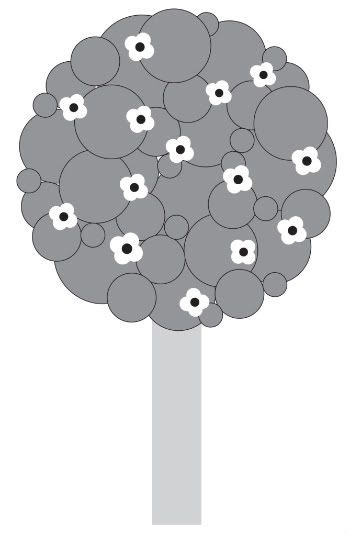
This sketch is also based off of my layout, "Our Little Family". There are a few things I wanted to share with you about this sketch and the different ways you can use it. 

Photos - There are 19 photos on this sketch! That's a lot! The fun thing about layouts that have a grid design is that they are easy. I used wallet size photos so I could still have most of the picture in sight when I cropped them down to the 2 1/2" size.
 •••••••••••
Most photo processing places offer wallet sizes but if the place you use doesn't you might check out http://www.photility.com They have a wonderful free software called Photo Sheet that allows you to group several separate images into a single image, like six 2 x 2 photos printed on a 4 x 6. 

You can also use larger photos with the sketch, like 3 x 3 and adjust everything as needed. Obviously you won't be able to fit as many photos but it will still work. You can also add in a larger focal photo somewhere too, like a 5 x 5 (cropped from a 5 x 7) in place of four photos or a 2 1/2 x 5 in place of two. Another way you can add in a bigger picture is to put one in place of the tree and then use smaller embellishments beside it.

Theme - This sketch will work great with a collection of your favorite photos, like I did on my layout. You could do a month in review, birthdays, holidays, etc. And you can remove the tree and add many other larger embellishments in it's place like:

• a big birthday hat
• a wedding cake
• big splashes of water
• a Christmas tree
• tall flowers
• a house
• tall guitars
 •••••••••••••
Stitching - I absolutely love stitching on my pages but I understand that not everyone is as big of a fan as I am. And I'll admit, the stitching was quite time consuming on this layout since there is so much. If you don't like stitching you can always do "faux" stitching with a pen or just add straight lines with a pen to get a similar look. 
••••••••••••••••••••••••••••••••••••••

Friday, May 13, 2011

Two-Page Week, Part 5 and two bonus sketches

••••••••••••••••••••
We apologize for the delay in posting. We had some technical difficulties with the site.

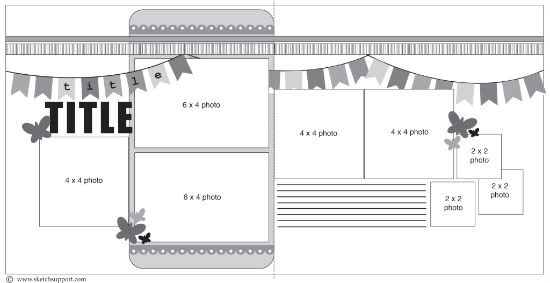
Two-page Sketch #13


 You can download and print this sketch by clicking on the two-page sketches link found under the "printable sketches" tab on the right sidebar. 


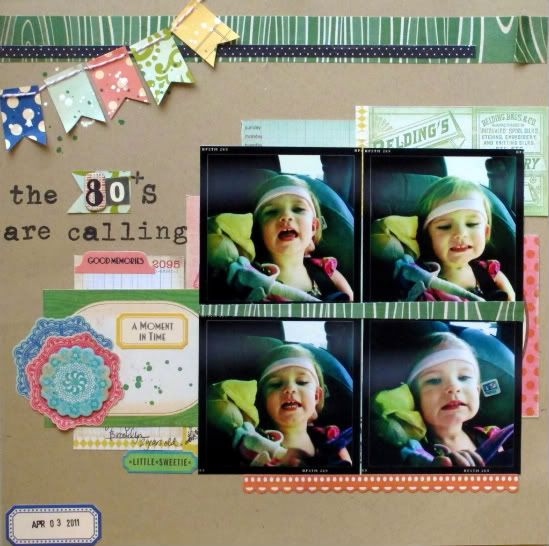
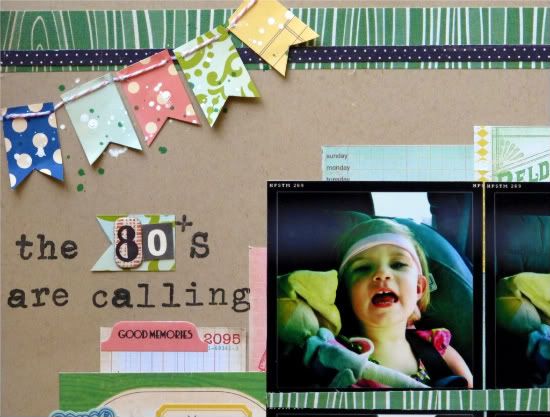
"The 80's are Calling" by Christy Arthur
Products - Hero Arts: Typewriter Stamp; October Afternoon: 5&dime Root Beer Barrels, Bubble Gum, Jawbreakers, Butterscotch, Lemondrops, Word and Shape Stickers, Miscellany; Crate Paper: Emma's Shoppe Borders, Phrase Stickers, Accent Cuts and Chipboard; Portrait Accent Cuts; Jenni Bowlin: Bingo Alpha Tile; Sassafras: Numerical Chipboard; Ranger: Adirondack Pitch Black ink; Studio Calico: Mister Huey Calico White and Pickle, Green Woodgrain fabrip; Other: Twine

• I used the left side of the two page sketch and turned it into a one page layout.

• I used four smaller 3x3 photos instead of the two larger 6x4 photos in the sketch.

• I layered different journaling cards behind the photos instead of the one, larger rectangle of paper in the sketch. I made that "rectangle" of journaling cards slightly smaller than the rectangle in the sketch (mine does not stretch behind the top horizontal strip).

• I made the banner smaller so it was in the corner more than stretching across the page like the sketch.


• I used a journaling card instead of the 4x4 photo and hid my journaling behind the accent card.

• I added a date accent to the bottom left corner, that is not in the sketch.

 • • • • • • • • • • • • • • • • • • • • • • • • • • • • • •


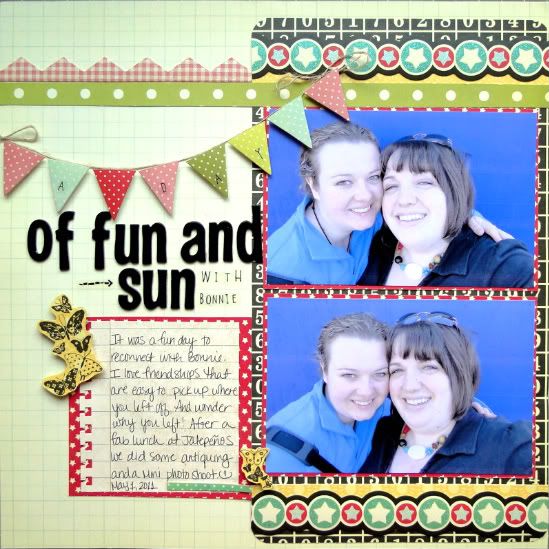
"A Day of Fun and Sun" by Melissa Elsner
Supplies - Paper, Border and Banner stickers: Pink Paislee; Alphabet Stickers: American Crafts, Cosmo Cricket; Stamp: Inkadinkado; Stamp Ink: Versafine; Border Punch, Corner Punch: EK Success

Design Notes: I was very excited to see some banners on this sketch but didn't have enough photos to fill up a two pager. I shrunk it to the one page and used one of the spots for a photo as a journaling block. To create the banner, I snipped off the triangles from the border sticker by Pink Paislee and then adhered them with pop dots. To create the areas where an embellishment was suppose to go, I simply stamped on the patterned paper and cut out the images.

 • • • • • • • • • • • • • • • • • • • • • • • • • • • • • •

Bonus Sketches
You can download and print these sketches by clicking on the one-page sketches link found under the "printable sketches" tab on the right sidebar.

One-Page Sketch #7 - based on the left page of two-page sketch #13


One-Page Sketch #8 - based on the right page of two-page sketch #13


•••••••••••••••••••••••••••••

Saturday, May 7, 2011

National Scrapbook Day Blog Hop

Happy National Scrapbook Day!

How great is it that we have a day to celebrate our favorite hobby! And what a great excuse to find great deals, participate in fun events, and to hang out with your scrapping friends doing what we all love, scrapbooking. At Sketch Support, we thought it would be a great reason to have another blog hop with our creative team.

Of course we'll do it in Sketch Support style with:

• A bonus two-page sketch for you to print,
• Lots of layouts based on the sketch,
• a scavenger hunt,
• and giveaways everywhere you look.

Here's how the blog hop works.

At the bottom of this post you will find links to each of the Creative Team member's blogs. You can jump around if you like but we recommend starting at the first on the list and at the end of her post you can click the link and "hop" to the next blog.

Along the way you'll find projects based on our bonus Two-page Sketch #12.


 You can download and print this sketch by clicking on the two-page sketches link found under the "printable sketches" tab on the right sidebar. 
 
You'll also find some giveaways as you travel along to each blog. To be eligible for those you'll have to visit their blog and read their requirements. And, of course, we have to do a giveaway here at Sketch Support too! It's the return of the...


"The Ultimate Scrapbook Generation Kit Club Sampler" 

The winner of this giveaway will receive:

The May Super Sketch Club kit - includes the materials and sketches to make five two-page layouts. The May kit includes products from BoBunny and My Mind's Eye.

May Boy Crazy kit - includes the materials to create a two-page boy themed layout with Fancy Pants products and a sketch.

May Girl Crazy kit - includes the materials to create a two-page girl themed layout with Fancy Pants products and a sketch.

May Generation Page kit - includes the materials to create a two-page layout with BoBunny products, a color photo of the layout, and directions.

May Hall of Fame Page kit - includes the materials to create a two-page layout with Cosmo Cricket products, a color photo of the layout, and directions.

May Generation Card kit - includes the materials to create four cards with My Mind's Eye products, color photos of the cards, directions, and a cutting guide.

To sum it up that's seven sketches and the materials to make nine two-page layouts and four cards!
There are two ways to be eligible for "The Ultimate Scrapbook Generation Kit Club Sampler" and yes, you can do both for two chances to win the giveaway.  (Just make sure if you want two chances that you post them in two separate comments.)

The first way to enter is to leave a comment at each Creative Team member's blog. After you do that, come back here and let us know in the comments on this post.

The second way to enter is to participate in our scavenger hunt. Below you will find a list of items to hunt for as you hop along to each blog. The items you are looking for will be on the layouts on each blog with one item per blog. After you have found them all, come back here and tell us what you found and which creative team member's blog you found it on.

Scavenger Hunt items

1. waves
2. a jeweled star
3. a wood chip border
4. Title: "Surprise Visit"
5. watermelon
6. gears
7. the word "grace"
8. stitched flourishes
9. a bicycle
10. a picture of Play-Doh
11. a swing
12. Mickey Mouse
13. a layout with four photos

Let the hoppin' begin! You'll start with Shari and if you get lost along the way just come back here to get back on track.


Check back later today for our Card Week, Part 6 with Guest Designer, Angela Ploegman.

Friday, May 6, 2011

Card Week, Part 5 and a bonus sketch

•••••••••••••••••••••••••••••••••••••
Shari, Christy, and Suzanna have all created wonderful layouts based on the card sketch. Each one uses the sketch in a completely different way.

We've also got our first bonus sketch in celebration of National Scrapbook Day and don't forget to check back tomorrow for our National Scrapbook Day blog hop! 

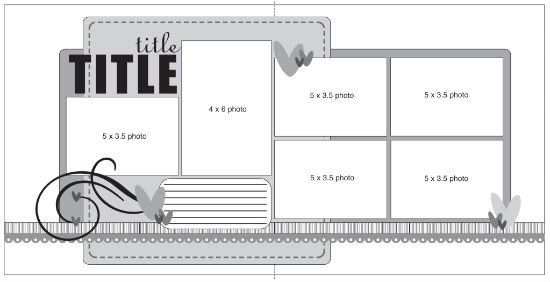
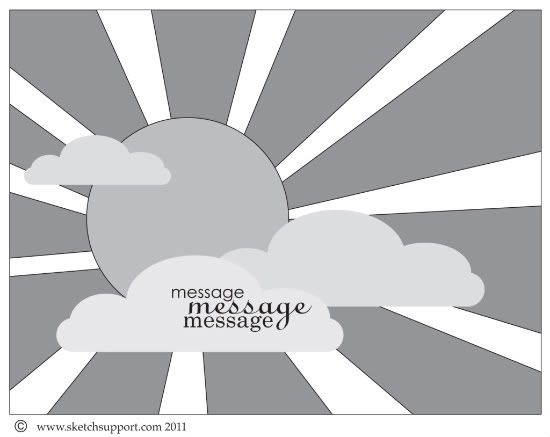
Card Sketch #6


You can download and print this sketch by clicking on the card sketches link found under the "printable sketches" tab on the right sidebar.


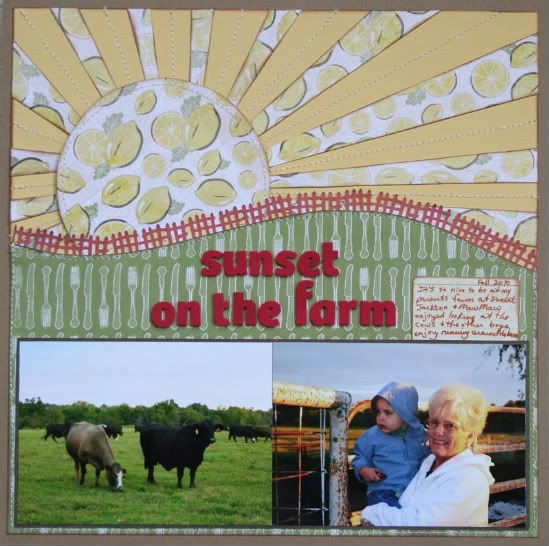
"Sunset on the Farm" by Shari Thurman
Supply List - Pattern Paper and Die Cut Elements: Kaiser Craft; Tools: Martha Stewart border punch; Ink: Colorbox Chalk Ink; Other: Machine Stitching and Cardstock

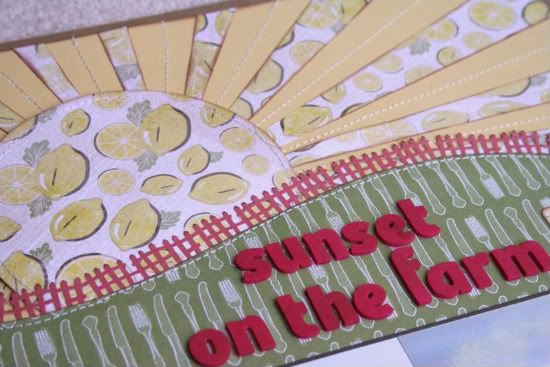
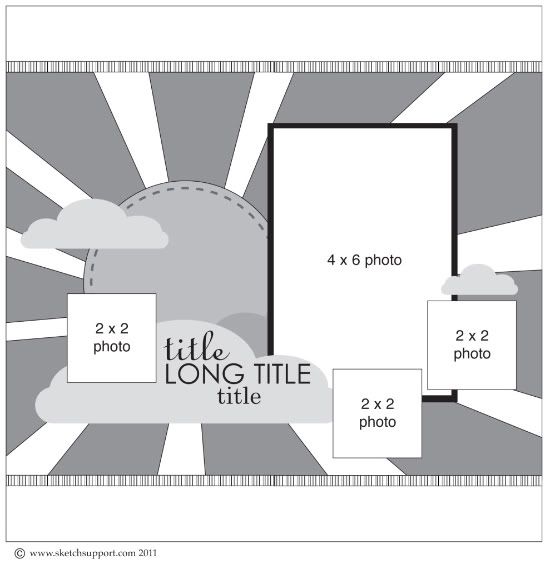
I loved the bright and cheery sun on this weeks sketch and knew right away I wanted to use it to make a layout about my parents farm. I had to adjust the circle. I used a 5" circle instead of the suggested 2" and then cut strips in random widths for the sun rays as shown on the sketch. I used yellow cardstock as my base and then attached the strips of the lemon paper on top. I then stitched between the sun rays on the cardstock and attached the sun to kraft paper.

I hand cut the green curve using a template I made earlier this year based on a previous sketch by Allison. I loved that sketch so much that I hid my curved template away for later use. I just love circles and curves on layouts.


I then tucked in my red fence border. To get the fence to curve, I simply snipped the bottom of the border and bent it gently. I held the fence in place by using my sewing machine to stitch around the green patterned paper.

Journaling reads: "It's so nice to be at my parents farm at sunset. Jackson and Mawmaw enjoyed looking at the cows and the other boys enjoyed running around in the barn. Fall 2010"

 • • • • • • • • • • • • • • • • • • • • • • • • • • • • • •


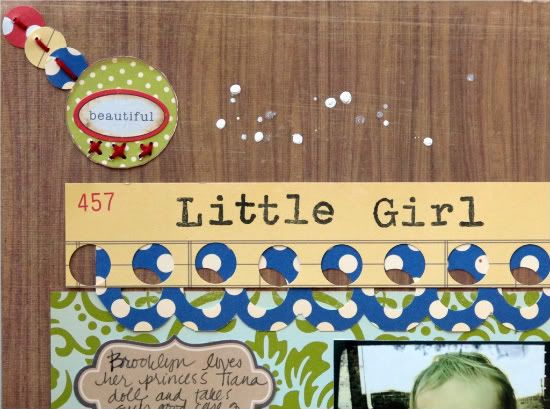
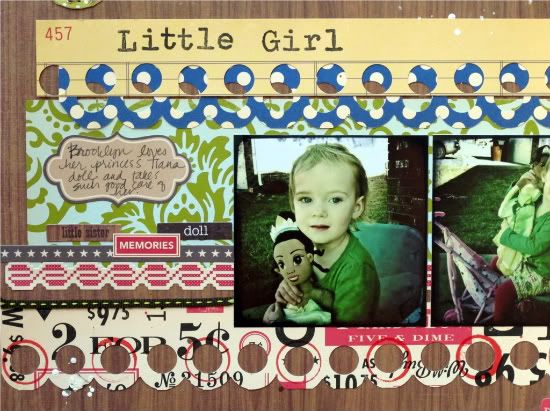
"Beautiful Little Girl" by Christy Arthur
Products - Crate Paper: Emma's Shoppe Phrase Stickers, Playhouse, Accent Cuts, Word Stickers - Toy Box Trims; October Afternoon: 5&Dime Shape Stickers, Root Beer Barrels, Bubble Gum, Circus Peanuts, Butterscotch, Label Stickers, Word Stickers and Miscellany; Echo Park: For the Record Table Cloth; Hero Arts: Typewriter Stamps; Studio Calico: Mister Huey Calico White, Schoolhouse, PonyBazzill: In Stitch'z Red/Orange

I simplified the diagonals in the sketch for this layout. I used circles that are stitched together to form the diagonal lines that meet at the green circle in the top left corner.


I chose to keep the diagonals very simple for this layout. To make them more pronounced, I could have stitched all the way across the layout.


 • • • • • • • • • • • • • • • • • • • • • • • • • • • • • •


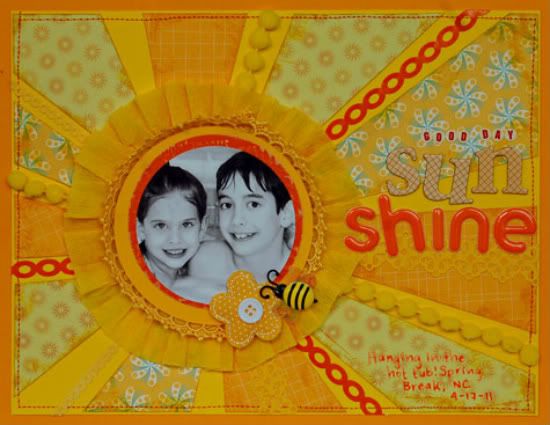
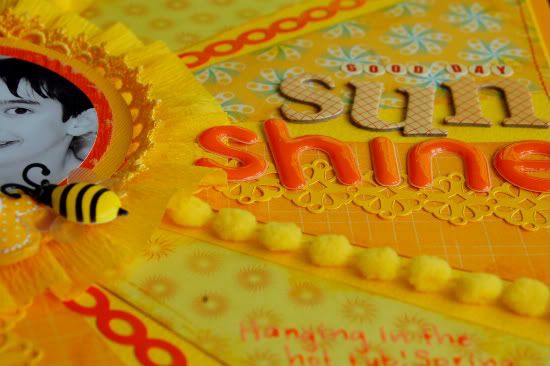
"Good Day Sunshine" by Suzanna Lee
Supplies - Cardstock: Bazzill, Coredinations; Patterned Paper: Cosmo Cricket, Best Creations, Bo Bunny; Paper Ribbon/Frills: Oriental Trading, Doodlebug, K & Co; Ribbon: Recollections, Doodlebug; Puffie: KI Memories; Dimensional Sticker: Jolee's; Letter Stickers: American Crafts, Jenni Bowlin; Ink: Ranger Distress Ink; Misc: crepe paper

The most obvious variation here is that I made an 8.5 x 11 layout instead of a card. I scanned in Allison's sketch and enlarged it in PhotoShop so that I had templates from which to cut the pieces of paper. I chose not to use the clouds as they detracted from the tone on tone feel I wanted to create for my layout. I also added a few extra circles as the sun center.


 • • • • • • • • • • • • • • • • • • • • • • • • • • • • • •

Bonus Sketch
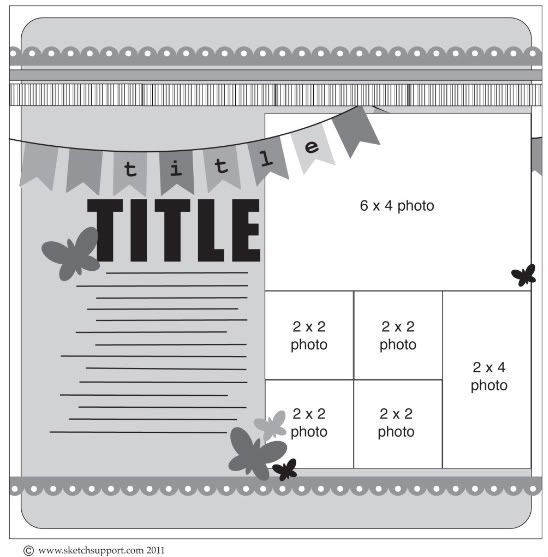
One-page Sketch #6 - based on Card Sketch #6

You can download and print this sketch by clicking on the one-page sketches link found under the "printable sketches" tab on the right sidebar.

Each Friday in May, in celebration of National Scrapbook Day, I'll be sharing bonus sketches. All of the bonus sketches are based on the sketch for that week. Today the one-page bonus sketch is based on the sunshine card sketch. 

•••••••••••••••••••••••••••••••


Saturday, February 26, 2011

"Get to Know the Creative Team" Blog Hop

••••••••••••••••••••••••••••
Welcome to the Sketch Support "Get to Know the Creative Team" blog hop!

Over the last two months I have had the chance to get to know this wonderful group of girls that make up the Sketch Support Creative Team. They are such a diverse group that is not only amazing in the crafty sense but also just amazing in general. I adore these girls and all the time and effort they put into making Sketch Support what it is. I would have to be insane not to invite all of our readers to get to know the girls who make this place possible. I want you to have a chance to get to know and adore them like I do.

Of course we are going to do this blog hop in Sketch Support style!

How about a new bonus two-page sketch to download and print?
How about tons of awesome projects based on the sketch?
How about giveaways galore?

Sounds pretty awesome, right?

Here's how the blog hop works.

At the bottom of this post you will find links to each of the Creative Team member's blogs. You can jump around if you like but we recommend starting at the first on the list and at the end of her post you can click the link and "hop" to the next blog.

Along the way you'll find projects based on our bonus Two-page Sketch #9.


You can download and print this sketch by clicking on the two-page sketches link found under the "printable sketches" tab on the right sidebar. 

You'll also find some giveaways as you travel along to each blog. To be eligible for those you'll have to visit their blog and read their requirements. And, of course, we have to do a giveaway here at Sketch Support too! I'm calling this giveaway  

"The Ultimate Scrapbook Generation Kit Club Sampler" 

The winner of this giveaway will receive:

The February Super Sketch Club kit - includes the materials and sketches to make five two-page layouts. The February kit includes products from Fancy Pants, Jillibean Soup, and BoBunny.

February Boy Crazy kit - includes the materials to create a two-page boy themed layout with BasicGrey products and a sketch.

February Girl Crazy kit - includes the materials to create a two-page girl themed layout with Echo Park products and a sketch.

February Generation Page kit - includes the materials to create a two-page layout with We R Memory Keepers products, a color photo of the layout, and directions.

February Hall of Fame Page kit - includes the materials to create a two-page layout with BasicGrey products, a color photo of the layout, and directions.

Generation Card kit - includes the materials to create four cards with My Mind's Eye products, color photos of the cards, directions, and a cutting guide.

To sum it up that's seven sketches and the materials to make nine two-page layouts and four cards!

To be eligible for "The Ultimate Scrapbook Generation Kit Club Sampler" you have to leave a comment at each Creative Team member's blog. After you do that, come back here and let us know in the comments on this post.

It's time to get to hoppin'! Have fun!

  
Check back later today for our One-page Week, Part 6 with Guest Designer, Jody Benjamin!
•••••••••••••••••••••••••••
Sunday, February 13, 2011

Add-on Sketch #2, a Bonus Download, and our Card Product Challenge Winner

• • • • • • • • • • • • • • • • • • • • • • • • • • • • • • • • • • • • • • • • • • • • •
 

 You can download and print this sketch by clicking on the add-on sketches link found under the "printable sketches" tab on the right sidebar.

Break out the Thesaurus, this month our add-on sketch is a word collage. The sketch has a love theme, but word collages can work with any theme. You can make this on your computer and print it out or you can construct it with alphabet stickers, word stickers, chipboard letters, or die cuts.

Tips: 
• Use a combination of different styles and sizes of letters.
• Having a Thesaurus on hand really helps to find words that fit your theme.
• Start with a larger word and then build around it with smaller words.
• Try making the collage on a piece of paper cut to the size you want the collage to be. This helps with getting the words lined up evenly.

Variations:
• Use an embellishment, a picture, or add your journaling in place of the largest word and build a collage of words above and below it.
• The sketch shows a 3" x 6" collage but you could easily make one that stretches across your whole project.
• Make a collage with words that stretch out further than the others.
• Add small details like brads, jewels, or stitching.
• Try making a horizontal word collage.

Be sure to come back tomorrow for the first post of add-on week and to see the awesome projects the creative team has put together.

• • • • • • • • • • • • • • • • • • • • • • • • • • • • • • • • • • • • • • • • • • • • •

Bonus Download

This month we've got a bonus printout for the add-on. If you like the sketch collage as it is you can print out our color version of it to use on your projects.


You can find this color version of the sketch by clicking on the add-on sketches link found under the "printable sketches" tab on the right sidebar. 

Each day this week, I'll show you ways you can use the color printout of the sketch on several different projects.

• • • • • • • • • • • • • • • • • • • • • • • • • • • • • • • • • • • • • • • • • • • • •

 Card Sketch/Jillibean Soup Product Challenge Winner

Thank you so much to those who shared their projects with us and took part in the challenge. We enjoyed getting a chance to travel to your blogs and galleries to see them!

The winner of the challenge is:

ruth said... 
This was so much fun! I love sketches for layouts and I'm learning to use them for cards now too. :)

Ruth's card is so pretty and such a great interpretation of the sketch. Ruth, you can email me at allison@scrapbookgeneration.com with your shipping information.
•••••••••••••••••••••••••••••••••••••••