Showing posts with label Shari Thurman. Show all posts

Tuesday, March 6, 2012

Card Week, Part 2

•••••••••••••••••
Card Sketch #17

You can download and print this sketch by clicking on the card sketches link found under the "printable sketches" tab on the right sidebar.


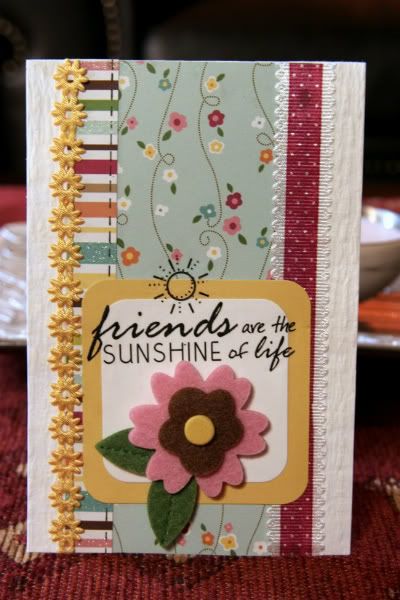
"Friends are the Sunshine of Life" card by Lynette Jacobs
Supply list - Cardstock: Worldwin; Printed papers: American Craft (City Park); Trims: American Crafts (City Park); Felt flower: American Crafts (City Park); Sentiment: Kaisercraft

Variation #1: I supplemented the two narrow strips with two different trims.

The rest of the card was done according to the sketch.

  • • • • • • • • • • • • • • • • • • • • • • • • • • • • • •


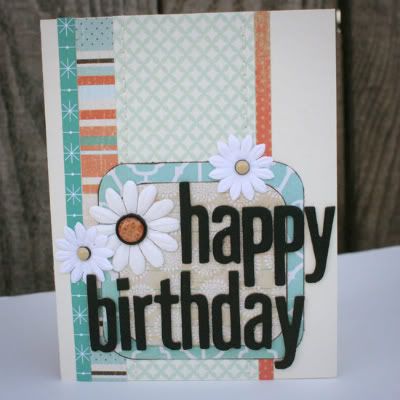
"Happy Birthday" card by Christine Chain
Suppliespatterned paper: My Mind’s Eye, Authentique; paper flowers: unknown, (in Green Tangerine’s January kit club); brads: Bo Bunny; fabric letters: American Crafts; ink: Tsukineko; other: embroidery floss

Variation #1 - The most obvious change I made was that I used half of an 8 1/2 x 11 sheet of cardstock to make the card 4 1/4 x 5 1/2. I kept all the other dimensions the same.


Variation #2 - I omitted the swirl and used larger letters for the sentiment. Which makes the title block more of a background than a block, but I like it like that :)

  • • • • • • • • • • • • • • • • • • • • • • • • • • • • • •


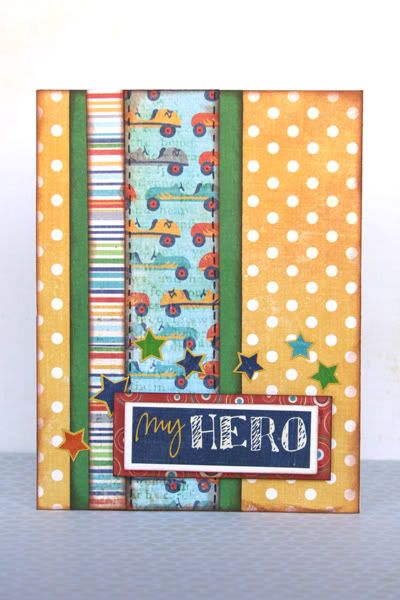
"My Hero" card by Shari Thurman
Supplies - Patterned Paper and Stickers: Echo Park(A Boy's Life); Cardstock: Georgia-Pacific; Ink: Colorbox Chalk Ink (Chestnut Roan); Adhesive: ATG by Scotch and EK Success (3D dots)

Variation #1: I used a polka dot pattern for the background.

Variation #2: I changed the shape of the sentiment.

Variation #3: I substituted the flourish for stars.
••••••••••••••••••••

Wednesday, February 15, 2012

Add-on Week, Part 3

•••••••••••••••••
Add-on Sketch #14


You can download and print this sketch by clicking on the add-on sketches link found under the "printable sketches" tab on the right sidebar.


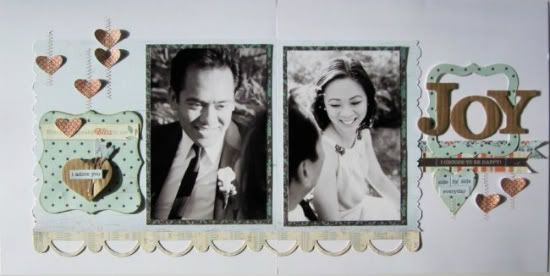
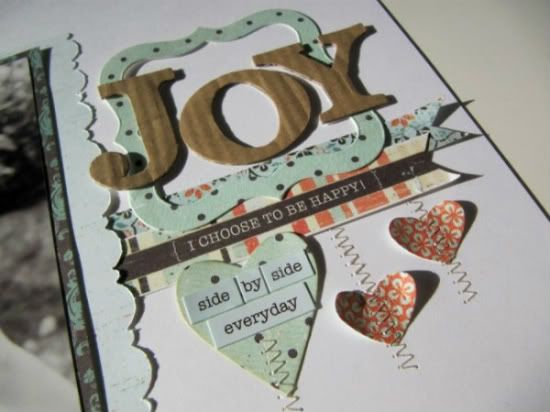
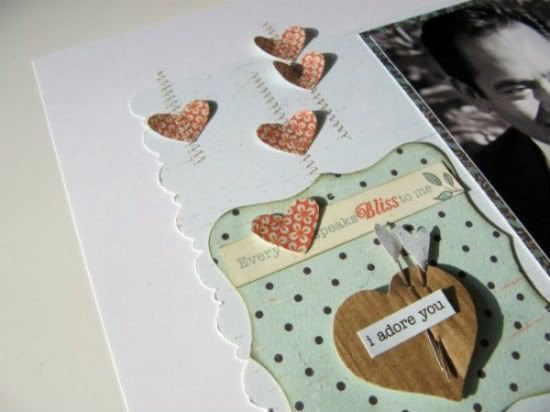
"Every Heart Speaks Bliss to Me" by Virginia Nebel
Supply list - Patterned paper: Authentique; Alphabets: Basic Grey; Diecuts: Sizzix; Accucut

Variation #1 -I used a zigzag stitching through single hearts on both left and right pages


• • • • • • • • • • • • • • • • • • • • • • • • • • • • • • 


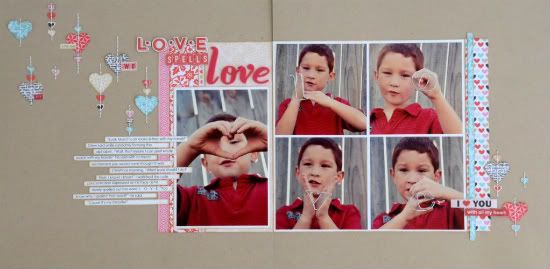
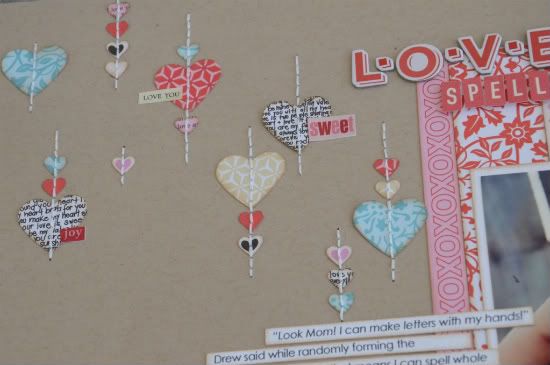
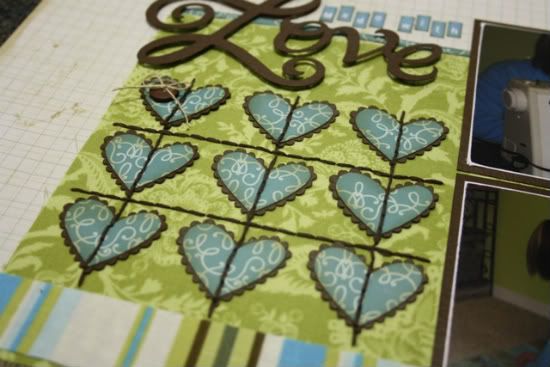
"L-O-V-E Spells Love" by Allison Davis
Supplies - Cardstock: Bazzill; Patterned paper: Fancy Pants; Chipboard alphabet: American Crafts; Alphabet stickers: Authentique; Foam alphabet: American Crafts; Word stickers: Making Memories: Embroidery floss: DMC; Heart punches: Martha Stewart and Recollections; Ghost letters: unknown; Paint: Ranger

I thought this heart design would work wonderfully with the pictures I had of Drew spelling the word "love" with his hands. (The concentration on his face as he tries to not only spell but to do it with his hands makes me smile!)

Variation #1 - I used the same concept but varied from the design by making several smaller lines of hearts instead of three big lines.


Variation #2 - I added word stickers to a few hearts.

Variation #3 - I didn't layer any hearts, they are all single pieces.

• • • • • • • • • • • • • • • • • • • • • • • • • • • • • • 


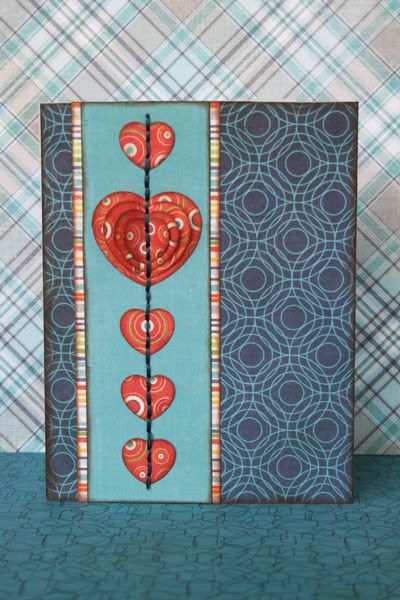
"String of Hearts" card by Shari Thurman
Supplies - Patterned Paper: Echo Park(A Boy's Life); Ink: Colorbox Chalk Ink (Chestnut Roan); Tools: We R Memory Keepers paper piercer and mat, Creative Memory heart punches; Thread: DMC

Variation #1: I used only one row of hearts. The larger heart is layered with four hearts.

Variation #2: I layered the card with three different pattern papers.
•••••••••••••••••••••

Thursday, February 9, 2012

Two-page Week, Part 4

••••••••••••••••••••••
Two-page Sketch #25


You can download and print this sketch by clicking on the two-page sketches link found under the "printable sketches" tab on the right sidebar.


"Made With Love" by Penny Grimsley
Supplies - Cardstock: Bazzill; Patterned paper: Pebbles (With Love); Alphabets: Silhouette Die Cutting Machine; Embellishments: Jillibean Soup, Tim Holtz, Making Memories; Punch: Martha Stewart; Ink: Jenni Bowlin; Embroidery Thread: DMC; Twine: The Twinery; Fonts: Pacifico, Pharmacy; Date Stamp: EK Success; Stamp: Ali Edwards

Variation #1 - I changed the photo blocks by swapping them from one page to the other. I needed my photos to be in order of the story I wanted to tell.

Variation #2 - I added a cardstock mat under the photos.

Variation #3 - I punched the borders of the patterned paper and then stitched along the edges for emphasis.

Variation #4 - I added a journaling card in place of the two 2x2 photos.

Variation #5 - I moved the title to the right page to work my heart into it.


Variation #6 - I substituted a stamped journaling bracket on the left page for the journaling strips.


Variation #7 - I added a ticket and paper clip with twine on it to capture the photo date.

• • • • • • • • • • • • • • • • • • • • • • • • • • • • • • 


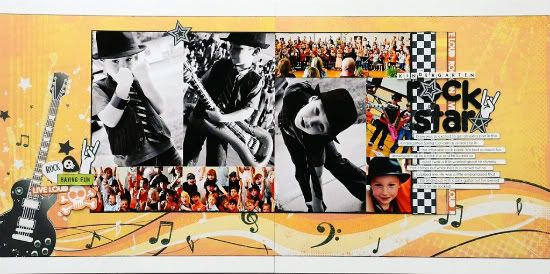
"Kindergarten Rock Star" by Allison Davis
Supplies - Cardstock: Bazzill; Patterned paper: Best Creation Inc; Alphabet stickers: Kaiser Craft; Chipboard alphabet: American Crafts; Paint: Ranger

Variation #1 - I flipped the sketch. The guitar/music notes paper was so perfect for these pictures that I couldn't resist using them and for those papers to work the guitar had to be on the left page.

Variation #2 - Instead of using three papers for the background, I used one large piece and stretched it all the way to the edges of the white cardstock.  In order for the guitar/music notes paper to work I had to stretch it to the ends.

Variation #3 - I used the large guitar in place of the flowers.


I also added a few more details to the right of the guitar.

Variation #4 - I used lots of different photo sizes than what the sketch suggests. I had three 4 x 6" photos that I wanted to include on the layout. I started with those three and then built the rest of the photo block around them.

On the left page I used four 2 x 2" photos. On the right I used one 6 x 2" photo, one 2 x 3-1/2" photo and one 2 x 2-1/2" photo.

Variation #5 - I framed the whole photo block by adding paint to the outer edge of the photo block as a whole.

Variation #6 - I moved the photo block up so that more of the music note design would show. 

Variation #7 - I cut the 12" strips by the title, down to the same height as the photo block. I wanted to leave most of the music notes design on the background paper showing.

Variation #8 - I moved the title and journaling strips down to work with my photos.


• • • • • • • • • • • • • • • • • • • • • • • • • • • • • • 


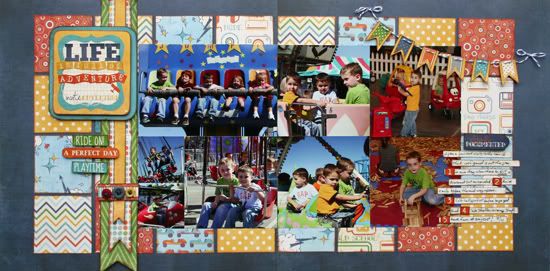
"Life is Full of Adventure" by Shari Thurman
Supplies - Patterned paper, Alpha and Element Stickers: Echo Park (A boy's Life); Adhesive: ATG by Scotch, EK Success (3D dots), Beacon 3 in 1 Advanced craft glue and Zots; Ink: Colorbox Chalk Ink (Chestnut Roan); Baker's twine: The twinery; Thread: DMC; Tools: We R Memory Keepers Paper Piercer and Piercing Mat; Buttons: unknown

Variation #1: I love this paper collection and I couldn't decide on just three patterns of paper for the background, so I decided to do a patchwork quilt-type background using the A and B sides of four different papers. The squares measure 2 1/2" each.

Variation #2: I've mentioned before that I love banners and pennants so much that I will put one on just about anything. Instead of using the three strips of paper down the left side as shown on the sketch, I layered three pennants in various lengths and widths.


I notched the ends of each and threaded them through a paper band embellished with buttons. I used 3D dots on the ends of each pennant for added interest.

Variation #3: I replaced the journaling strips on the left with three phrase stickers and omitted the butterflies.

Variation #4: I kept the title in the same location, but I placed it on a journal spot and double matted it on paper using 3D dots between each layer.

Variation #5: I replaced the flower embellishment on the right with my journal strips.


Variation #6: I changed the size of my photos on the right to 4 x 4" to work with the photos I wanted to use.

Variation #7: I added a banner to the top right corner of the layout.
•••••••••••••••••••••••••

Friday, February 3, 2012

Card Week, Part 5

••••••••••••••••
Card Sketch #16


You can download and print this sketch by clicking on the card sketches link found under the "printable sketches" tab on the right sidebar.


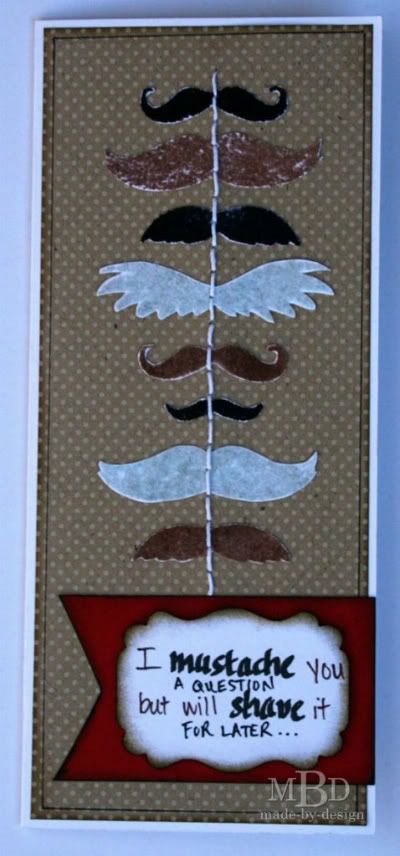
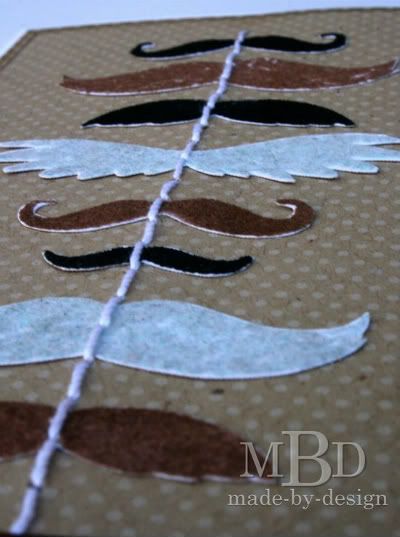
"I Mustache You a Question..." by Megan Bickers
Supplies Used - Cardstock: Georgia Pacific (White), Bazzill (Red); Patterned Paper: Making Memories (Kraft: White Mini Dot); Inks: Ranger Distress Inkpads (Antique Linen, Brushed Corduroy, Pumice Stone), Tsukineko (Versamark: Clear); Stamps: Inkadinkado (Mustaches); Tools: Ranger (Foam Blending Tool), Fiskars (Real Estate Punch), WeR Memory Keepers (Sew Easy: Straight Stitch), Close To My Heart (Heat Tool); Markers: EK Success (Zig Black Writer: Brown and Black), Beifa (Calligraphy Marker: Black); Adhesive: Ranger (Glossy Accents), Recollections (Foam Squares); Other: Studio G (Fun Flock: Brown, Grey, Black), Stampin' Up (Heat and Stick Powder), White Crochet Thread, Ruler.

Variation #1: I used one row of images instead of a grid of images. I sewed down the row of mustaches with a single piece of string.


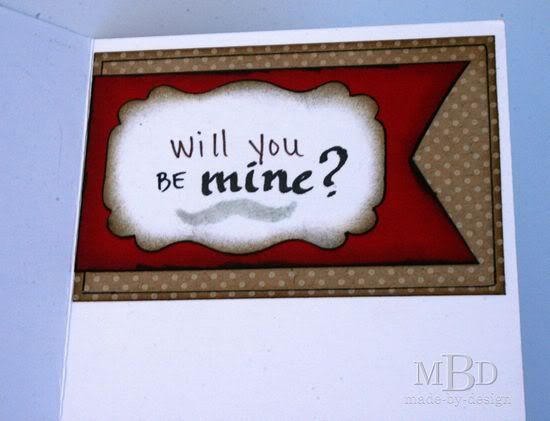
Variation #2: Instead of including my message directly on the card, I wrote the words on a punch shape and matted it with some red cardstock. Part of the saying is on the front of the card and the rest is on the inside.


Other things to note: I stamped the mustaches and used flock to make them more realistic. My saying was partially found on Pinterest, but I also added to it so that it would fit my Valentine's theme.

• • • • • • • • • • • • • • • • • • • • • • • • • • • • • • 


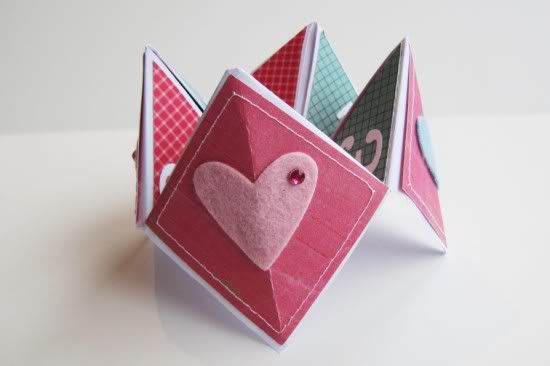
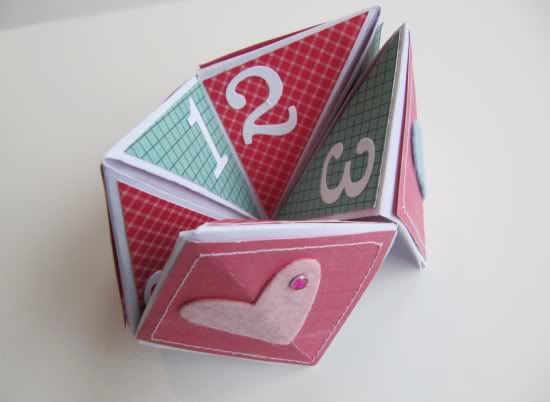
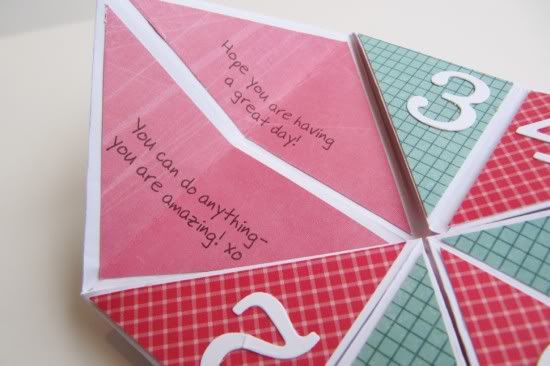
'Cootie Catcher messages' by Virginia Nebel
Supplies List - Patterned paper: My Mind's Eye; Embellishments: Kaiser Kraft rhinestone; Diecuts: Lifestyle Crafts

Variation #1: I took inspiration from the square pattern by creating an inter-active project that starts with a square piece of paper. I kept the stitching and heart theme on the outside.


Variation #2: Instead of the message(s) placed on the front of the project, all of them are hidden inside waiting to be revealed.


• • • • • • • • • • • • • • • • • • • • • • • • • • • • • • 


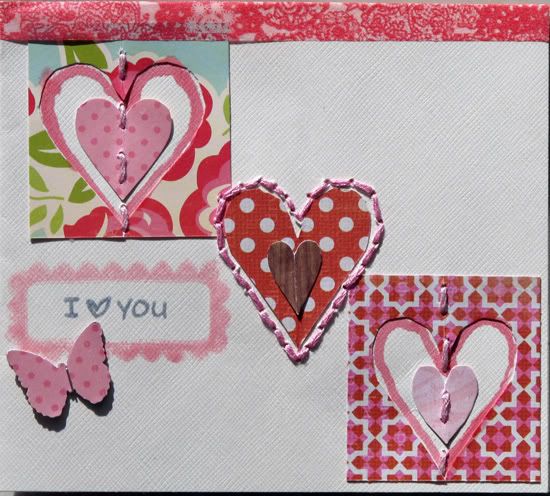
"I Love You" by Christy Arthur
Supply List - Patterned Paper: Lily Bee Design (Head over Heels Crush), October Afternoon (Sidewalks Marbles and Ring Around the Rosie); Embellishments: Crate Paper (Random Phrase Stickers), Hambly (Washi Tape); Stamps: My Minds Eye (Stella and Rose Hattie Remember), Lawn Fawn (Say Cheese); Ink: Jenni Bowlin (Weather Vane); Tools: Martha Stewart (Classic Butterfly Punch), Bazzill In Stitch Floss; Mist: Studio Calico (Mister Huey Piglet)

Variation #1: I made a diagonal row of hearts and only made one row.

Variation #2: I stitched a line through each of the hearts on the outside of the card. But, for the inside, I stitched around the heart to accent it.

Variation #3: I moved the message to the left side and added a butterfly embellishment.

Variation #4: I lined the top with washi tape.

Variation #5: For the outside hearts, I used the negative image and outlined it with mist to help it stand out. Then I added a smaller heart in the center.


• • • • • • • • • • • • • • • • • • • • • • • • • • • • • • 


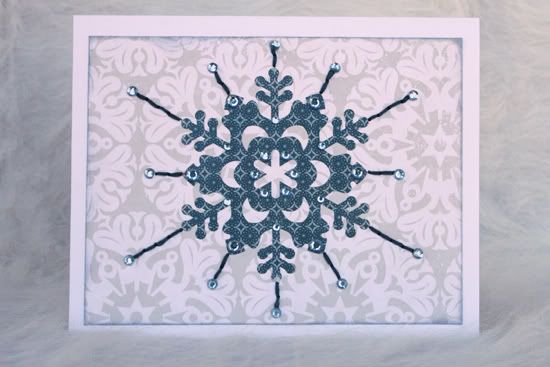
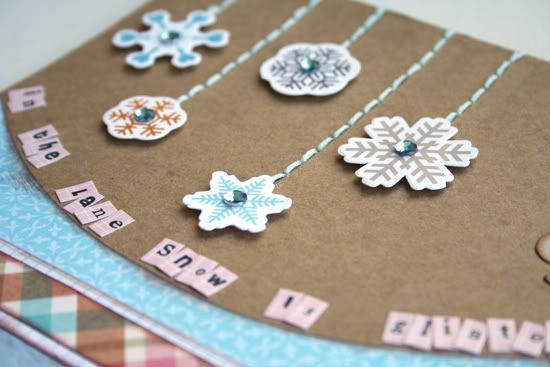
"Snowflake" by Shari Thurman
Supplies - Cardstock: Bazzill; Patterned paper and Sticker: Echo Park; Adhesive: ATG by Scotch; Ink: VersaColor; Thread: DMC; Tools: We R Memory Keepers Paper Piercer and Piercing Mat; Rhinestones: Kaiser Craft


Variation #1: I flipped the card sideways and used pattern paper as my background and inked around it with smoke blue ink.

Variation #2: Instead of stitching a grid with nine hearts, I started with a single snowflake and created diagonal lines from each of its points.

Variation #3: I embellished the snowflake with rhinestones.

Variation#4: I omitted the sentiment.
•••••••••••••••••••••••••

Tuesday, January 31, 2012

Card Week, Part 2

••••••••••••••••
Card Sketch #16


You can download and print this sketch by clicking on the card sketches link found under the "printable sketches" tab on the right sidebar.


"Bundle Up" by Shari Thurman
Supplies - Cardstock: Bazzill; Patterned paper and Ephemera: Pink Paislee; Adhesive: ATG by Scotch, EK Success 3D dots and Zots; Ink: Colorbox Chalk Ink (Chestnut Roan); Thread: DMC; Tools: We R Memory Keepers Paper Piercer and Piercing Mat

Variation #1: I placed pattern paper along the bottom of the card and added my sentiment. I used 3D dots to elevate the sentiment slightly.


Variation # 2: I stitched the grid onto the card and then placed the hearts on top, rather than stitching through the hearts as shown on the sketch.

Variation #3: I layered the hearts in the center column using 3D dots.

• • • • • • • • • • • • • • • • • • • • • • • • • • • • • • 


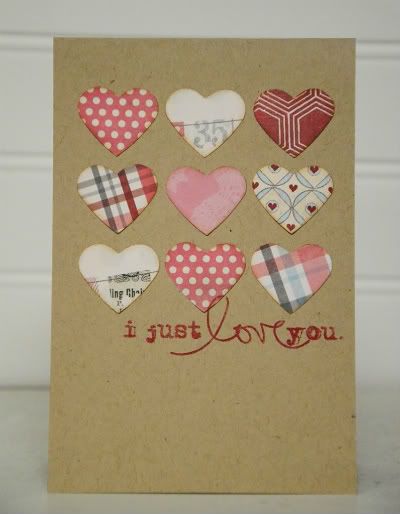
"I Just Love You" card by Allison Davis
Supplies - Cardstock: Bazzill; Patterned paper: My Mind's Eye; Heart punch: Martha Stewart; Stamp: Technique Tuesday; Ink: Colorbox Fluid Chalk Ink

Variation #1 - I used much larger hearts than the sketch suggested.

Variation #2 - I didn't add the stitching in the grid pattern across the hearts.

• • • • • • • • • • • • • • • • • • • • • • • • • • • • • • 


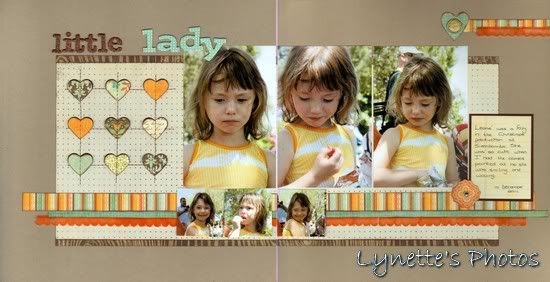
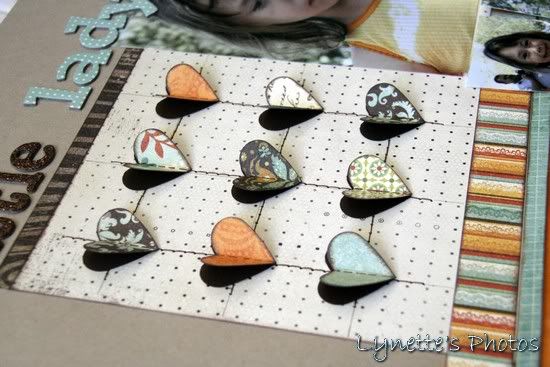
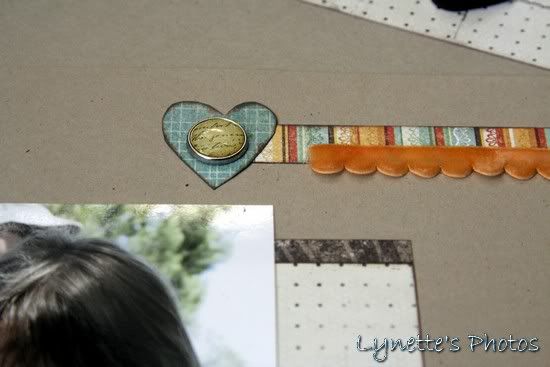
"Little Lady" by Lynette Jacobs
Supply List - Cardstock: Kraft paper by Scenic Route; Printed papers: Basic Grey (Basics), My Mind's Eye (Stella and Rose Mabel); Brads: My Mind's Eye (Stella and Rose); Trim: My Mind's Eye (Stella and Rose); Alphabets: American Crafts; Sketch: Allison Davis/Sketch Support (Two-page Sketch #10)

Variation #1: I used the sketch as is and added it as embellishment to an older sketch by Allison.

Variation #2: I punched brown hearts and then overlaid them with the printed paper ones.


• • • • • • • • • • • • • • • • • • • • • • • • • • • • • • 


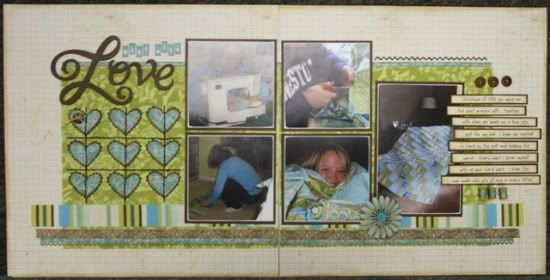
“Made With Love” by Carolyn Wolff
Supply List - Cardstock: Bazzill; Patterned Paper: Lilybee Designs and American Crafts; Fabric: unknown; Ink: Ranger Distress Ink; Floss: DMC; Wood Spools: Maya Road; Hearts: Cricut; Buttons: unknown; Twine: May Arts; Die-cut Flower: American Crafts; Ribbon: American Crafts

Variation #1 – I decided to make a two-page layout instead of a card. I used the grid shown on the sketch as the main element on the left page.

Variation #2 – I used fabric instead of paper to create the background of my layout. They were leftover pieces from the quilt shown in the photos.

Variation #3 – I moved the message from the bottom of the sketch to the top of my layout.

Variation #4 – Rather than have the stitching cross in the center of the hearts, I had it intersect below the hearts.

 •••••••••••••••••••••

Wednesday, January 11, 2012

Two-page Week, Part 3

••••••••••••••
Two-page Sketch #24


You can download and print this sketch by clicking on the two-page sketches link found under the "printable sketches" tab on the right sidebar.


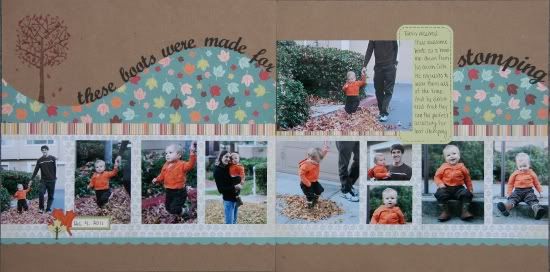
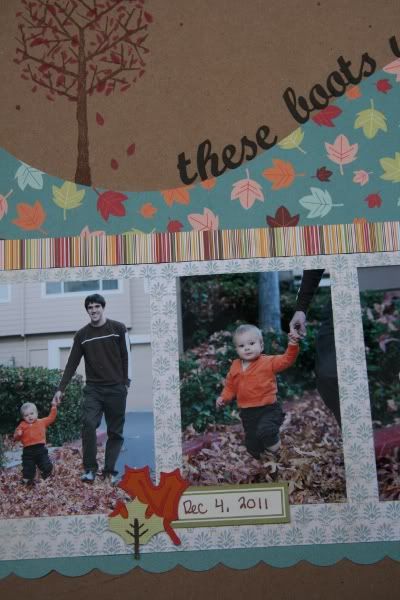
"These Boots Were Made for Stomping" by Noey Hunt
Products used - Patterned papers: Cosmo Cricket (leaves), Close to My Heart (cream/blue); Stamps: Close to My Heart; Journaling block: Scenic Route; Tools: Silhouette with Script MJ Bold font, Cricut CTMH Art Philosophy cartridge (leaves)

Variation 1: I had mostly vertical photos to use for the layout, so I changed the series of horizontal photos to twice as many vertical photos. I printed them slightly smaller than 3x4 because I wanted to leave a little space between the photos to breakup the scene.

Variation 2: I changed the theme from Christmas to fall and swapped out the ornaments for a tree with falling leaves.


Variation 3: My title was so long that I continued it on the right page. I wanted emphasis on "stomping" so I increased the size on those letters.

 • • • • • • • • • • • • • • • • • • • • • • • • • • • • • •


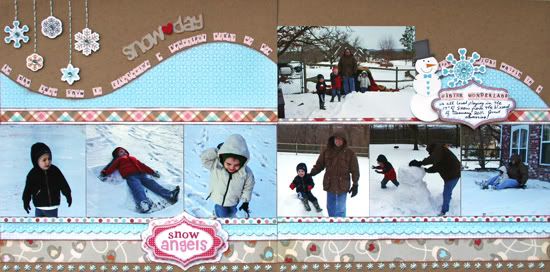
"Snow Day" by Shari Thurman
Supplies - Patterned paper, Ephemera and Bitty Alphas: Pink Paislee; Cardstock: Bazzill; Adhesive: ATG by Scotch and EK Success 3D dots; Ink: Colorbox Chalk Ink (Chestnut Roan); Thread: DMC; Tools: We R Memory Keepers, Sew Easy Stitch Piercer (backstitch and burst), Paper Piercer and Piercing Mat; Rhinestones: Kaiser Craft; Paper Punch: EK Success

Variation #1: I used five snowflakes instead of three and used pop dots and rhinestones to embellish them.


Variation #2: I used a shorter title from the ephemera pack.

Variation #3: Using tiny alphabet stickers along the curve, I added lyrics from the song 'Walking in a Winter Wonderland".

Variation #4: I used six 4x4" photos.

Variation #5: I added two additional strips of pattern paper along the bottom.

Variation #6: I added a hand stitched snowflake border in an icy shade of blue along the bottom of the layout.


Variation #7: I added a subtitle towards the bottom instead of the word stickers.

Variation #8: I adjusted the journal spot by adding a snowman and snowflake, and then omitting the journal strip.

 • • • • • • • • • • • • • • • • • • • • • • • • • • • • • •


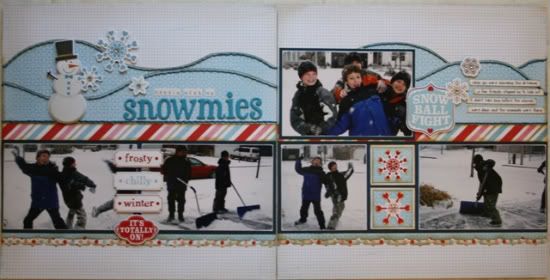
“Hangin’ With My Snowmies” by Carolyn Wolff
Supply List - Cardstock: Bazzill; Patterned Paper, Stickers and Die-Cuts: Pink Paislee; Ink: Ranger Distress Ink; Floss: DMC; Clear Gems: Zva Creative; Border Punch: Fiskars

Variation #1 – I created two layers of ‘hills’ on the background of my layout. I stitched along the bottom edge of the hills as well as along the top.


Variation #2 – I placed my title on top of the rolling hills instead of along the edge like the sketch shows. I added the snowflakes (a few more and in slightly different spots) but I did not add the stitching.

Variation #3 – I replaced the two small photos on the right page with two die-cut snowflakes.


Variation #4 – I created journal strips on the right page and replaced the journal box with a die-cut embellishment and snowflakes.

Variation #5 – I added a few word strips on the left page along the bottom, between the photos.

 • • • • • • • • • • • • • • • • • • • • • • • • • • • • • •


"Snow Much Fun" by Penny Grimsley
Supplies - Cardstock: Bazzill; Patterned paper: Echo Park; Alphabets: Jillibean Soup and Silhouette; Punches: Martha Stewart, Fiskars; Die Cut Shapes: Silhouette; Gems: Doodlebug; Brads: Making Memories, Queen & Co.; Floss: DMC

Variation #1 - I replaced the top right 4x6 photo with a 5x7 photo, double-matted for emphasis.


Variation #2 - I added a 4x6 photo to the left page.

Variation #3 - I scooted the title over to allow for the added photo.

Variation #4 - I did three 4x4 photos on the bottom right instead of the 2x2's and 4x6.


Variation #5 - I added stitching along the top side of the wavy strip of patterned paper.

Variation #6 - I added a strip of cardstock under the striped strip to add emphasis.

Variation #7 - I used an "icicle" strip along the bottom in place of the scallop strip.

Variation #8 - I enlarged the journaling block and matted it and eliminated the journaling strips.
••••••••••••••

Monday, January 2, 2012

Card Sketch, Part 1

•••••••••••••••••••••
Card Sketch #15


You can download and print this sketch by clicking on the card sketches link found under the "printable sketches" tab on the right sidebar.


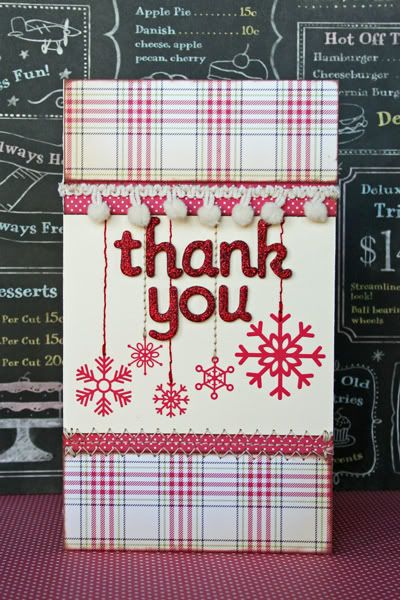
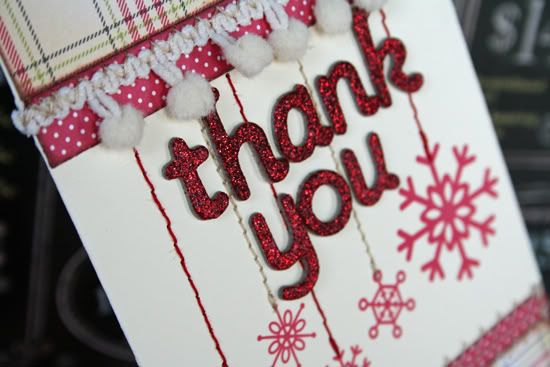
"Thank You" card by Shari Thurman
Supplies - Patterned paper, Rub-ons and Trim: October Afternoon; Alphabet: American Crafts; Cardstock: Bazzill; Adhesive: ATG by Scotch; Ink: Colorbox Chalk Ink (Chestnut Roan); Thread: Coats and Clark

Variation #1: I used the card as the background and placed 1 1/2" plaid strip and 1/2" polka dot strip at the top. I then used a 1 1/2" plaid strip and 1/4" polka dot strip at the bottom of the card.

Variation #2: I machine stitched the trim to the polka dot strip and machine stitched the 1/4" strip with regular and zig zag stitching also.


Variation #3: I used rub-on snowflakes and machine stitched with cream and red thread.

I love using my Christmas paper collections to create thank you notes after the holidays. This was a fun sketch to work with.

  • • • • • • • • • • • • • • • • • • • • • • • • • • • • • •


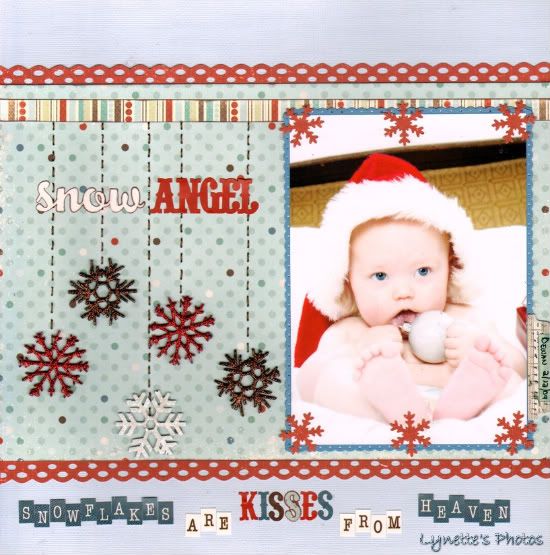
"Snow Angel" by Lynette Jacobs
Supply list - Cardstock: Bazzill; Printed Papers: Echo Park (Wintertime), Fancy Pants (Hot Chocolate); Letters: Echo Park (Wintertime); Chipboard snowflakes: Dusty Attic; Punches: Upikit; Other: DMC Thread

Variation #1: I adjusted the sizes to suit a 5x7 photo layout.

Variation #2: I used a border diecut on the strips above the largest printed papers.


Variation #3: I painted and glittered the chipboard snowflakes.
••••••••••••••••••••