Today Jennifer and I both used the add-on sketch for a similar purpose yet we both had different outcomes. I love that two people can use the same sketch and get totally different results.
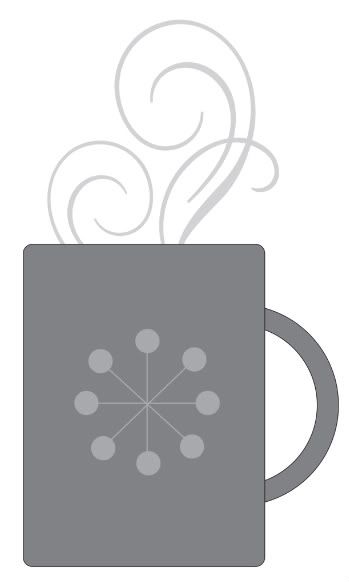
Add-on Sketch #1
You can download and print this sketch by clicking on the add-on sketches link found under the "printable sketches" tab on the right sidebar.
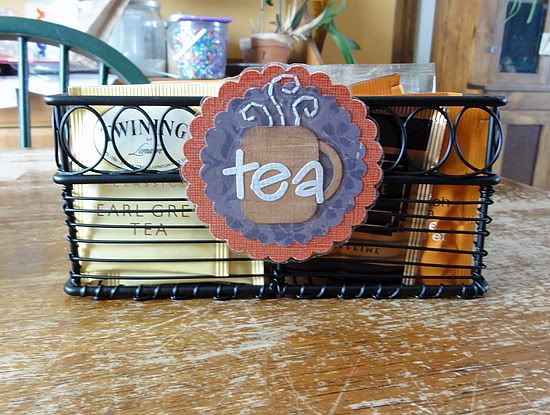
Tea basket label by Jennifer Larson
Supplies - Patterned Paper: Crate Paper and Making Memories; Punches: Marvy Uchida (scallop circles) and EK Success (corner rounder); Letter stickers: Pink Paislee; Floss: DMC; Ink: Stampin' Up!; Laminator: Xyron
1. When I saw the cup, it made me think of my new obsession, hot tea! I decided to make a label for the tea basket in my kitchen.
2. I punched a couple of scallop circles with different patterned paper, trimmed the cup out of another piece of patterned paper, made the cup handle using the directions on the sketch.
3. I inked the edges of the cup to make it stand out more, and I shrunk its size since my label is small. Because the image is smaller, I did not add the decoration on the cup that's in the sketch. I did add the word "tea" with letter stickers.
4. I hand drew the steam lines, then hand stitched with DMC.
5. After assembling the label, I ran it through my Xyron to laminate it.
• • • • • • • • • • • • • • • • • • • • • • • • • • • • • • • • • • • • • • • • • • • • •
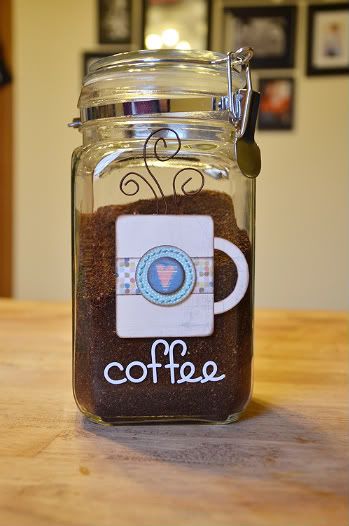
Supply list - Patterned paper: BasicGrey; chipboard: BasicGrey; Alphabet stickers: Doodlebug; Memory Thread: DMC; Canister: unknown
My husband always leaves the coffee, in it's packaging, on the counter and it drives me insane. It can be a little bit of an eyesore, (when our kitchen is actually clean.) I decided to take advantage of this sketch and turn an eyesore into something a little cuter.
Variation #1 - I needed the mug to be just a little bit larger so I increased all the measurements on the sketch by 1/2". Adjusting the size of this sketch is super easy if you just keep the same proportions.
Variation #2 - I added a small strip of patterned paper across the middle. I had to be really careful of what kind of paper I used for my mug since bold patterns or darker colors might get lost in all the dark coffee inside the canister. By adding the strip in the middle I was able to add a pattern into my design.
Variaton #3 - Since the canister is holding coffee and not cocoa I went with a chipboard circle with a heart. This seemed perfect since we love coffee in this house! I also added a little bit of hand stitching around the blue circle.
For my swirls I used brown Memory Thread from DMC. This is one of my favorite products. If you've never heard of it before, it's a craft wire wrapped in a colored thread. It is incredibly easy to shape and bend into the design you want and it comes in a large variety of colors. I love using for things like this mug, as an accent on an embellishment.
I also added the word "coffee" underneath the mug. My five-year-old has been attempting to make his own breakfast and snacks and I didn't want him to get confused and think it was for hot chocolate. The last thing our little red-headed ball of hyper needs is caffeine.
•••••••••••••••••••••••••••••••


9 comments:
Very cute ideas! Love the tea basket!
I love both of these ideas. How cute to have a tea basket and love the clear coffee jar. I'm loving all these ideas.
Allison how cute for Drew to be making his breakfast and snacks, that's a independent little boy you have.
Great job you two. I love the diversity! You definitely got my wheels turning!
I love both of these creations. I don't drink tea or coffee (I know, weird) but I am sure I can find another reason to make up one of these cute jars/baskets. Thanks for the inspiration!
cute ideas girls, the basket would make a great gift wether it be coffee,tea or hot cocoa packs! Love it, thanks for the ideas!
Staci
It would be cute for hot cocoa packs! I didn't even think of that and what a cute gift it would be! :)
Love that you both labeled every day items.
I'm getting thirsty!
Ha! Paula in Ontario.....you are too funny.
Post a Comment