
We're calling today's post "the non-one-page layouts post", for lack of a better title.
Tammy has create a beautiful (with a capital B) canvas that is a fun take on the sketch. And you know we've always got to show a few two-page layouts based on the one-page sketch! This one-page sketch is super easy to stretch into a two-page layout and you'll see how Jennifer and I both adapted it for two-pages.
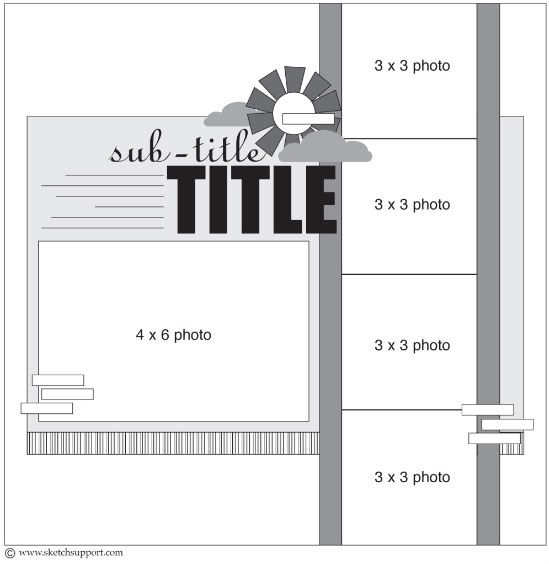
One-page Sketch #4
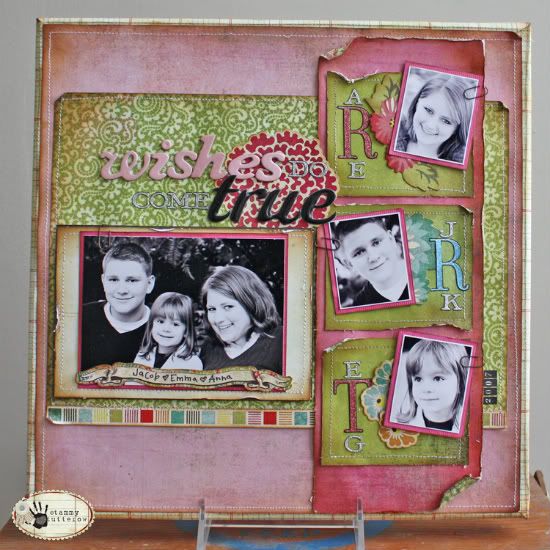
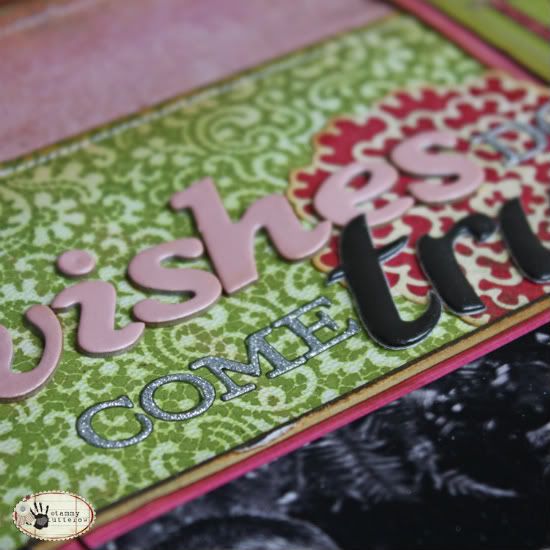
"Wishes Do Come True" canvas by Tammy Tutterow
Supplies - Patterned Paper: BasicGrey (Hello Luscious: Raspberry Syrup, Inviting, Simply Grand, Rosemary, Jalapeño Jelly); Cardstock: Bazzill; Stickers: BasicGrey (Hello Luscious Element Stickers); Alphabet Stickers: American Crafts (Thickers: Marquise, pink and unknown, black), K&Co Glitter Alphabets (Light Blue and Coral), Making Memories (Paper Reverie Alpha Shimmer and Tiny Alphas); Embellishments: Tim Holtz Idea-ology Mini Paper Clips; Adhesive: Claudine Hellmuth Studio Matte Multi Medium, Tombo Aqua, Scrapbook Adhesives by 3L EZ Runner; Ink: Tim Holtz Distress Ink (Vintage Photo); Misc: Donna Salazar Disstrezz-It-All, sewing machine
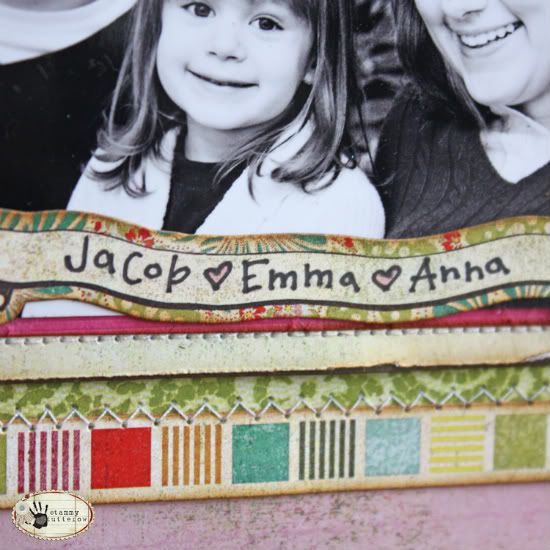
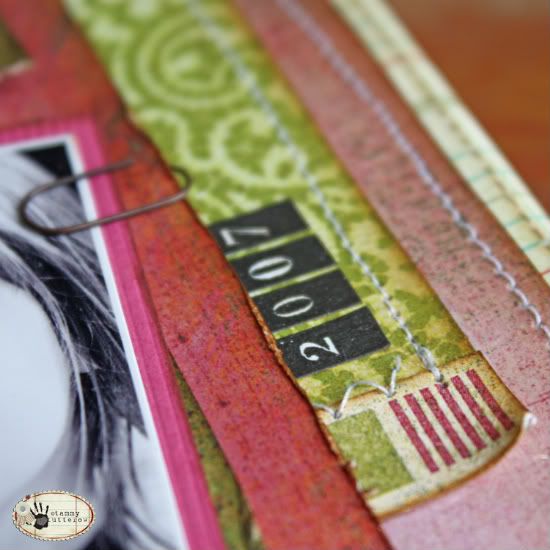
I wanted to create a display piece to feature some of my very favorite photos of my three children. This sketch was perfect for adapting to a canvas. Because I used a 12x12 canvas, I needed to add an extra layer to the sketch to cover the sides and edges.
I decided to omit the journaling from the sketch and use just a title to express the sentiment I wanted to
include.
I also used three photos instead of four as the sketch shows. This allowed me to have a bit more space on the photo strip to add some added dimension by curling my paper edges up which gave a peek at the pattern on the back side of the paper.
To help the small glitter letters stand out more and be easier to read, I used a fine tip pen to outline them.
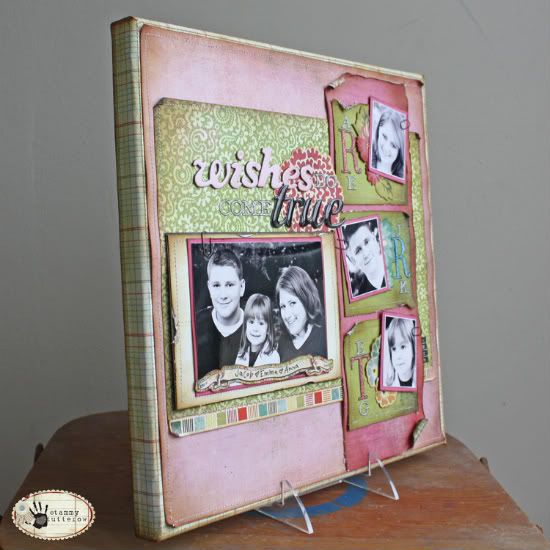
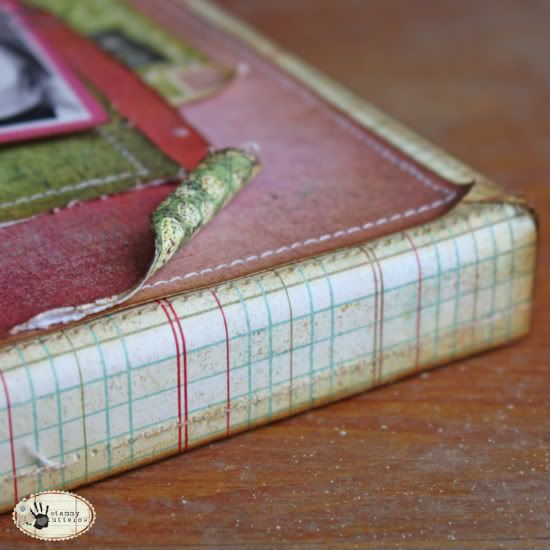
Here are a few more pictures of the details:
• • • • • • • • • • • • • • • • • • • • • • • • • • • • • • • • • • • • • • • • • • • • •
••••••••••••••••••••••••

Products - Cardstock: Bazzill (kraft); Patterned paper: Fancy Pants, My Mind's Eye, Adornit, American Crafts; Punch: EK Success; Oval Cutter: Coluzzle/Provo Craft; Chipboard letters: The Girls' Paperie, American Crafts; Paint: Claudine Hellmuth/Ranger; Grid stamp: Unity Stamps; Ink: Stampin' Up!; Stickers: My Mind's Eye; Die cuts: My Mind's Eye; Flowers: Jillibean Soup; Floss: DMC; Pen: American Crafts; Other: Brads, buttons
1. I wanted to use this sketch to make a page about our trip to Minnehaha Falls last year, but I had a lot of photos, so I decided to stretch it out over two pages. I essentially did the same thing on both pages, just in reverse and following the orientation of my photos.
2. I chose subdued, outdoorsy colors for the page and products that reflected the outdoors without being too showy.
3. I painted the raw chipboard letters yellow, then stamped on them with a grid stamp to rough them up a little.
• • • • • • • • • • • • • • • • • • • • • • • • • • • • • • • • • • • • • • • • • • • • •
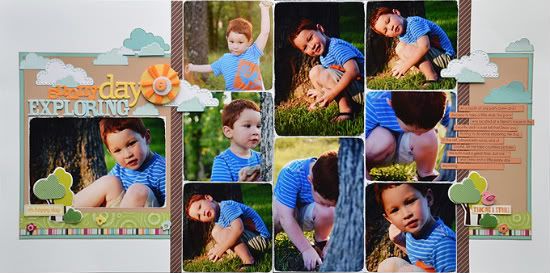
"Sunny Day Exploring" by Allison Davis
Supplies - Cardstock: Bazzill (white) and Core'dinations (green circles); Patterned paper: American Crafts; Embellishments: American Crafts (trees, flowers, bird, stickers, felt sun); Alphabets: Prima (sunny) and American Crafts (day, exploring); Border punch: Fiskars; Embroidery floss: DMC
I loved the overall design of the one-page sketch and thought it would be an easy one to stretch to a two-page layout.
Variation #1 - Stretching the sketch is the perfect way to explain how I adapted the one-page sketch into a two-page layout. I kept the elements the same and stretched the whole design to fit over two pages.
Variation #2 - When I use a one-page sketch for a two-page layout I almost always keep the title in the original place it is on the sketch and then move my journaling to the opposite page. In the case of this sketch I moved it to the opposite page for more room since I had a story that wasn't going to fit in the space provided on the sketch.
Variation #3 - I added an extra piece behind the background rectangle. I wanted to add a little more color around the solid brown piece.
Variation #4 - I loved this layout by creative team member, Noey Hunt and the cute clouds she had going across the page. I mentally tucked it away in my "must do" file. This layout was the perfect opportunity.
I followed the sketch with the sun and cloud embellishments but instead of just having the clouds near the title I also stretched them across the whole layout. I added stitching to a few of the clouds and used foam adhesive behind a some of them so they would pop up off the page.
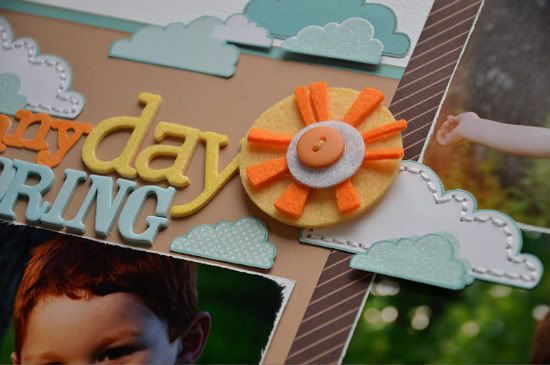
Variation #5 - Since I had the clouds going across the top I thought I would continue the landscape look on the bottom too. I added a green scallop strip to represent grass along the bottom.
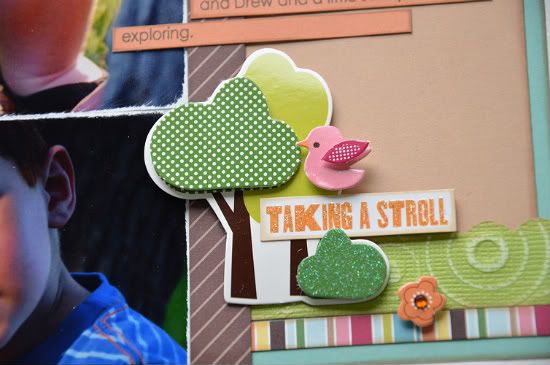
To complete the look I added trees, flowers, stickers, and a bird.
• • • • • • • • • • • • • • • • • • • • • • • • • • • • • • • • • • • • • • • • • • • • •
Sketches for Scrapbooking Giveaway Winner
The winner of the giveaway for our followers is...
melinap
You can email me at allison@scrapbookgeneration with your shipping information and to let me know which volume of Sketches for Scrapbooking you would like.
You can email me at allison@scrapbookgeneration with your shipping information and to let me know which volume of Sketches for Scrapbooking you would like.
10 comments:
GREAT TAKES! I love how many pictures you can get on this one sketch with a two page and that canvas is TO DIE FOR! Great job ladies!
These are wonderful pages - all a little different, but all gorgeous! I really love Tammy's canvas - gorgeous!
Fantastic project & layouts!! Love them!!!
Love how you stretched the sketch ladies...the canvas and taking it into double LOs! gReat work!
Love them all! Allison I love the cheerfulness of your LO and it makes me long for Spring to reappear!
Wow...the canvas is just STUNNING...seriously STUNNING! Wowza....Love the other layouts too! Such a talented DT Sketch Support has! Thank you for all the inspiration!
Yes, interesting how people are always asking how to convert a 2page into a 1 page, and here you go and do the reverse. AWESOME!
great job again for today's projects. love the canvas. the layouts are fun and colorful and loved them. congrats on the winner.
Love Love Love the Canvas Project..all the detail is amazing. It was also great to see how to stretch the Lo into 2 pages.
Awesome details ladies!! Ali I love how you rounded the photo corners!
Post a Comment