
Today, it's our April Guest Designer, Jennifer DeWolfe's turn to share what she has created based on the card sketch. Both of the creations below are fabulous and I bet one of them will surprise you! And it proves that sketches can be used as inspiration for all kinds of crafty projects.
Card Sketch #5

You can download and print this sketch by clicking on the card sketches link found under the "printable sketches" tab on the right sidebar.
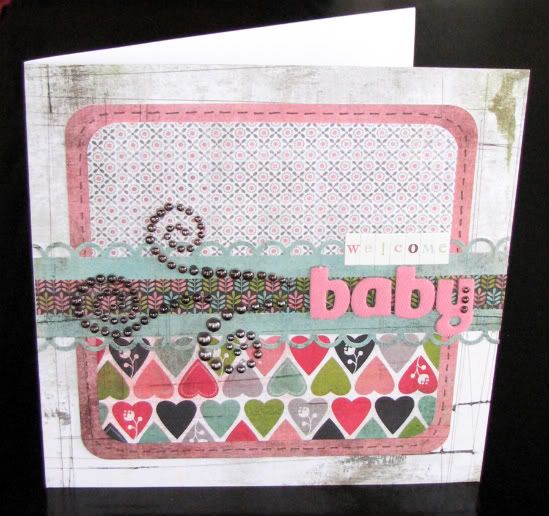
"Welcome Baby" card by Jennifer DeWolfe
Supplies Used - Cardstock: Bazzils (white); Patterned Papers: Basic Grey (Olivia 6x6 pad); Alphabets: American Crafts Thickers (Pink) and Making Memories Tiny Alphas; Marker: Zig and Copic; Punches: EK Success (Scallop) and Creative Memories (Corner Rounder); Embellishments: Basic Grey Pearls (Pink)
I stuck pretty close to the sketch for this one because I love how perfect it was for pretty much any occasion.
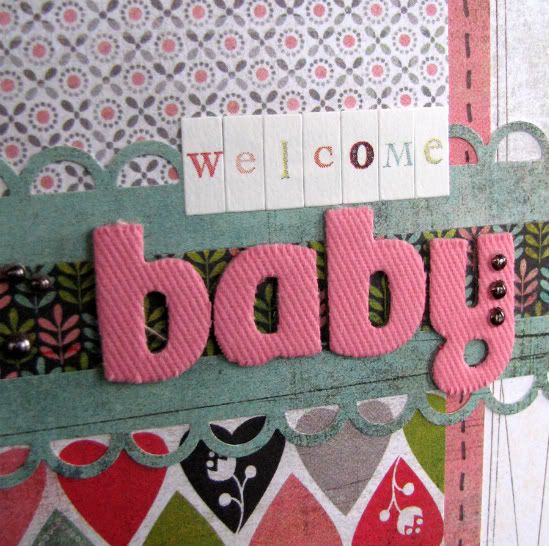
A friend of mine recently had a baby so I needed to make a card for the gift and this sketch was perfect. Because I was in a hurry to make this card I skipped the stitching and instead used a pen and drew my stitches instead. I also used some of BasicGrey’s swirls that were originally pink and colored them grey with a Copic pen to better match my card.

• • • • • • • • • • • • • • • • • • • • • • • • • • • • • • • • • • • • • • • • • • • • •
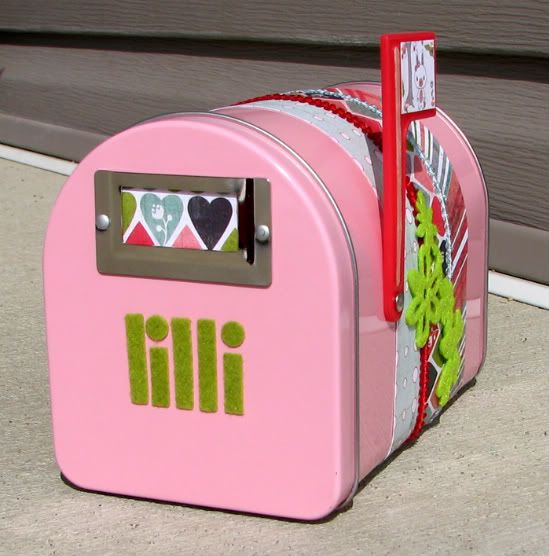
"Lilli’s Mailbox" by Jennifer DeWolfe
Supplies Used – Mailbox: Purchased at Walmart; Patterned Papers: Basic Grey (Olivia 6x6 pad); Alphabets: American Crafts Felt Stickers (Green) Embellishments: Pink Paislee Felt Flowers (Green), Ranger Ink Liquid Pearls (Pink), Ribbons from my stash.
I bought this cute little mailbox for a friend’s daughter and thought it needed some prettying up. This sketch was easily adaptable for that purpose.
Because the mailbox was small I had to make some modifications to the sketch in order for it to fit. I reduced the top and bottom rectangles from 2 ¼ to 1 inch and stretched them to 6 inches long to go all the way around the mailbox. The middle strip I also modified from ½ inch to 1 inch and stretched it to 6 inches long. I adhered all three strips together on the mailbox and then replaced the scalloped strips with some ribbon strips as they we smaller but still gave the same affect.
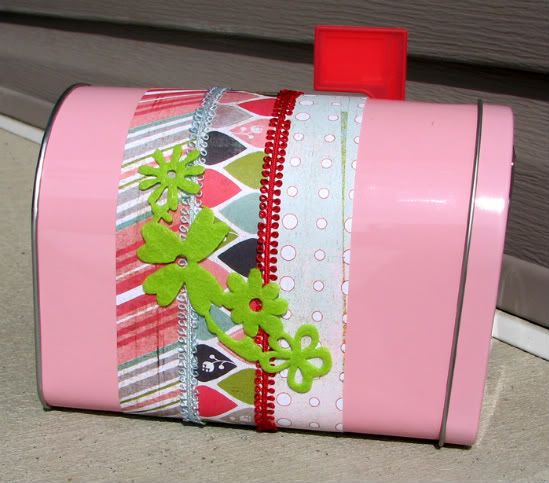
Now because I had both sides of the mailbox to consider, I decided to replace the swirls on the sketch with felt flowers on both sides of the mailbox. I then decorated the flag with a piece of patterned paper and liquid pearls.
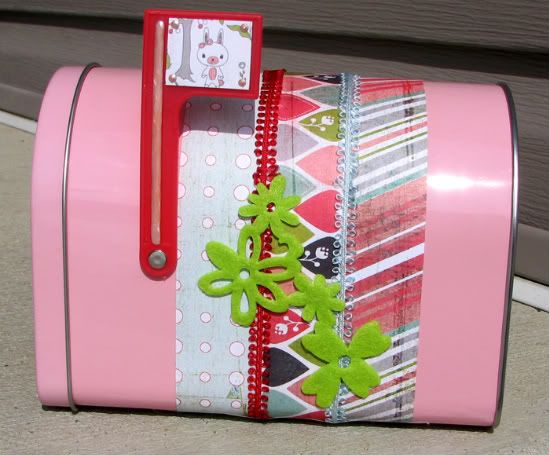
I move the message from the patterned paper and placed it on the front of the mailbox in the form of Lilli’s name. The mailbox is perfect for Lilli to hide all her little trinkets from her brothers!
•••••••••••••••••••••••••••••••••••
3 comments:
Very unique! How inspiring!
The card is beautiful and how cute is that mailbox! Thanks for sharing!
Adorable projects! I especially love that mailbox. A very unique way to interpret the sketch!
Post a Comment