••••••••••••••••
Card Sketch #14
You can download and print this sketch by clicking on the card sketches link found under the "printable sketches" tab on the right sidebar.
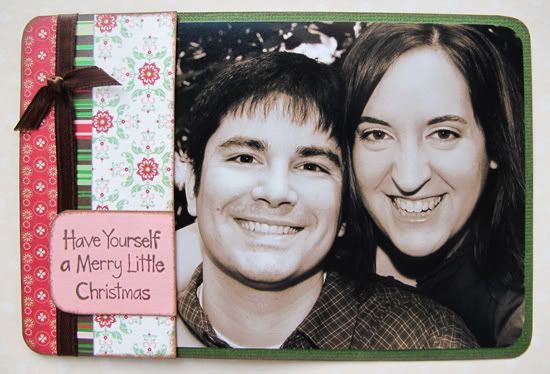
"Have Yourself a Merry Little Christmas" by Melissa Bell
Supplies - Cardstock: DCWV; Patterned paper: SEI; Ribbon: Offray; Rub-ons: Provo Craft; Stamps: Studio G; Corner Rounder: We R Memory Keepers; Ink: Colorbox Fluid Chalk Ink and Staz On
I love this card sketch and it really did inspire me, but what I ended up creating doesn't really look much like it this time around. For the last couple of weeks I have been looking at Christmas photocards at various sites online trying to decide which one to choose. I guess you could say photocards have been on my mind and I thought why not try creating my own.
Variation #1 - Instead of making a folding card I made mine a flat 6x4 card.
Variation #2 - Since I made my card horizontal I just stretched out the white space and had that be my photo.
Variaton #3 - Instead of using a tree embellishment I decided to keep it simple by just using strips of patterned paper and ribbon.
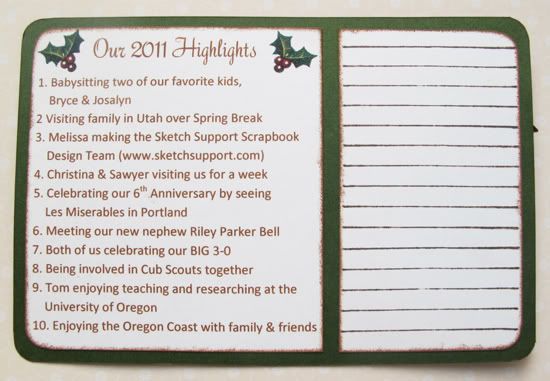
For the back of the card I decided to go with a top ten list for 2011 and then create a place to write a personal note.
Now who is willing to create 39 more of these for me?
• • • • • • • • • • • • • • • • • • • • • • • • • • • • • •
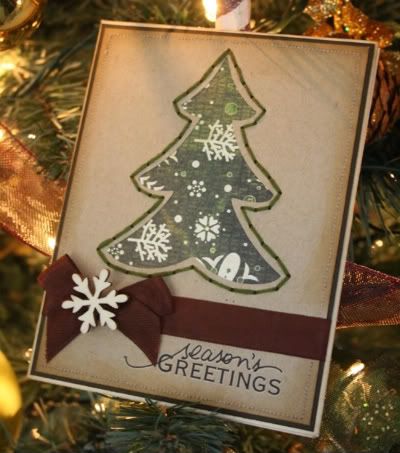
"Season's Greetings" by Carolyn Wolff
Supply List - Cardstock: Bazzill; Patterned Paper: Basic Grey; Rub-On: Little Yellow Bicycle; Ribbon: May Arts; Ink: Ranger Distress Ink; Floss: DMC; Die-Cut: SVG File From The Cutting Café; Snowflake: Maya Road
Variation #1 – I die-cut the tree shape in to the kraft cardstock and placed patterned paper behind instead of creating a tree and placing it on the card front.
Variation #2 – Instead of adding the stitching to the tree, I stitched around the outside of the die-cut using embroidery floss.
Variation #3 – I eliminated the star and the trunk of the tree. I added ribbon and the snowflake.
Variation #4 – I used a rub-on for my sentiment and placed it in the lower right corner rather than overlapping my tree.
• • • • • • • • • • • • • • • • • • • • • • • • • • • • • •
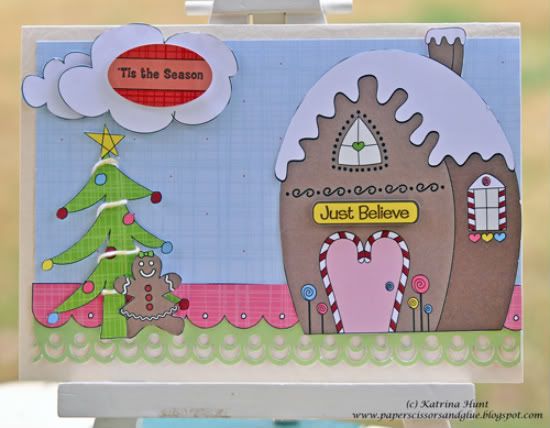
"Tis The Season" by Katrina Hunt
Supplies - Patterned Paper: Nikki Sivils, Scrapbooker (Gingerbread Land Collection); Cardstock: American Crafts; Die Cut Embellishments: Nikki Sivils, Scrapbooker (Gingerbread Land Collection); Adhesives: Glue Arts, Fabri Tac and Scrapbook Adhesives; Twine: The Twinery (Baker’s twine in Buttercup)
Variation 1 - Flipped card to open from bottom
Variation 2 - Tree flipped and made smaller
Variation 3 - Added additional elements, which caused me to move the message to above the tree instead of below.
Variation 4 - Instead of a die cut bracket shape layer, I just layered border strips for something different.
• • • • • • • • • • • • • • • • • • • • • • • • • • • • • •
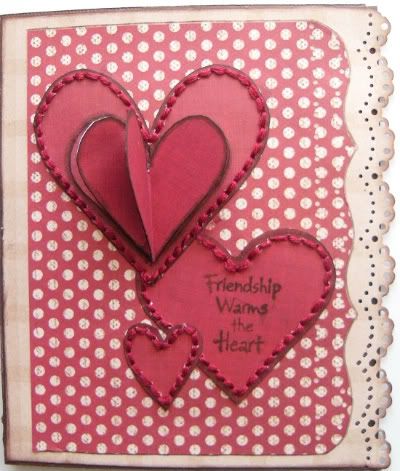
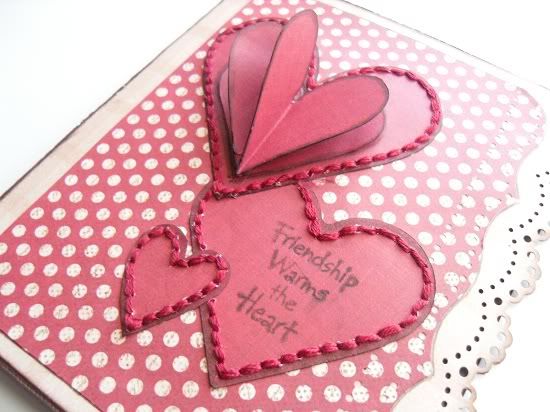
"Friendship Warms the Heart" by Amy Roller
Supplies - Patterned paper: Die Cuts With a View, Lasting Impressions; Thread: DMC; Stamps: Hero Arts; Ink: Colorbox;
Variation# 1: I added a border punch along the edge of my cardstock.
Variation # 2: I decided I wanted to use another shape other than the tree for this one. I went with a cluster of hand cut hearts instead. The largest heart has 4 smaller, identical hearts folded and glued together accordion style and then both ends were glued to the large heart to make a 3-D shape and add some extra depth.
Variation # 3: Obviously because of changing the shape, my stitching was placed differently than on the sketch. I went around each heart instead of across them. Then I stamped my sentiment directly on one of them.
•••••••••••••••••


3 comments:
Ladies these are all fantastic!! Never ceases to amaze me how different the end result is with the same initial starting point!
love all the different takes on the sketch today...great job ladies! :)
Melissa - a Christmas postcard is an awesome idea. It is such a personal creation to send to someone. I love the idea.
Katrina - Love your card and how it creates a little scene. Such a cute line of paper too.
Amy - Very nice and I love the 3D heart.....oh and the stitching too :)
Post a Comment