Showing posts with label Amy Roller. Show all posts

Thursday, December 8, 2011

Card Week, Part 4

••••••••••••••••
Card Sketch #14


You can download and print this sketch by clicking on the card sketches link found under the "printable sketches" tab on the right sidebar.


"Have Yourself a Merry Little Christmas" by Melissa Bell
Supplies - Cardstock: DCWV; Patterned paper: SEI; Ribbon: Offray; Rub-ons: Provo Craft; Stamps: Studio G; Corner Rounder: We R Memory Keepers; Ink: Colorbox Fluid Chalk Ink and Staz On

I love this card sketch and it really did inspire me, but what I ended up creating doesn't really look much like it this time around. For the last couple of weeks I have been looking at Christmas photocards at various sites online trying to decide which one to choose. I guess you could say photocards have been on my mind and I thought why not try creating my own.

Variation #1 - Instead of making a folding card I made mine a flat 6x4 card.

Variation #2 - Since I made my card horizontal I just stretched out the white space and had that be my photo.

Variaton #3 - Instead of using a tree embellishment I decided to keep it simple by just using strips of patterned paper and ribbon.

For the back of the card I decided to go with a top ten list for 2011 and then create a place to write a personal note.


Now who is willing to create 39 more of these for me?

  • • • • • • • • • • • • • • • • • • • • • • • • • • • • • •


"Season's Greetings" by Carolyn Wolff
Supply List - Cardstock: Bazzill; Patterned Paper: Basic Grey; Rub-On: Little Yellow Bicycle; Ribbon: May Arts; Ink: Ranger Distress Ink; Floss: DMC; Die-Cut: SVG File From The Cutting Café; Snowflake: Maya Road

Variation #1 – I die-cut the tree shape in to the kraft cardstock and placed patterned paper behind instead of creating a tree and placing it on the card front.

Variation #2 – Instead of adding the stitching to the tree, I stitched around the outside of the die-cut using embroidery floss.

Variation #3 – I eliminated the star and the trunk of the tree. I added ribbon and the snowflake.

Variation #4 – I used a rub-on for my sentiment and placed it in the lower right corner rather than overlapping my tree.

  • • • • • • • • • • • • • • • • • • • • • • • • • • • • • •


"Tis The Season" by Katrina Hunt
Supplies - Patterned Paper: Nikki Sivils, Scrapbooker (Gingerbread Land Collection); Cardstock: American Crafts; Die Cut Embellishments: Nikki Sivils, Scrapbooker (Gingerbread Land Collection); Adhesives: Glue Arts, Fabri Tac and Scrapbook Adhesives; Twine: The Twinery (Baker’s twine in Buttercup)

Variation 1 - Flipped card to open from bottom

Variation 2 - Tree flipped and made smaller

Variation 3 - Added additional elements, which caused me to move the message to above the tree instead of below.

Variation 4 - Instead of a die cut bracket shape layer, I just layered border strips for something different.

  • • • • • • • • • • • • • • • • • • • • • • • • • • • • • •


"Friendship Warms the Heart" by Amy Roller
Supplies - Patterned paper: Die Cuts With a View, Lasting Impressions; Thread: DMC; Stamps: Hero Arts; Ink: Colorbox;

Variation# 1: I added a border punch along the edge of my cardstock.

Variation # 2: I decided I wanted to use another shape other than the tree for this one. I went with a cluster of hand cut hearts instead. The largest heart has 4 smaller, identical hearts folded and glued together accordion style and then both ends were glued to the large heart to make a 3-D shape and add some extra depth.


Variation # 3: Obviously because of changing the shape, my stitching was placed differently than on the sketch. I went around each heart instead of across them. Then I stamped my sentiment directly on one of them.
•••••••••••••••••

Monday, December 5, 2011

Card Week, Part 1

••••••••••••••••
Card Sketch #14


You can download and print this sketch by clicking on the card sketches link found under the "printable sketches" tab on the right sidebar.


"Merry Christmas" by Melissa Elsner
Supply list - Cardstock: Bazzill Basics Paper; Patterned Paper, Rub-Ons: Lily Bee Design; Pen: Zig Memory System; Electronic Cutter: Silhouette SD; Star Brad: Unknown

Variation #1: For this sketch I decided to use my Silhouette to cut the triangle and shaped background. The triangle is at a slightly different measurement from the sketch but still works.

Variation #2: For my tree, I decided to keep the triangle base and then added strips of patterned paper. Each strip is about 1/4" in width or a little larger. I have to admit, I didn't really measure them but I liked the look of the different strips.

Variation #3: The rub-ons were perfect for the sentiment, which I placed in the same place as the sketch.

  • • • • • • • • • • • • • • • • • • • • • • • • • • • • • •


"Have a Holly Jolly Christmas" by Christine Chain
Suppliespatterned paper: Basic Grey (Jovial); rub-on: Basic Grey (Jovial); ribbon: My Mind’s Eye (Lush); brad: My Mind’s Eye (Lush); ink: Tsukineko; word stickers: Authentique; glitter glue: Stickles; punch: EK Success

1 - Instead of stitching, I used lines of glitter glue.

2 - I used a square bling brad turned on its side instead of a star, to add a bit of dimension.

3 - To make my sentiment stand out a bit more, I used a rub-on to create a bit of a journaling block and then added word stickers.

  • • • • • • • • • • • • • • • • • • • • • • • • • • • • • •


"No Greater Gift.." by Amy Roller
Supplies - Patterned paper: Die Cuts With a View; Cardstock: Bazzill; Stamps: Close To My Heart; Thread: DMC; Ribbon: Michaels; Border punch: Martha Stewart

Variation# 1: I made my card larger to add another pattern to the background.

Variation# 2: I left off the curved edge on the first background because I added a border punch along the edge of the second patterned background.

Variation #3: I stitched a cream garland around the tree instead of the angled lines shown on the sketch.
•••••••••••••••••••

Thursday, November 17, 2011

Add-on Week, Part 4

•••••••••••••••••••
Add-on Sketch #11
You can download and print this sketch by clicking on the add-on sketches link found under the "printable sketches" tab on the right sidebar.


"Falling For You" by Amy Roller
Supplies - Patterned paper: My Minds Eye, Lasting Impressions, unknown-(reds-scraps ); Cardstock: Stampin up!

I decided to make a card for my husband with this add-on, sort of a Valentines card. I thought the leaf fit perfectly tying into the "Falling For You" title.

Variation #1: I took the strips straight across the leaf instead of angling down it. I did this because I had word strips I wanted to incorporate and they have to go horizontally.


  • • • • • • • • • • • • • • • • • • • • • • • • • • • • • •


"Turkey" by Melissa Bell
Supplies - Cardstock: Bazzill; Patterned paper: We R Memory Keepers; Chalk Ink: ColorBox; Tools: Cricut (Simply Charmed); Scoring Board: Martha Stewart; Pearls: Queen & Company

When I saw this sketch I tried to think of something fun I could do with the leaf motif. No inspiration was to be found. My mom suggested that it would make a cute turkey feather and that got me excited!

Variation #1 - I turned the sketch upside down and used it as a template for my turkey feathers.

Variation #2 - I originally planned covering the feathers in strips of patterned paper but decided that would take too long. I'm making this turkey for a place cards for Thanksgiving. I wanted to be able to mass produce it easily.
••••••••••••••

Wednesday, November 9, 2011

Two-page Week, Part 3

•••••••••••••••••••
Two-page Sketch #22


You can download and print this sketch by clicking on the two-page sketches link found under the "printable sketches" tab on the right sidebar.


"My do it Myself" by Lynette Jacobs
Supplies used - Cardstock: Bazzill; Printed papers: Crate Paper, Echo Park(Life is Good); Stickers: Echo Park; Buttons: Basic Grey; Flowers: Petaloo; Punch: Martha Stewart.

Variation #1: I punched the background block.

Variation #2: I used 4x6 photos.

Variation #3: I cut the pattern paper strips 9 inches long.

Variation #4: I added trim below the photos.

  • • • • • • • • • • • • • • • • • • • • • • • • • • • • • •


"Hoenderdaell" by Mireille Divjak
Supply list - Patterned Paper: Bo Bunny (Forever Fall Collection); Chipboard: Bo Bunny (Forever Fall Collection); Noteworthy: Bo Bunny (Forever Fall Collection); Jewels: Bo Bunny (Forever Fall Collection); cardstock stickers: Bo Bunny (Forever Fall Collection); Dimensional Stickers: Bo Bunny (Forever Fall Collection); Alpha's: Pink Paislee; Pens: American Crafts and Sakura; Ink: Colorbox; Sew Easy: We R Memory Keepers

Variation #1: Instead of four photos I used 10 different size photos. I tried to keep as close as possible to the square shape

Variation #2: I matted my photos.

Variation #3: Instead of the flower shaped embellishments on the left page I used dragonflies.

  • • • • • • • • • • • • • • • • • • • • • • • • • • • • • •


"No Matter Where Your Road Takes You..." by Amy Roller
Supplies - Cardstock: DCWV, Bazzill; Patterned paper: My Minds Eye; Chipboard embellishments: Basic Grey, My Mind's Eye, unknown; Thread, Letters: American Crafts, unknown, Prima;

Variation #1: I used the same space for pictures, but didn't use 4 x 4 pictures. I didn't want to crop the picture of the boys going down the road so I left it 4 x 6 and just fit the rest in the same size vertically but a few were different in width.

Variation #2: I ran the top title all the way across both pages and carried it down to the journaling box.


Variation #3: I didn't use exactly the same embellishments as the sketch, I just mixed it up and added most in the general area that they were on the sketch.

 •••••••••••

Friday, November 4, 2011

Card Week, Part 5

•••••••••••••••••
 Card Sketch #13


You can download and print this sketch by clicking on the card sketches link found under the "printable sketches" tab on the right sidebar.


"Ella Made Three" by Katrina Hunt
Supplies - Patterned Paper: Pink Paislee/Collage Press (Vintage Vogue Collection); Die Cut Embellishments: Pink Paislee/Collage Press (Vintage Vogue Collection); Stamps: Unity Stamp Co. (All Seasons Kit Of The Month Sept. 2011); Adhesives: Scotch ATG, Fabri Tac and Scrapbook Adhesives; Punch: EK Success; Foam Letters: American Crafts (Thickers); Twine: The Twinery Baker’s Twine; Wooden Spool Tops: Pink Paislee/Collage Press

Variation 1 - Layout instead of card.

Variation 2 - Flipped the sketch.

Variation 3 - Added lots of layers.

  • • • • • • • • • • • • • • • • • • • • • • • • • • • • • •


"Princess" by Lynette Jacobs
Supplies Used - Cardstock: WorldWin textured cardstock and Bazzill; Printed Papers: Melissa Francis; flower diecut and butterflies: K & Co; Flowers: Prima; Pearls: Upikit; Punch: Martha Stewart; Title: K&Company (My Creative Scrapbook Ltd Edition August kit)

Variation #1: I cut my strips 3/4 inch wide.

Variation #2: I punched some cardstock to form a frame around the photo.

Variation #3: I added the butterflies to the flowers and the corner of the photo.

  • • • • • • • • • • • • • • • • • • • • • • • • • • • • • •


"They Have a Wild & Crazy Fashion Sense" by Amy Roller
Supplies - Cardstock: Bazzill; Patterned Paper and stickers: Scrap Within Reach; Ink: Colorbox; Ribbon: unknown; Letters: (Green) American Crafts, (Blue) Cosmo Cricket, (Multicolored) unknown

Variation#1: Obviously, the main variation is that I made a layout from the card sketch. I followed it closely and just made everything larger scale.

Variation#2: I had to move the title/sentiment up to the top because I used the rectangle area for the pictures.


Variation#3: I added a few extra embellishments by the title and bottom right corner.
••••••••••••••••••••••

Thursday, November 3, 2011

Card Week, Part 4

•••••••••••••••••
 Card Sketch #13


You can download and print this sketch by clicking on the card sketches link found under the "printable sketches" tab on the right sidebar.


"Thank You" card by Allison Davis
Supplies - Cardstock: Bazzill; Patterned paper: American Crafts; Chipboard flowers: American Crafts; Alphabet stickers: Doodlebug; Corner rounder: Fiskars

Variation #1 - I flipped the overall design of the sketch (the background and the strips) but kept the embellishments and message in the same place as suggested on the sketch.

  • • • • • • • • • • • • • • • • • • • • • • • • • • • • • •


"Falling For You" card by Christina Hoffman
Supplies - Cardstock: Bazzill; Patterned Paper, Alphabets, Tree, Hearts, Arrow and Journaling Tag: Nikki Sivils, Scrapbooker; Embroidery Thread: DMC

Variation #1: I flipped the sketch.

Variation #2: I added a curvy strip underneath the journaling block.

  • • • • • • • • • • • • • • • • • • • • • • • • • • • • • •


"Love You" card by Katrina Hunt
Supplies - Patterned Paper: Pink Paislee/Collage Press (Vintage Vogue Collection); Die Cut Embellishments: Pink Paislee/Collage Press (Vintage Vogue Collection); Stamps: Unity Stamp Co. (Moments in Bloom Kit); Adhesives: Scotch ATG, Fabri Tac and Scrapbook Adhesives; Foam Letters: American Crafts (Thickers); Twine: Stampin’ Up Twine; Wooden Spool Tops: Pink Paislee/Collage Press

Variation 1 - Made layers instead of the strips

Variation 2 - Added the twine/spool top embellishment over to the side.

  • • • • • • • • • • • • • • • • • • • • • • • • • • • • • •


"Wish" by Amy Roller
Supplies - Cardstock: Stampin up!; Patterned paper: Stampin UP!; Ink: Colorbox; Marker: Stampin up!; Stamps: Stampin up!; Chipboard: Fancy Pants; Rhinestones: Close To My Heart

For this project, I had a chipboard frame I wanted to use so there are several variations on this one.

Variation#1: Instead of making a card, I adapted the sketch to use a chipboard frame I had that says, "wish". I covered it with pattern paper, front and back.

Variation #2: Because of the opening in the frame, I used that area as the rectangle part of the sketch. I hand cut some flowers from the papers and popped them up in the corner of the opening and then added some rhinestones as well.


Variation #3: I used a small hand cut shape in the bottom left corner of the frame opening to place a stamped sentiment, second to the "wish" on the bottom.


Variation #4: I moved the banner strips from along the right vertical side of the sketch to the top left corner on the inside of the frame. I didn't want to omit them, but didn't have anything solid to adhere them to when I changed from the card sketch to the frame.

The last thing I added was a piece of cardstock to the back of the frame to form the stand.

 •••••••••••••••••

Friday, October 28, 2011

One-page Week, Part 5 - Simple Stories Product Challenge

It's time for the Simple Stories product challenge! We're sharing another round of projects from the challenge today.

If you missed the product challenge for Card Week, Two-page Week, or Add-on Week, Simple Stories has provided a kit of the same materials for each member of the Sketch Support Creative Team. Together with the October sketches we have been showing you how using the same products and even the same sketches can produce so many different results.

Since it is One-page Week all of the projects (and we've got a lot of them!) we are posting today are based on One-page Sketch #14.
One-page Sketch #14


You can download and print this sketch by clicking on the one-page sketches link found under the "printable sketches" tab on the right sidebar.


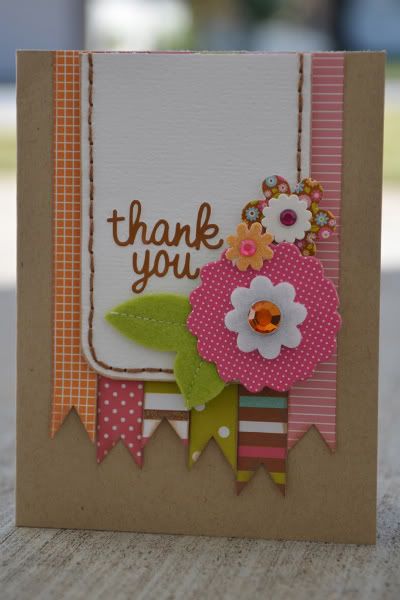
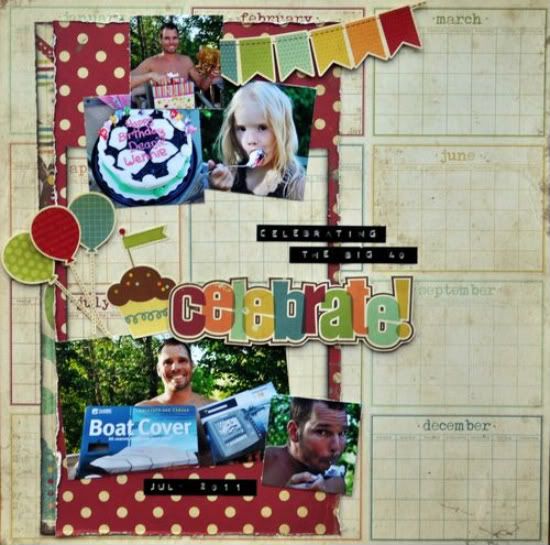
"Celebrate" by Jill Sarginson
Supplies Used - Patterned Paper: Simple Stories; Ink: Vibrance; Stickers: Simple Stories; Adhesive: Pop dots; Miscellaneous: Dymo Gun

As per usual, I stuck closely to the sketch here, I think I even kept my photos the same size! This page was very easy to create because Simple Stories kits are jammed packed with stickers and all sorts of fun designs you can cut out and adhere to your page!

• • • • • • • • • • • • • • • • • • • • • • • • • • • • • •


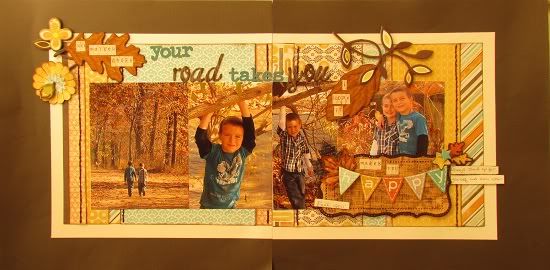
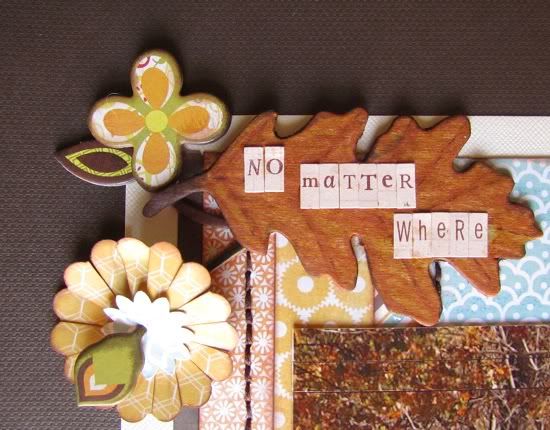
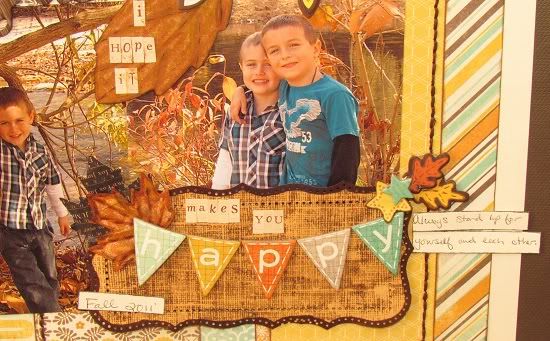
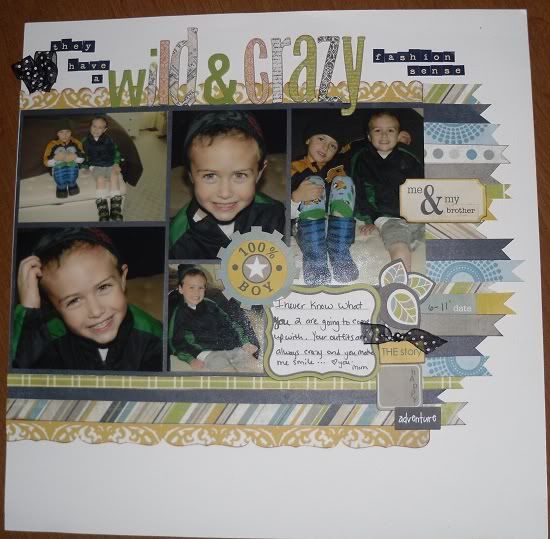
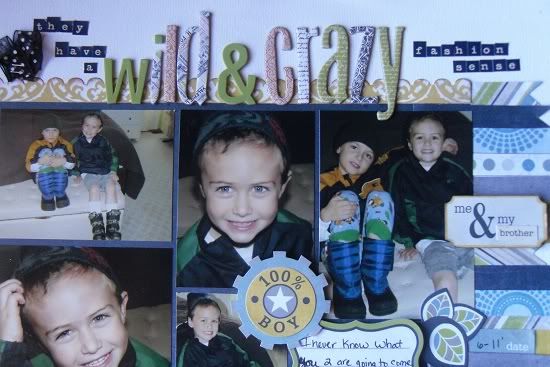
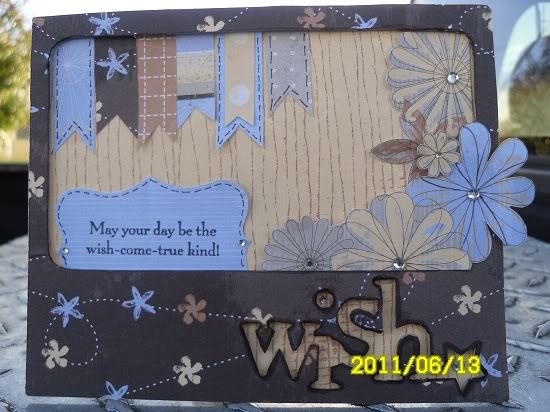
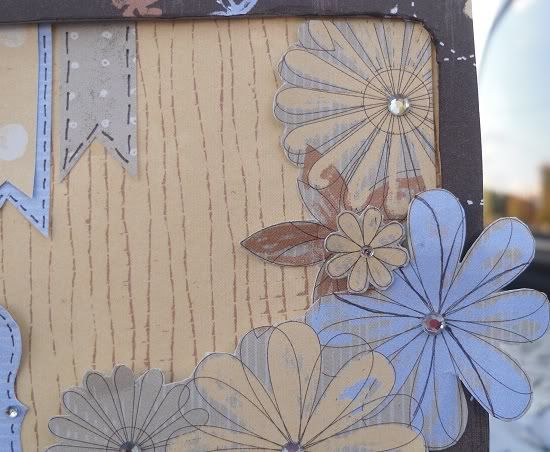
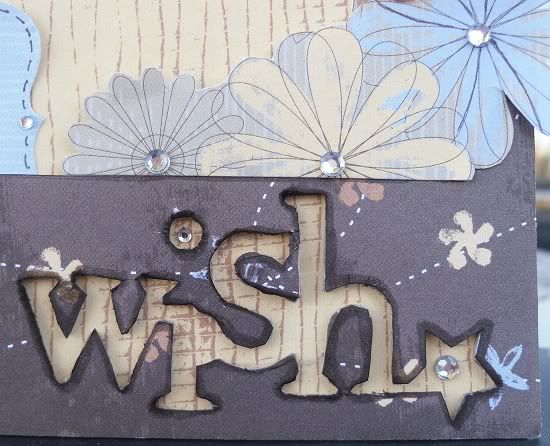
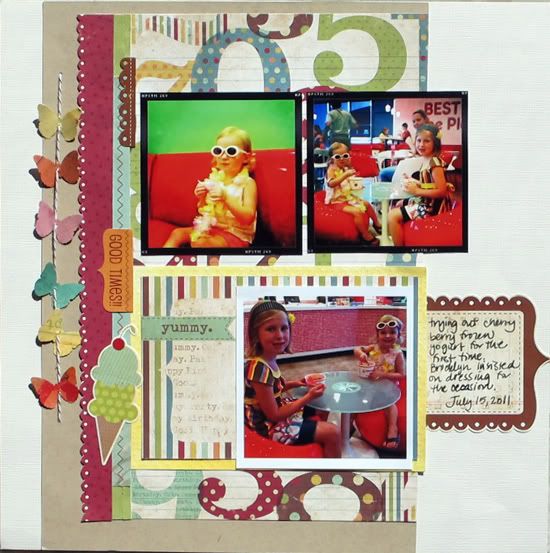
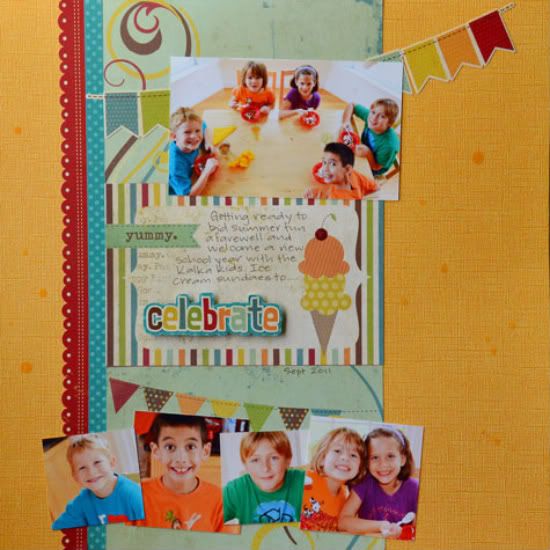
"Yummy" by Christy Arthur
Products - Cardstock: Bazzill; Patterned Paper: Simple Stories (Happy Day Make A Wish, It's Your Day; 100 Days of Summer Flash Cards); Mist: Studio Calico (Mister Huey Lemonade, Piglet, Orchard and Bluegrass); Stickers: Simple Stories (Happy Day Fundamental Cardstock); Punch: Martha Stewart (Classic Butterfly); Floss: Brown Twine

Variation #1: Instead of the flag banner at the top, I moved the banner to the left side and used butterflies.


Variation #2: I used less photos than are shown in the sketch. I simplified and used two smaller photos at the top, similar to the sketch, and one larger photo below.

Variation #3: I moved the larger photo up on my layout, even with the title.

Variation #4: I moved the journaling to the right side, instead of below the title.


Variation #5: I did not add stitching along the borders of my layout.

• • • • • • • • • • • • • • • • • • • • • • • • • • • • • •


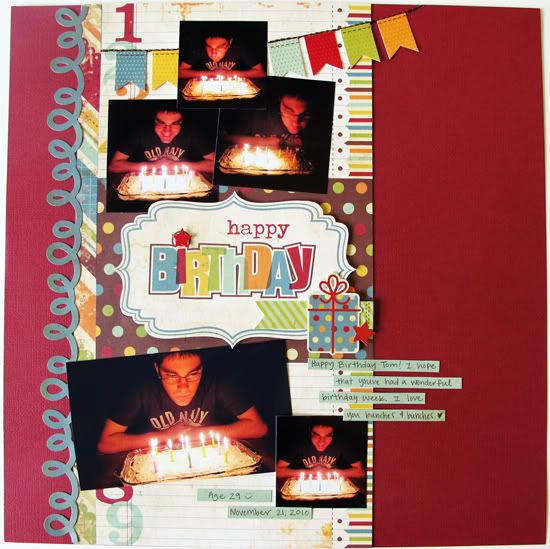
"Happy Birthday" by Melissa Bell
Supplies - Cardstock: American Crafts; Patterned paper: Simple Stories; Stickers: Simple Stories; Pop Dots: EK Success; Floss: DMC

Variation #1 - I used a cardstock border sticker instead of patterned paper for the far left vertical strip.

Variation #2 - I hand stitched across the top of the banner.

Variation #3 - I didn't stitch around the center 6x4 rectangle and embellished it differently.

• • • • • • • • • • • • • • • • • • • • • • • • • • • • • •


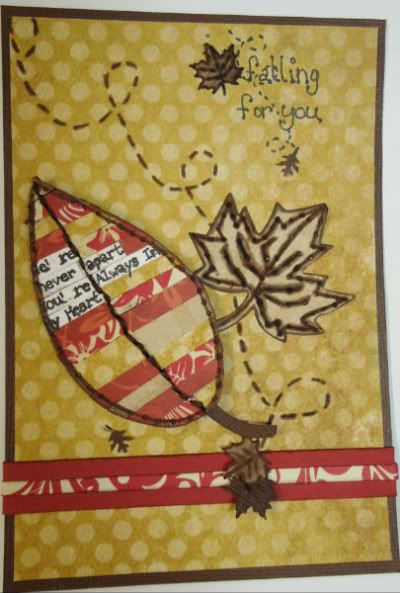
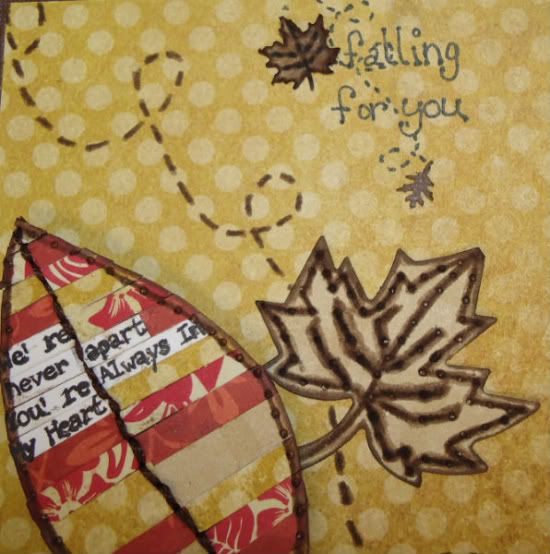
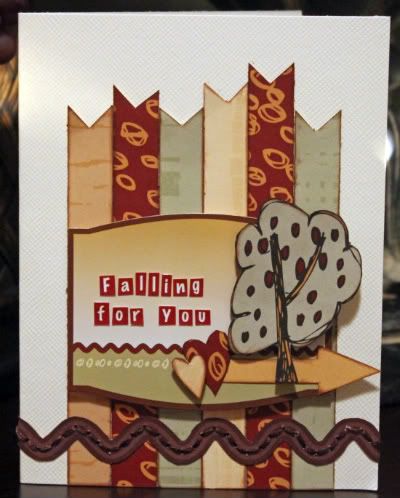
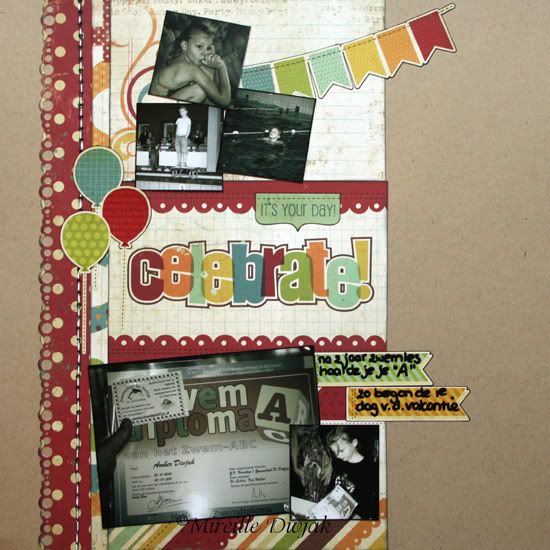
"Celebrate" by Mireille Divjak
Supply list - Cardstock: Canvas Corps (kraft); Patterned Paper: Simple Stories (Happy Day collection); Ink: Colorbox cat eyes (Black); Adhesives: Aleene's (tacky glue); Borderpunch: EK Success; Stickers: Simple Stories; Pens: American Crafts and Sakura

Variation #1: I used balloons instead of candle.

• • • • • • • • • • • • • • • • • • • • • • • • • • • • • •


"Celebrate" by Suzanna Lee
Supplies used - cardstock: Coredinations, Bo Bunny Press; patterned paper: Simple Stories; mist: Maya Road; stickers: Simple Stories

Variation 1: I flipped the picture placement with my larger picture up top and a row of smaller pictures at the bottom.

Variation 2: Title is still in the box per the sketch but my journaling is there as well. I omitted the journaling strips as a result.

• • • • • • • • • • • • • • • • • • • • • • • • • • • • • •


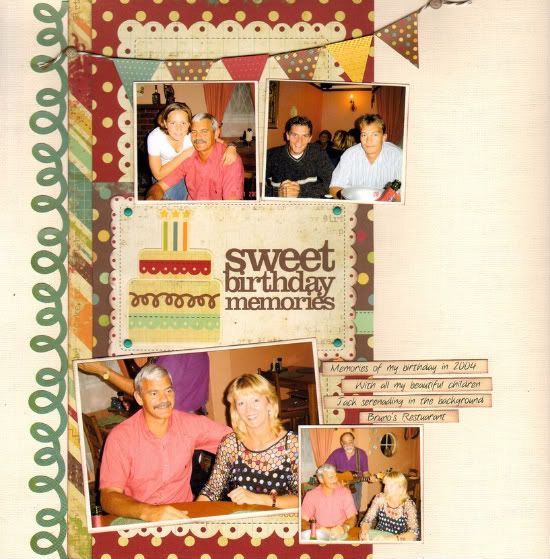
"Sweet Birthday Memories" by Lynette Jacobs
Supply List - cardstock: bazzill; patterned paper: Simple Stories; banner stickers: Simple stories; ink: Versa Magic; brads: Upikit, doodlebug.

Variation 1: I replaced the photos with different size photos.

Variation 2: I replaced the solid strip of paper with the doodle border.

Variation 3: I added the brads to the title block.

• • • • • • • • • • • • • • • • • • • • • • • • • • • • • •


"Happy Birthday" by Jennifer Larson
Supplies - cardstock: Stampin' Up!; patterned paper, stickers: Simple Stories; ink: Stampin' Up!; floss: DMC; other: buttons

1. I used the basic layout of the design, but the photos I had were mostly vertical in orientation. To avoid cutting anyone out of the photos, I didn't use any 2x2 photos and created another vertical print instead.

2. I deleted the actual stitching and chose a stiched sticker instead.

3. I added some embellishments - buttons and flourishes.

• • • • • • • • • • • • • • • • • • • • • • • • • • • • • •


"Making Grandma Laugh" by Noey Hunt
Products used - Patterned papers and stickers: Simple Stories; Letters: Authentique, Creative Memories, Making Memories; Cardstock: Bazzill

Variation #1: I left off the bottom right photo and replaced it with one of the calendar blocks from Simple Stories.

Variation #2: I wanted to anchor the left side of the banner so I added balloons and then repeated the balloons over the journaling block.

• • • • • • • • • • • • • • • • • • • • • • • • • • • • • •


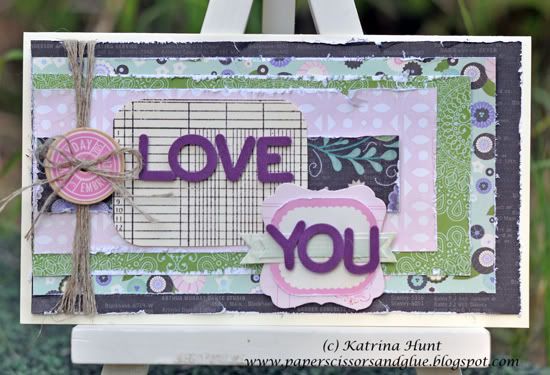
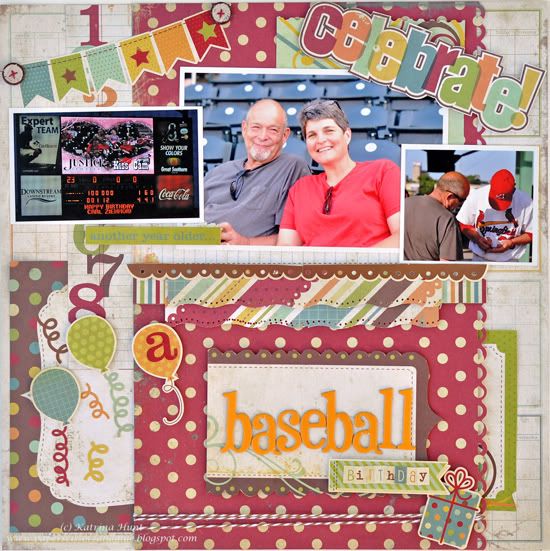
"A Baseball Birthday" by Katrina Hunt
Supplies - Patterned Paper: Simple Stories (Happy Day Collection); Adhesives: Scotch ATG, Fabri Tac and Scrapbook Adhesives; Buttons: Nikki Sivils, Scrapbooker; Twine: The Twinery Baker’s Twine; Punches: Ek Success, Fiskars; Stickers: Simple Stories (Happy Day Collection); Chipboard Letters: American Crafts Thickers

Variation 1 - Centered everything, instead of placing over to the left more.

Variation 2 - No picture at bottom and centered the three pictures on top.

Variation 3 - Added lots of layers where there were none before (under my centered pictures and at the sides).

Variation 4 - Title moved down.

• • • • • • • • • • • • • • • • • • • • • • • • • • • • • •


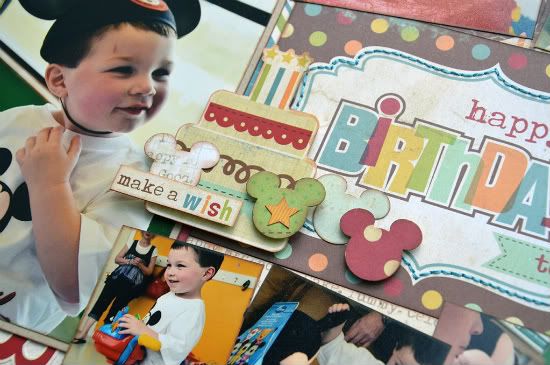
"Happy Birthday to You" by Allison Davis
Supplies - Cardstock: Bazzill; Patterned paper: Simple Stories; Stickers: Simple Stories; Mickey punch: EK Success

Variation #1 - I had so many pictures I wanted to include on this layout that I had no choice but to turn it into a two-page layout. I started by moving the design on the one-page sketch all the way to the right edge of the left page. For the rest of the layout I used my own design.

Variation #2 - I added a 4 x 6 photo to the left of the one-page sketch design.

Variation #3 - Instead of using the candles, as suggested on the sketch, I used a birthday cake and some Mickey ears to go with the theme of Jackson's birthday party.


Variation #4 - Because of my photo options and the design I wanted with the two-pages, I changed up the picture sizes a little. On the top I used a wallet size print, a 2 x 2, and a 2-1/2 x 2-1/2. On the bottom I used one 2 x 2 and then two 2-1/2 x 2-1/2.

• • • • • • • • • • • • • • • • • • • • • • • • • • • • • •


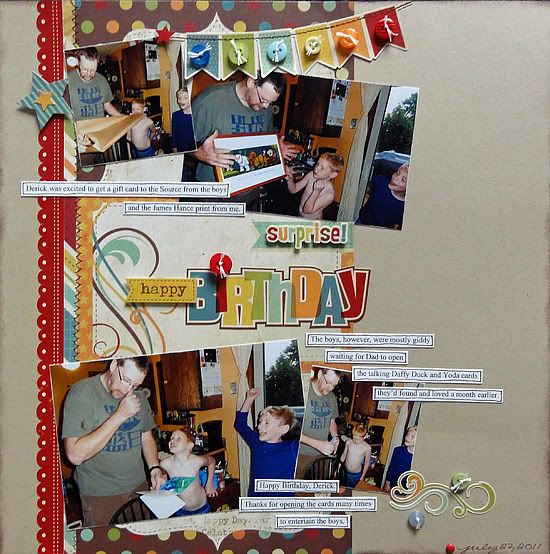
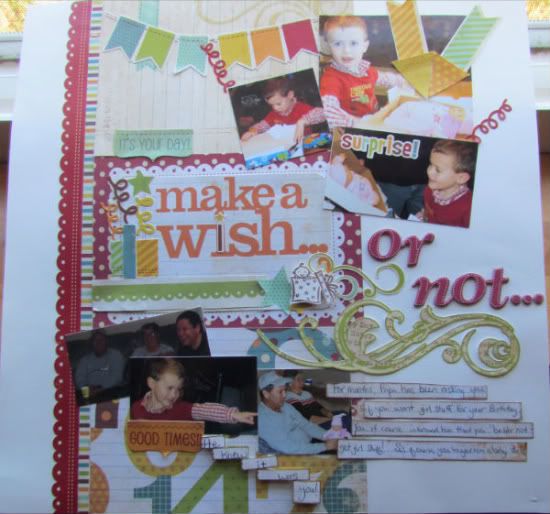
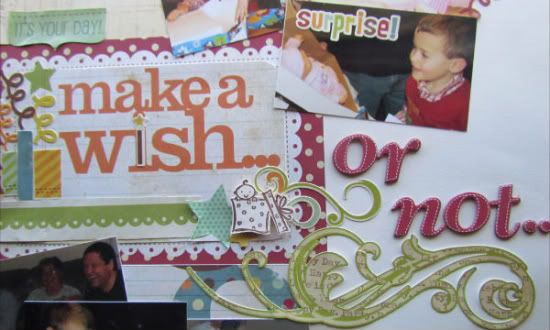
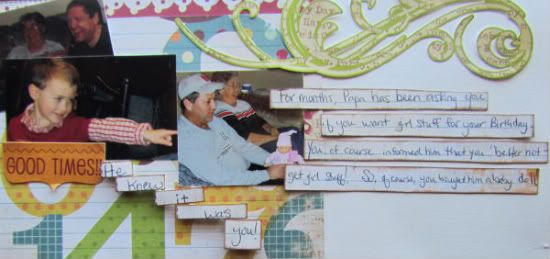
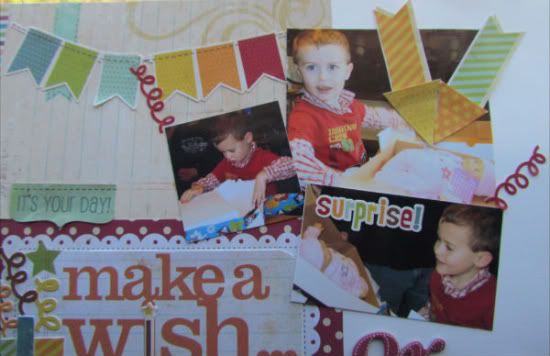
"Make a Wish...or Not..." by Amy Roller
Supplies - All products are Simple Stories unless listed below; Baby Stamp: Stampin UP!; Cardstock: Close to my Heart; Letters: American Crafts, Thickers

For this page, I used two of the 4 x 6 blocks from the Simple Stories line and put them down on my cardstock first. Then I cut a 4 x 6 block from pattern paper to make the bottom piece. I also cut out another block for the title "Make a Wish" which I layered over the middle tag.


I added some handcut birthday candles from the sticker sheet and added confetti streamers for my flames. I then added the green swirl and the rest of the title, "or not" along with a small stamped image.


Next I used the scalloped sticker strip and stripe that I had pieced together from another Tag sheet up the side of row of tags.

For the top tag, I added a banner sticker strip and moved my photos over to the right to be able to fit it all in. I had a larger photo I couldn't crop that small.


I also added some confetti around the photos and the word "surprise!" I made arrows to point to the focal point of the pictures, which was the baby doll. I did this by cutting a strip from a sticker and adding a triangle banner piece to the end of each strip.

Because I didn't have a large enough photo for the bottom tag, I used 3 smaller photos that played out the events of the day. The whole story behind the layout is added in the journaling strips beside and below the pictures.
•••••••••••••••••••