Showing posts with label Melissa Elsner. Show all posts

Thursday, December 22, 2011

Add-on Week, Part 4

•••••••••••••••••••••
Add-on Sketch #12

You can download and print this sketch by clicking on the add-on sketches link found under the "printable sketches" tab on the right sidebar.


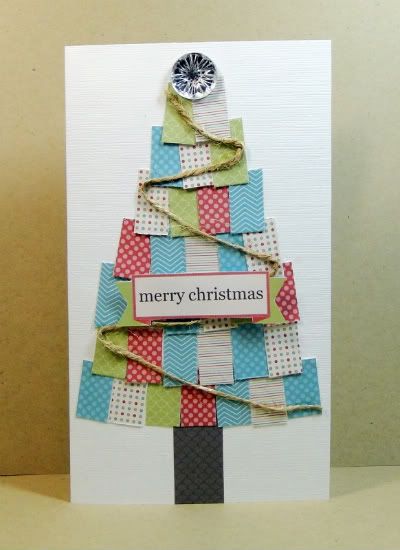
"Merry Christmas" by Melissa Elsner
Supplies - Cardstock: The Paper Company; Bling: Michaels; Jute: unknown; Digital Supplies (Paper, Sentiment Spot): Jen Martakis Designs (Holiday Story Collection)

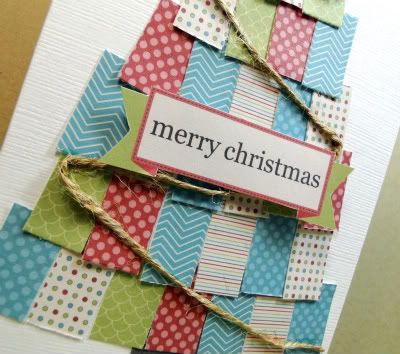
Variation #1: I was totally inspired by the bits of paper with this sketch and used all different kinds of patterned paper from the digital kit to construct it.

Variation #2: I threw out all measurements and just cut the papers to the size I wanted and then adhered to the cardstock.

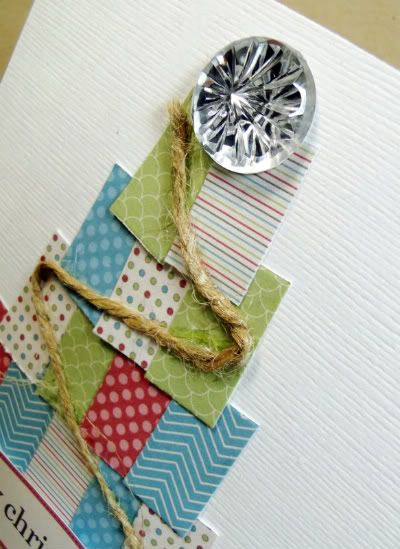
Variation #3: Instead of the star, I put on a big piece of bling.


Variation #4: For the "garland" I just used some jute since there was so much pattern and color with the paper pieces.


  • • • • • • • • • • • • • • • • • • • • • • • • • • • • • •


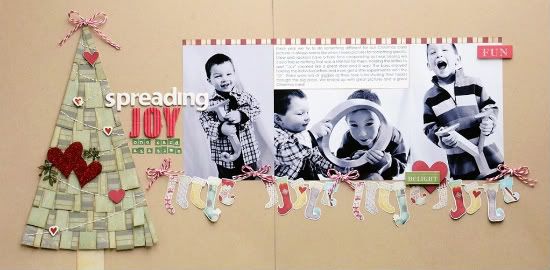
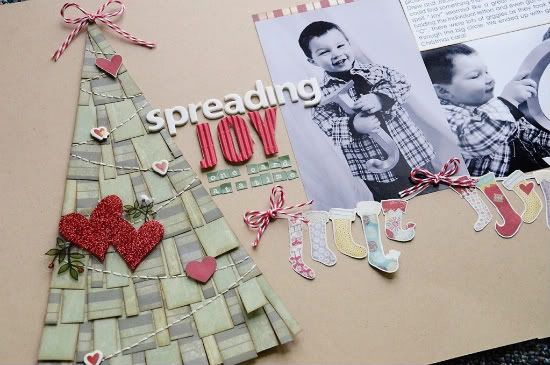
"Spreading Joy..." by Allison Davis
Supplies - Cardstock: Bazzill; Patterned paper: Fancy Pants; Chipboard and glitter hearts: Fancy Pants; Alphabet, chipboard: Basic Grey; Alphabet, corrugated: Jillibean Soup; Alphabet, stickers: Cosmo Cricket; Word stickers: Little Yellow Bicycle; Baker's twine: The Twinery

Variation #1 - I wanted the tree to take up a lot of space on the left page so I enlarged the add-on sketch to 6 x 10".

Variation #2 - I ended up using only two different patterns for the strips on the tree. Since the two patterns are the same color I thought an easy way to add interest would be to use different sizes of strips. 


I used strips cut to 1/4", 1/2" and 3/4" to create the tree and alternated the patterns.

Variation #3 - I added hearts to the hand stitched garland and then the large glitter hearts to the center of the tree. I also added a baker's twine bow to the top of the tree.
•••••••••••••••••

Monday, December 5, 2011

Card Week, Part 1

••••••••••••••••
Card Sketch #14


You can download and print this sketch by clicking on the card sketches link found under the "printable sketches" tab on the right sidebar.


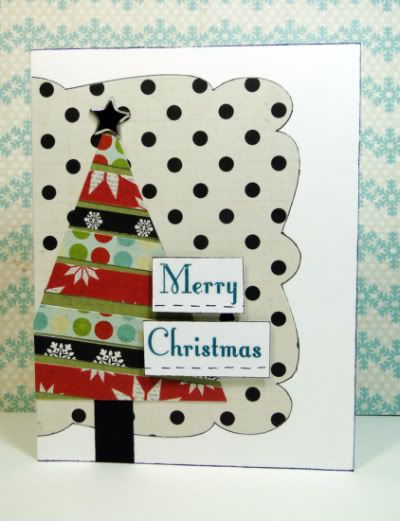
"Merry Christmas" by Melissa Elsner
Supply list - Cardstock: Bazzill Basics Paper; Patterned Paper, Rub-Ons: Lily Bee Design; Pen: Zig Memory System; Electronic Cutter: Silhouette SD; Star Brad: Unknown

Variation #1: For this sketch I decided to use my Silhouette to cut the triangle and shaped background. The triangle is at a slightly different measurement from the sketch but still works.

Variation #2: For my tree, I decided to keep the triangle base and then added strips of patterned paper. Each strip is about 1/4" in width or a little larger. I have to admit, I didn't really measure them but I liked the look of the different strips.

Variation #3: The rub-ons were perfect for the sentiment, which I placed in the same place as the sketch.

  • • • • • • • • • • • • • • • • • • • • • • • • • • • • • •


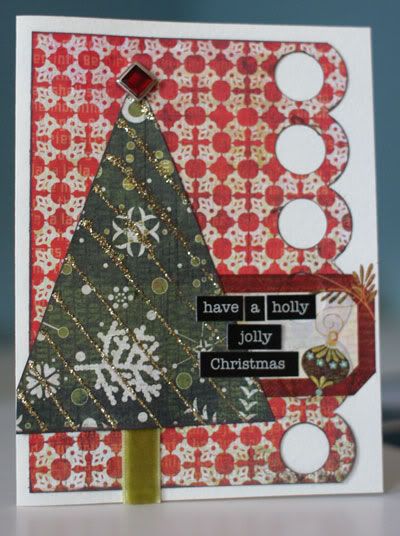
"Have a Holly Jolly Christmas" by Christine Chain
Suppliespatterned paper: Basic Grey (Jovial); rub-on: Basic Grey (Jovial); ribbon: My Mind’s Eye (Lush); brad: My Mind’s Eye (Lush); ink: Tsukineko; word stickers: Authentique; glitter glue: Stickles; punch: EK Success

1 - Instead of stitching, I used lines of glitter glue.

2 - I used a square bling brad turned on its side instead of a star, to add a bit of dimension.

3 - To make my sentiment stand out a bit more, I used a rub-on to create a bit of a journaling block and then added word stickers.

  • • • • • • • • • • • • • • • • • • • • • • • • • • • • • •


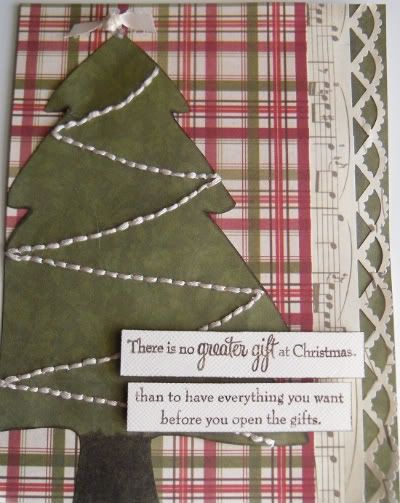
"No Greater Gift.." by Amy Roller
Supplies - Patterned paper: Die Cuts With a View; Cardstock: Bazzill; Stamps: Close To My Heart; Thread: DMC; Ribbon: Michaels; Border punch: Martha Stewart

Variation# 1: I made my card larger to add another pattern to the background.

Variation# 2: I left off the curved edge on the first background because I added a border punch along the edge of the second patterned background.

Variation #3: I stitched a cream garland around the tree instead of the angled lines shown on the sketch.
•••••••••••••••••••

Tuesday, November 22, 2011

One-page Week, Part 2

••••••••••••••
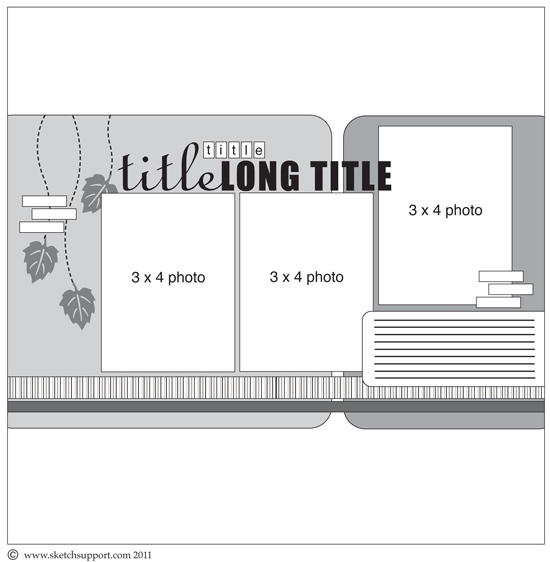
One-page Sketch #15


You can download and print this sketch by clicking on the one-page sketches link found under the "printable sketches" tab on the right sidebar.


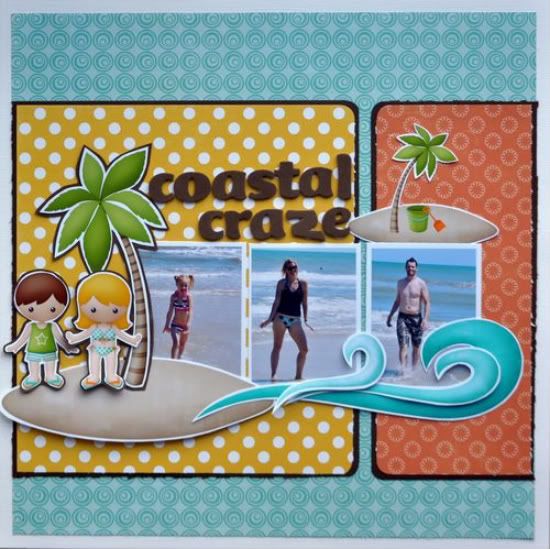
"Coastal Craze" by Jill Sarginson
Supplies Used - Patterned Paper: Echo Park; Alpha: Thickers; Elements: Kristin Aagard's Tropical Paradise digital kit; Cardstock: Bazzill; Tools: corner rounder

Variations:

• I reduced my photos to 2.5x3

• I aligned all of my photos horizontally

• I switched the journaling area from the bottom right to the top right and placed embellishments there vs. the journaling

• I replaced the leaves with a palm tree and other elements.

• I matted the entire layout onto cardstock and then matted the pattern paper onto cardstock as well.

• Instead of the horizontal strip of pattern paper, I put some waves in.

  • • • • • • • • • • • • • • • • • • • • • • • • • • • • • •


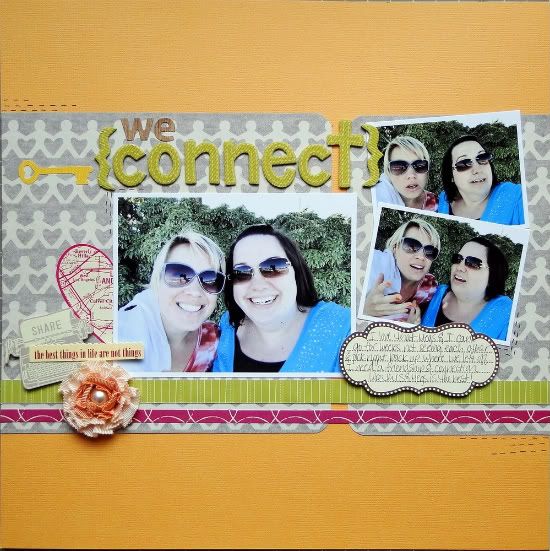
"We Connect" by Melissa Elsner
Products - Cardstock, Patterned Paper, Thickers, Stickers, Journal Spot: American Crafts (Amy Tangerine); Letter Stickers: Sassafras Lass (woodgrain); Flower: Prima Marketing; Pen: Zig Memory System

Variation #1: For the photos, I decided to do one large 4x6 instead of two 3x4's and two 3x2's where there was one 3x4.

Variation #2: Instead of the stitched element on the left side of the layout, I did a cluster of embellishments to help balance out the layout and spread out my title.

Variation #3: Because of the choice to do two smaller photos on the right, it left less room for the large journaling area so I used a journal spot so I could fit in my writing.

  • • • • • • • • • • • • • • • • • • • • • • • • • • • • • •


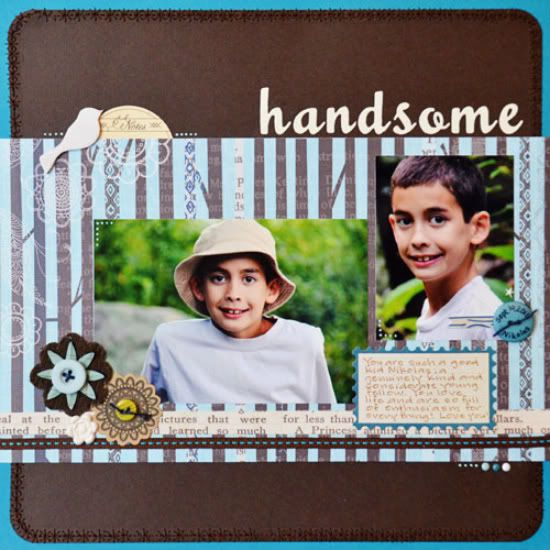
"Handsome" by Suzanna Lee
Supplies used - cardstock: Bazzill Basics; patterned paper: Little Yellow Bicycle, Lily Bee; ribbon: Pine Cone Press; chipboard and doilie: Maya Road; buttons: My Minds Eye; flowers: Making Memories; die cut: Quikcutz; stickers: Studio Calico, Pink Paislee; journal spot: Elle's Studio; ink: Colorbox; twine: Creek Bank Creations; pens: American Crafts, Sakura Souffle

Variation #1: I only used one sheet moving horizontally across the page versus the the two with the break between. I felt that the stark contrast of the brown trees and light blue background created a visual break.

Variation #2: I used different picture sizes to accommodate what I had.

Variation #3: My title is in a different location. This is largely due to viability. It was difficult to read anywhere else.

Variation #4: I still have the trio of embellishments, in this case flowers, that are on the sketch but slightly lower than mapped out.


I LOVE the stitching of the fluttering leaves but it would have gotten lost on the background paper I chose.

Variation #5: Extra background matting with stitching and cluster of goodies at the top of the patterned paper.
••••••••••••••••••••

Monday, October 31, 2011

Card Week, Part 1

•••••••••••••••••
 Card Sketch #13


You can download and print this sketch by clicking on the card sketches link found under the "printable sketches" tab on the right sidebar.


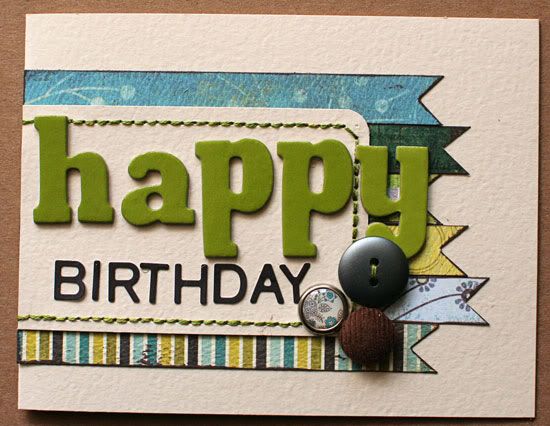
"Happy Birthday" card by Christine Chain
Supplies - patterned paper: My Mind's Eye, Basic Grey; letter stickers: American Crafts, Basic Grey; brads: unknown (in my Green Tangerine's Kit Club March kit); buttons: American Crafts; ink: Tsukineko; other: embroidery floss

1) I really stuck to the sketch for sizes this time. I really like how having all of the strips 1/2" made it easy for me to play around with what order I wanted them in (I trimmed the length after I made my decision).

2) I swapped out the flowers, purely because I didn't have any flowers that matched, but I had some buttons and brads!

  • • • • • • • • • • • • • • • • • • • • • • • • • • • • • •
•••••••••••••

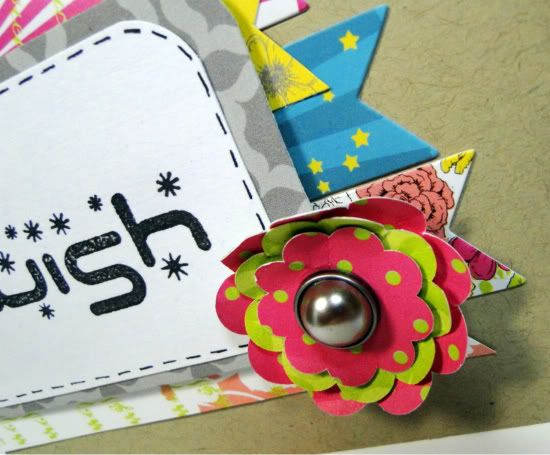
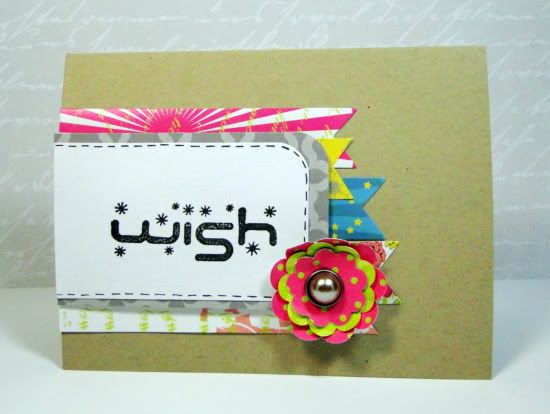
"Wish" card by Melissa Elsner
Supplies - Cardstock: Bazzill; Patterned paper, Stickers: Pink Paislee; Brad: My Minds Eye; Ink: Versafine; Stamp: Fiskars; Pen: Zig Memory Systems; Corner Punch: EK Success

Variation #1: For the banner strips I chose to use some banner stickers instead of cutting out paper. Worked perfectly and less work.

Variation #2: For the triple flowers, as shown in the sketch, I gained inspiration by doing a triple layered flower and just made it larger to take up the space.


Variation #3: I chose to matte the top layer of paper to help offset the bold colors and it also helped so my sentiment didn't get too lost in the card.

  • • • • • • • • • • • • • • • • • • • • • • • • • • • • • •


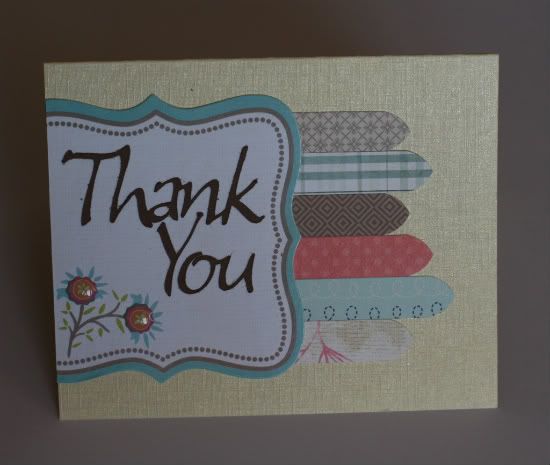
"Thank You" card by Noey Hunt
Products used - Patterned papers: DCWV, My Mind's Eye, October Afternoon, Bo Bunny; Epoxy Stickers: SEI; Journaling Block: Colorbok; Tools: Cricut Calligraphy cartridge (sentiment)

Variation #1: I changed the shape of the banners. I used my corner rounder to double round the ends of my paper strips.

Variation #2: I used a journaling block as the background for the sentiment. The block ended up being wider than the paper strips.

Variation #3: I moved the flowers over to the left (well, they are a printed part of the journaling block, but I rotated it) to make room for the title I chose.
••••••••••••••••••

Friday, October 21, 2011

Add-on Week, Part 5 - Simple Stories Product Challenge

•••••••••••••••••••••••••
It's time for the Simple Stories product challenge! We're sharing another round of projects from the challenge today.

If you missed the product challenge for Card Week and Two-page Week, Simple Stories has provided a kit of the same materials for each member of the Sketch Support Creative Team. Together with the October sketches we are going to show you how using the same products and even the same sketches can produce so many different results.

Since it is Add-on Week all of the projects we are posting today are based on Add-on Sketch #10.

Add-on Sketch #10

You can download and print this sketch by clicking on the add-on sketches link found under the "printable sketches" tab on the right sidebar.


"Celebrate" by Suzanna Lee
Supplies used - cardstock: Bazzill Basics; patterned paper, stickers and digital elements: Simple Stories (www.simplestories.typepad.com); twine: The Twinery; embroidery thread: DMC

Variation 1: I only pop dotted one of the three layers.


Variation 2: Circle sizes dictated by the size of the digital elements and circle punches I had.

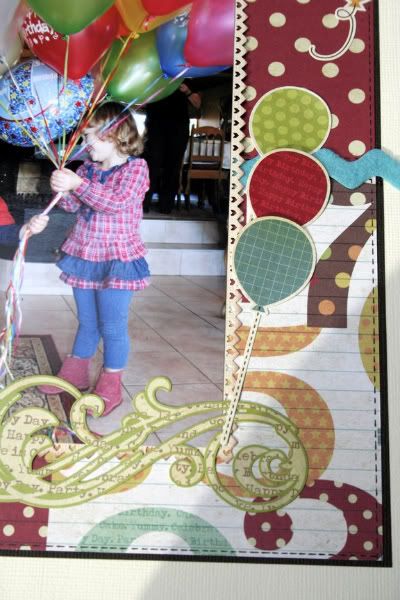
This a hybrid add-on as I printed digital elements and used my circle punches to create the balloons with some stickers to embellish. When I find the cards that I carefully saved, they will go into the pocket that I created especially for that purpose!

• • • • • • • • • • • • • • • • • • • • • • • • • • • • • •
•••••••••••••• 
••••••••••
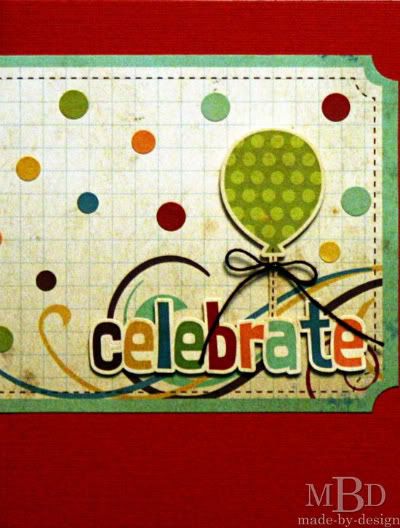
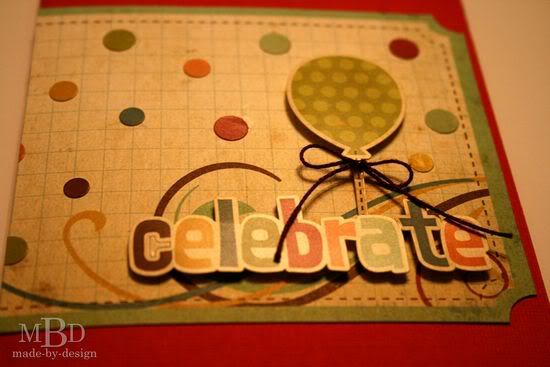
"Celebrate" by Megan Bickers
Supplies Used - Cardstock: Bazzill (red); Patterned Paper: Simple Stories (Happy Day); Stickers: Simple Stories (Happy Day); Adhesives: Ranger (Inkssentials Glossy Accents), Scrapbook Adhesives (Foam Squares); Tools: We R Memory Keepers (Corner Chomper-Ticket Stub); Other: Crochet Thread (brown)

Variation #1: Instead of using a group of balloons on my layout, I used a single one-layer balloon sticker. The only dimension I used on the balloon was that it was attached with foam squares.


Variation #2: I was inspired by the layered circles in the sketch and I created a background with some of the smaller circle stickers from the Happy Day sticker sheet. I used one of the Journaling card elements and punched the edge with a ticket stub punch. The circle stickers were layered onto this piece, along with the word celebrate.

• • • • • • • • • • • • • • • • • • • • • • • • • • • • • •   


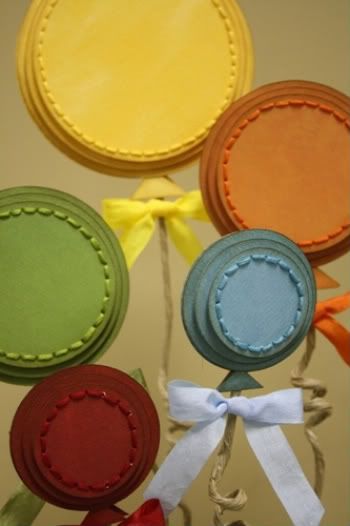
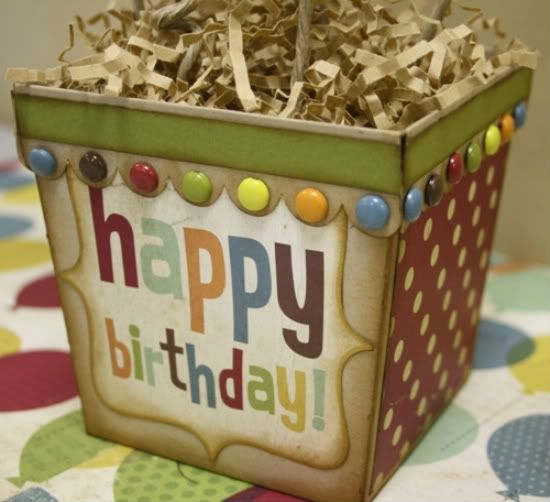
"Happy Birthday" decor by Carolyn Wolff
Supply List - Cardstock: Bazzill; Patterned Paper: Simple Stories; Brads: Basic Grey; Basket: SVG Cutting File from SVG Cuts; Shredded Paper and Balloon Sticks: Michaels; Ribbon: May Arts; Floss: DMC; Ink: Ranger.

Well, this was a fun sketch to play with!

Variation #1 – I used different size circles than what was listed on the sketch. My largest balloon uses 4”, 3 ¾“ and 3 ½“ circles. The medium size balloons use 3”, 2 ¾ “ and 2 ½ “ circles. The smallest balloons use 2”, 1 ¾“ and 1 ½ “ circles.


Variation #2 – I used covered floral wire for my balloon sticks. I curled the wire around a pencil and then stuck it in a cube of floral foam inside the basket.

Variation #3 – I added stitching to each of my balloons on the top layer.

Variation #4 – I added a coordinating piece of ribbon to each balloon stick.


• • • • • • • • • • • • • • • • • • • • • • • • • • • • • •   


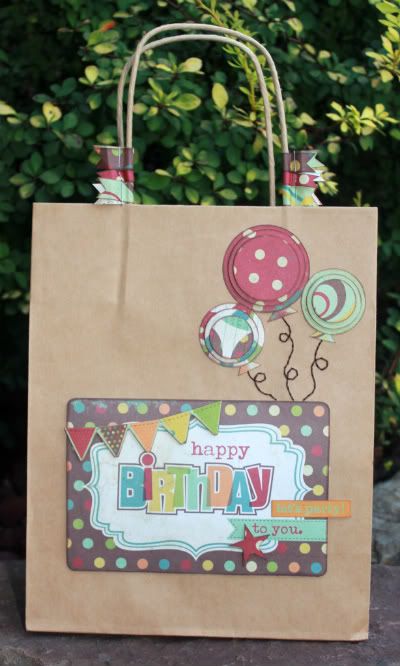
"Happy Birthday to You" gift bag by Christina Hoffman
Supplies - Patterned paper, journaling block and banner: Simple Stories; Emboridery Thread: DMC; Gift Bag: unknown

I didn't make any changes to the sketch. I just added the balloons to a gift bag.

• • • • • • • • • • • • • • • • • • • • • • • • • • • • • •   


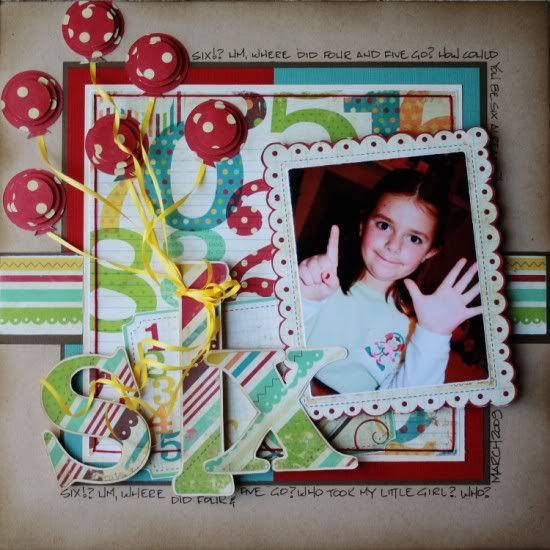
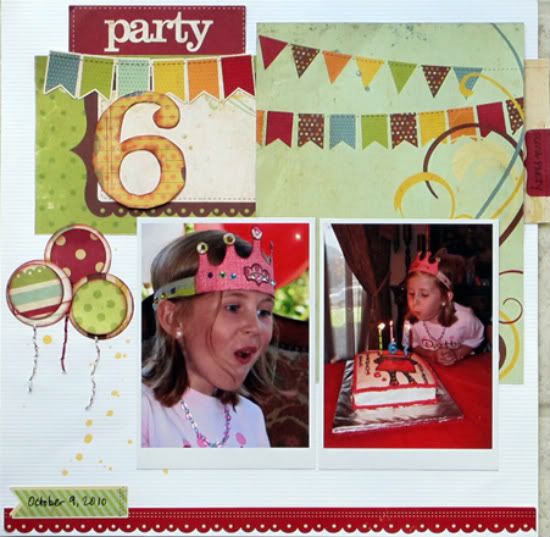
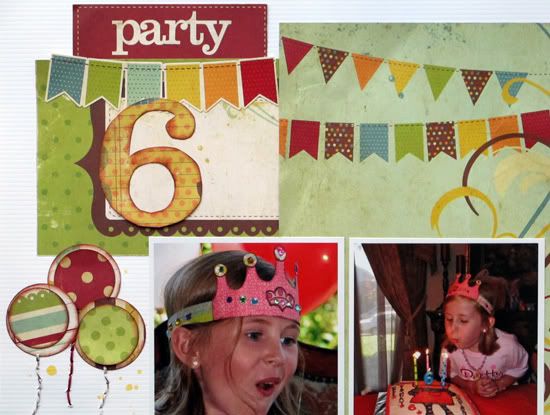
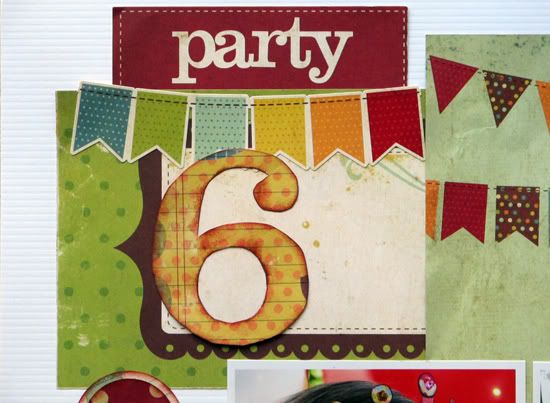
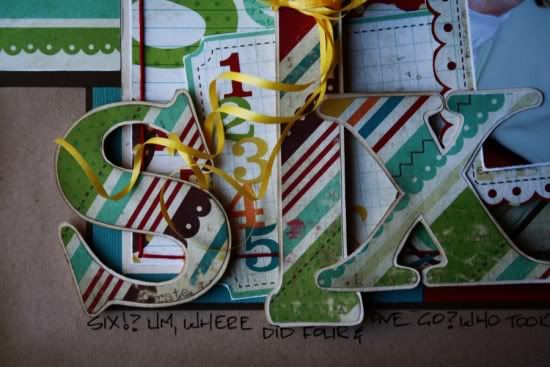
“Six” by Janette Kincaid
Supplies - Patterned Paper: Simple Stories (Happy Day collection); Cardstock: Bazzill; Ink: Ranger Distress ink (Vintage Photo); Adhesive: Helmar Scrapdots and 450 Quick Dry; Journal Pen/Marker: Zig (Black); Floss: DMC; Circle Cutter: Creative Memories; Other: chipboard letters to trace, gift wrapping ribbon.

I loved the October Card Sketch so much that I decided to make another layout using it as my starting point and added this week’s balloon Add-on Sketch as an embellishment.

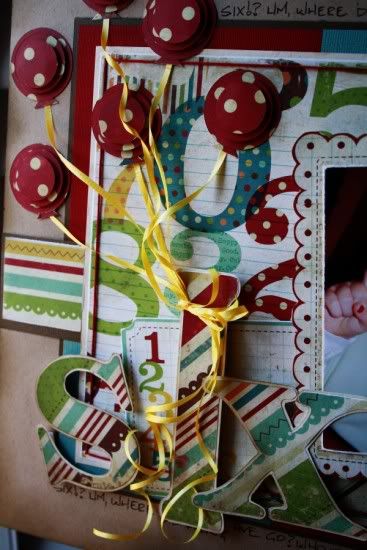
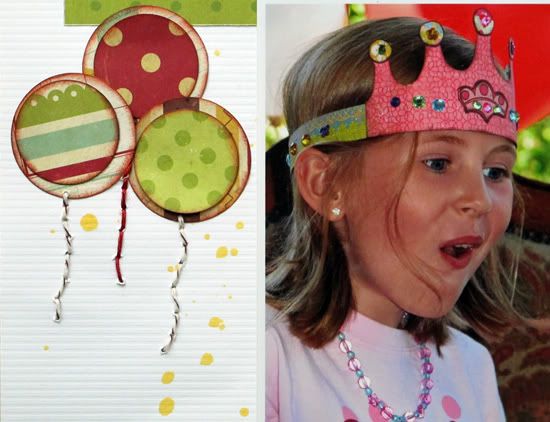
Variation 1: I used three sizes of circles and stacked each on top of one another with Scrapdots sandwiched between. I love the red and white poka-dot paper in the kit! It’s one of my favourites and it makes fantastic balloons!


Variation 2: I trimmed the scalloped frame from one of the 4x6 journal block papers in the kit to use as a frame around my photo. You can’t see in the image but I trimmed a section out of the middle of the pre-printed frame and pieced it back together to make it fit around my photo.


Variation 3: I trimmed the number journaling block from one of the 4x6 journal block papers in the kit to use as a background for my title. I love that these journal blocks are so versatile - not just for journaling!

Variation 4: I cut a larger strip out of the diagonal pattern paper and placed it horizontally on my layout as the band across the middle.

Variation 5: I traced some random chipboard letters and cut them out of the patterned paper.


I backed each letter in cardstock to give them a bit more strength and added to the layout with Scrapdots. I cut some gift wrapping ribbon to length and tore it half to make it thinner – the full width was too wide for my little balloons. Once the ribbon was adhered to the page I gathered up the ends of the ribbon and wrapped it around the letter ‘I’.


• • • • • • • • • • • • • • • • • • • • • • • • • • • • • •   


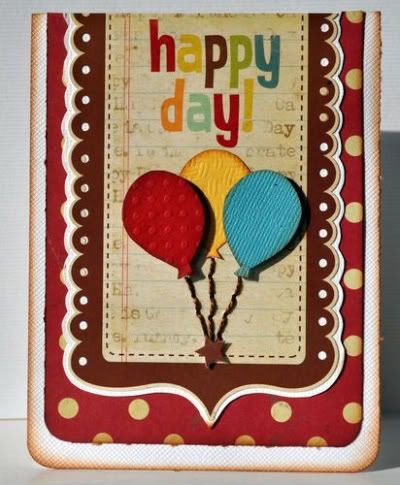
"Happy Day!" card by Jill Sarginson
Supplies Used - Cardstock: Bazzill Basics, DCWV; Patterned Paper: Simple Stories; Tools: corner rounder; Ink: Vibrance; Stickers: Simple Stories; Floss: DMC; Adhesive: Pop dots

I used Simple Stories fabulous stickers to use as the main layer of this card.

1. To make the balloons, I simply googled "balloon template" in Google images, selected one I liked, re-sized and printed and then used it as a template to cut the balloons out of cardstock.

2. I pop-dotted the two balloons on top and then stitched the strings on.

3. I used a little star sticker from the stick sheet to use as an anchor for the balloons.

• • • • • • • • • • • • • • • • • • • • • • • • • • • • • •   


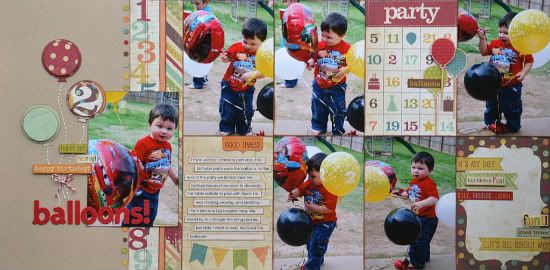
"Balloons!" by Allison Davis
Supplies - Cardstock: Bazzill; Patterned paper: Simple Stories; Stickers: Simple Stories; Baker's Twine: The Twinery; Alphabet: American Crafts

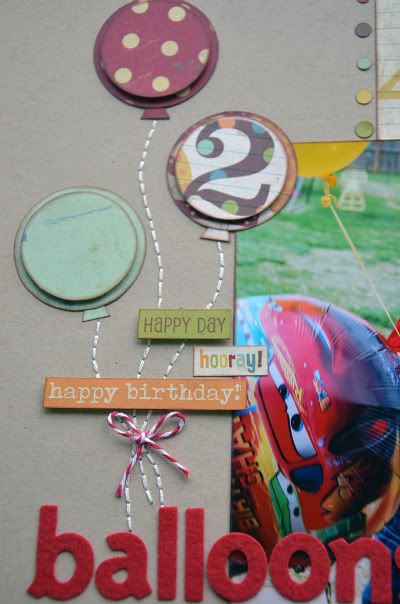
Variation #1 - I didn't exactly follow the measurements of the circles on the sketch. I based the size of the balloons on my layout by framing the number "2" for one of the circles. Since it was Jackson's second birthday this was an easy way for me to get that number on the page.


Variation #2 - I only have two layers on my balloons, not three like the sketch suggests.

Variation #3 - I added a little bow tied with baker's twine to the bottom of the balloon strings.

• • • • • • • • • • • • • • • • • • • • • • • • • • • • • •   


"Party" by Christy Arthur
Products - Cardstock: Bazzill; Patterned Paper: Simple Stories (Happy Day Make A Wish, It's Your Day, 4x4 Quote and 6x8 Photo Mat, 4x6 Journaling Element 1, Vertical Journal Card Element; 100 Days of Summer Flash Cards); Mist: Studio Calico (Mister Huey Lemonade); Ink: Colorbox (Brown Cats Eye Pigment Ink); Floss: Bazzill In Stitch'z (Red/Orange), Brown Twine

Variation #1: I only layered one punched circle on top of the other, instead of the three layers in the sketch.


Variation #2: I did not add the triangle parts of the balloons at the base of the circles.

Variation #3: My balloon strings do not connect.


• • • • • • • • • • • • • • • • • • • • • • • • • • • • • •   


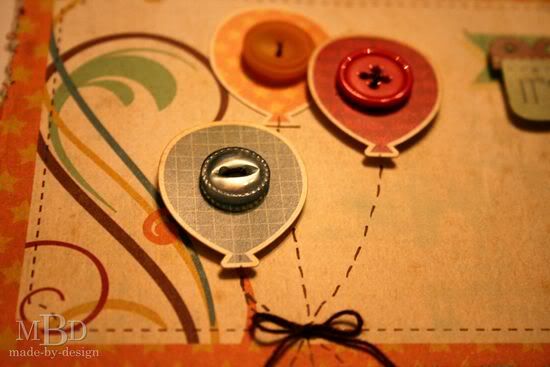
"It's Your Day" by Megan Bickers
Supplies Used - Patterned Paper: Simple Stories (Happy Day); Stickers: Simple Stories (Happy Day); Adhesives: Ranger (Inkssentials Glossy Accents), Scrapbook Adhesives (Foam Squares); Tools: Heidi Swapp (Edge Distresser); Other: Crochet Thread (brown); Autumn Leaves (buttons); Zig Writer (brown).

Variation #1: Instead of layering shapes to create balloons, I just used the balloon stickers that came with the Happy Day line of products. The balloons were attached to the card with foam squares and I added a button to each balloon for texture. The strings of the balloons were drawn with a brown marker, then I added a brown string bow.


Other details: I used a journaling card and distressed the edges. The sentiment and scallop were both stickers that came from the same line of papers. This gift tag was super quick to create!

• • • • • • • • • • • • • • • • • • • • • • • • • • • • • •   


"It's Your Day" by Melissa Elsner
Supplies used - Paper, Stickers: Simple Stories; Cardstock: Bazzill Basics Paper; Other: thread


Variation #1: For two of the balloons I only layered the circles twice.

Variation #2: For all of my balloons, I did different dimensions and used the circle punches I have on hand in my stash.

Variation #3: To create the strings as shown in the sketch, I used my paper piercer and kept with the stitching theme.
••••••••••••••••••••

Tuesday, October 18, 2011

Add-on Week, Part 2

••••••••••••••••

Add-on Sketch #10

You can download and print this sketch by clicking on the add-on sketches link found under the "printable sketches" tab on the right sidebar.


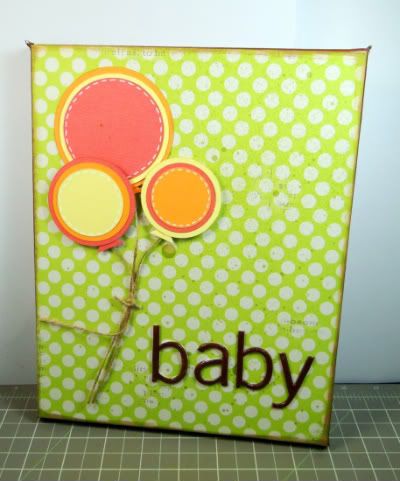
“Baby Canvas” by Melissa Elsner
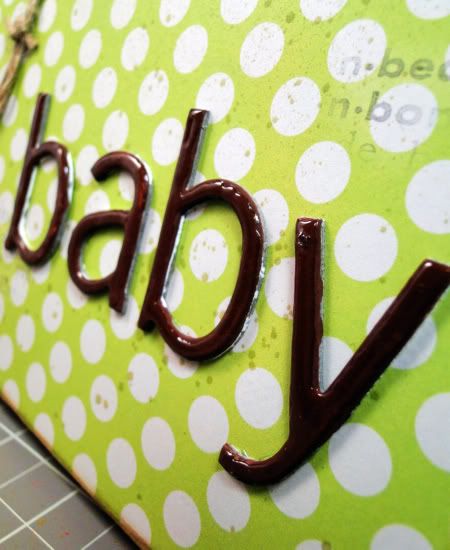
Supplies - Patterned Paper: Lily Bee Design; Cardstock: American Crafts, Core'dinations; Alpha Stickers: Basic Grey; Paint: Craft Smart; Spray Ink: Clearsnap; Glaze: Glossy Accents by Ranger Industries; Adhesive: Helmar; Pen: Uniball Signo; Electronic Cutter: Silhouette SD; Canvas, Jute: Unknown

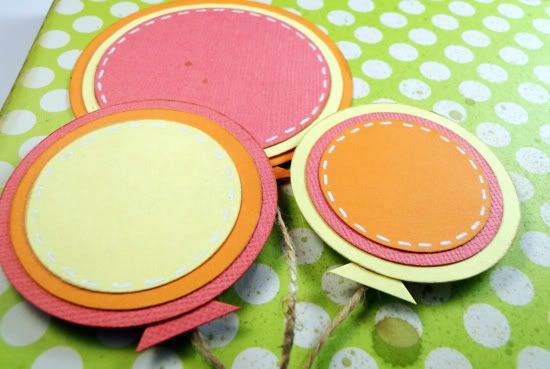
Variation #1 - I added an inch in measurement to all dimensions of the largest and medium balloons and kept the original measurements for my small balloon to create three different sizes.


Variation #2 - I chose to use solid cardstock and use multiple colors for each balloon to make my simple design more colorful.


• • • • • • • • • • • • • • • • • • • • • • • • • • • • • •    

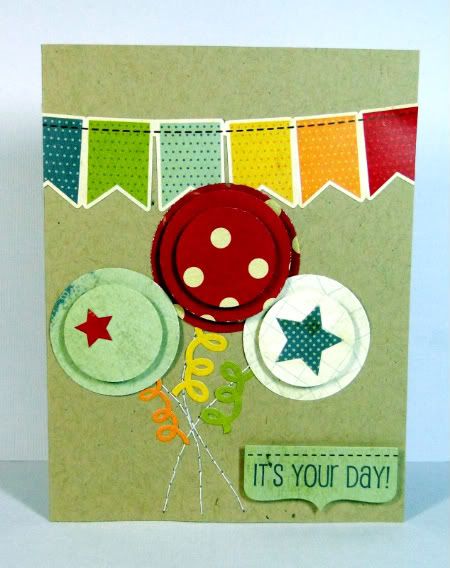
"It's Your Day" card by Jill Sarginson
Supplies Used - Cardstock: Bazzill Basics; Patterned Paper: Pink Paislee (Hometown collection); Tools: corner rounder, Creative Memories star punches; Ink: Vibrance; Stickers: Simple Stories; Adhesive: Pop dots

To make the balloons, I simply googled "balloon template" in Google images, selected one I liked, resized and printed and then used it as a template to cut the balloons out of cardstock. I pop-dotted the
two balloons on top and then stitched the strings on.
•••••••••••••••••

Friday, October 7, 2011

Card Week, Part 5 - Simple Stories Product Challenge

•••••••••••••••
Are you ready for a little challenge? Sketch Support and Simple Stories have come together to present a product challenge for our creative team and for you too.

Simple Stories has provided a kit of the same materials for each of our creative team members. The products we are using in our challenge can be found here.

Together with the October sketches we are going to show you how using the same products and even the same sketches can produce so many different results. Each week on Friday we will post our product challenge projects based on the sketch for that week.

Card Sketch #12


You can download and print this sketch by clicking on the card sketches link found under the "printable sketches" tab on the right sidebar.


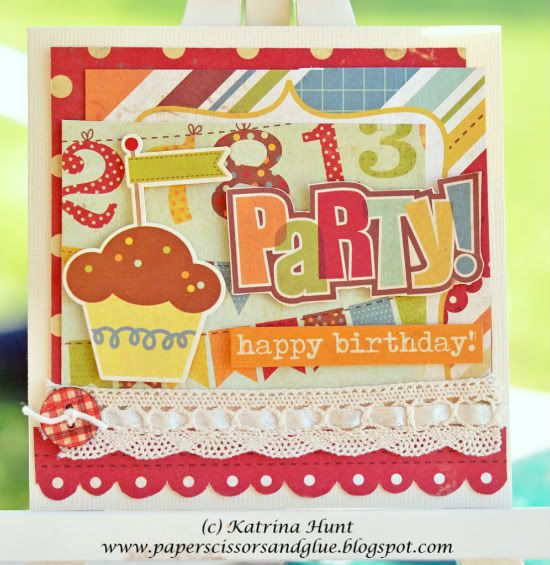
"Party! Happy Birthday!" card by Katrina Hunt
Supplies - Cardstock: American Crafts; Patterned Paper: Simple Stories (Happy Day); Ribbon and Button: My Mind’s Eye; Adhesive: Scotch ATG and Scrapbook Adhesives

After I did the one page layout, I made my card from the scraps I had left! Basic variation is I offset the layers and flipped the cupcake to the left instead of the right.

• • • • • • • • • • • • • • • • • • • • • • • • • • • • • •   


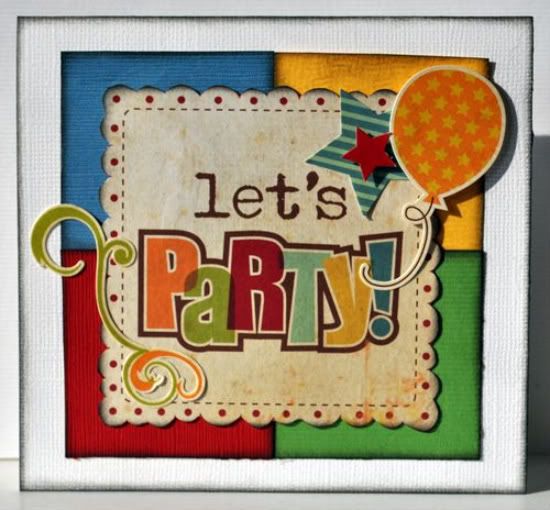
"Let's Party!" card by Jill Sarginson
Supplies Used - Cardstock: Bazzill Basics, DCWV; Patterned Paper: Simple Stories; Ink: Vibrance; Stickers: Simple Stories; Adhesive: Pop dots

I stuck pretty closely to the sketch here although I just noticed that I forgot the strip of horizontal patterned paper! Because the patterned paper is so fun and colourful, I opted to make my four squares different colours of cardstock. I pop-dotted and adhered some of the awesome stickers to finish off the card!

• • • • • • • • • • • • • • • • • • • • • • • • • • • • • •   


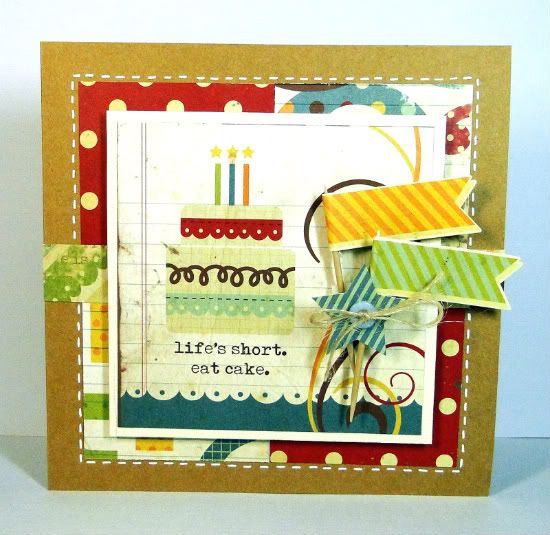
"Life's Short. Eat Cake." card by Melissa Elsner
Supplies - Paper, Stickers, Journal Post: Simple Stories; Cardstock: Core'dinations; Other: button, jute, toothpicks


Variation #1: When I saw the flourishes on the journal spot, I knew it would be perfect for this card sketch.

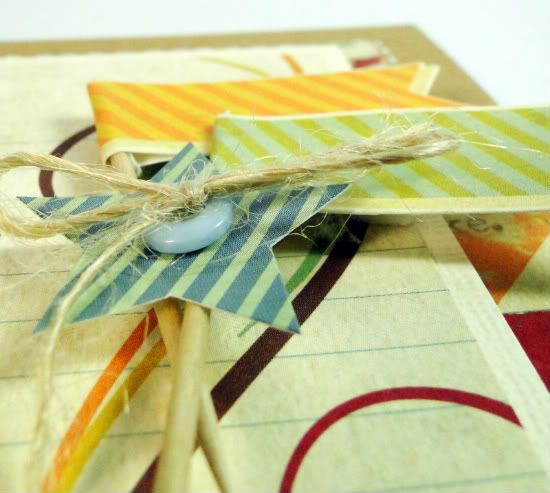
Variation #2: To add some dimension and texture to the card, I attached the flag stickers to a couple of toothpicks. Stuck them together and adhered the star sticker and button to make it look tied together.


Variation #3: I love how stitching seems to bring things together and ground elements so I added some faux stitching around the outer edge to do just that.

• • • • • • • • • • • • • • • • • • • • • • • • • • • • • •   


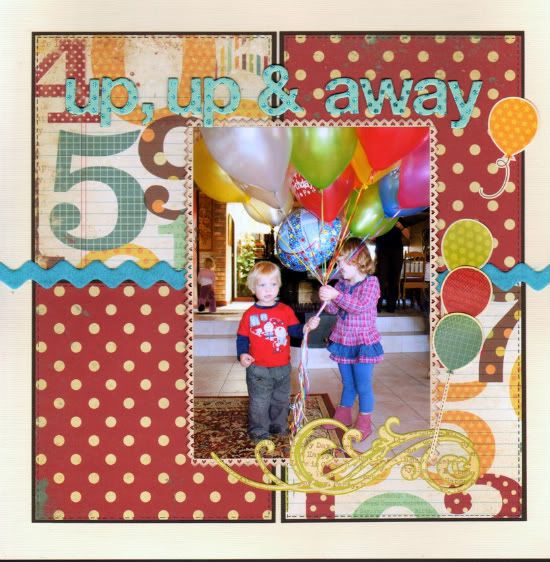
"Up, Up and Away" by Lynette Jacobs
Supplies used - Cardstock: Bazzill; Printed papers and stickers: Simple Stories; Felt ribbon: My Mind's Eye (Fine and Dandy); Alpha: American Craft

•  I cut four 5x5 inch squares and matted them on brown cardstock.

• I added faux stitching to each square.

• I replaced the striped paper with a felt ribbon.

• I matted my photo on a punched photo mat.

• I added the balloons and the flourish to the right hand corner of the photo.


• • • • • • • • • • • • • • • • • • • • • • • • • • • • • •   


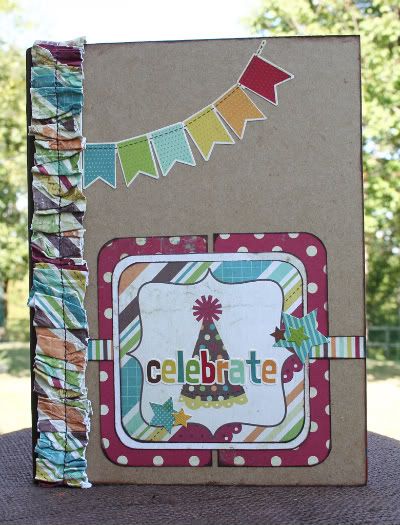
"Celebrate" birthday journal by Shari Thurman
Supply List - Patterned Paper: Simple Stories; Cardstock Stickers: Simple Stories; Ink: Colorbox Chalk Ink (Dark Brown); Adhesive: ATG by Scotch; Cardstock: unknown; Elastic: Joann's; Composition Notebook: Carolina pad and paper; Other: machine stitching

This birthday journal was a fun project to make. I am always forgetting birthdays and I'm hoping that recording them in this journal will help me remember them better.

I started by covering my journal with Kraft paper and inking the edges. Using Allison's card sketch and Simple Stories paper and cardstock stickers, I embellished the front.

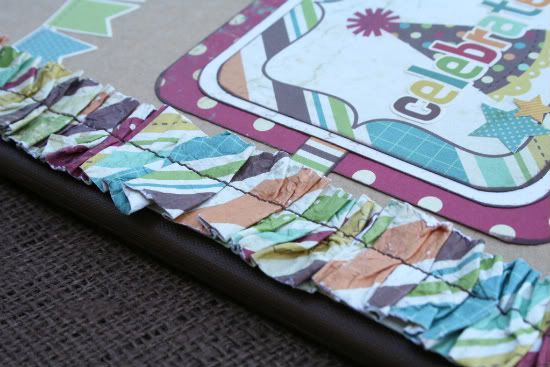
I then created an elastic paper bookmarker. I saw something similiar on www.skiptomylou.org via Pinterest that was made with ribbon. I immediately started thinking of how I could use scrapbook paper to create something similiar. I love paper! It's kind of like a headband for a book.


To create the bookmarker, I wrapped elastic around the inside of the cover and cut. Be sure not to pull it tight. I marked the length of the book on the middle of the strip of elastic. I cut 3 strips of paper measuring 1-1/4" x 12", moistened and crinkled them up. Let set 5 minutes and then open. Fold and stitch to the center of the elastic that you previously marked. My paper was only slightly damp when stitched it. I only used about 2 1/2 of the strips once it was all folded and stitched into ruffles. Finally, overlap the ends of the elastic about 1/2- 3/4" using a zig zag stitch. Place on your book.

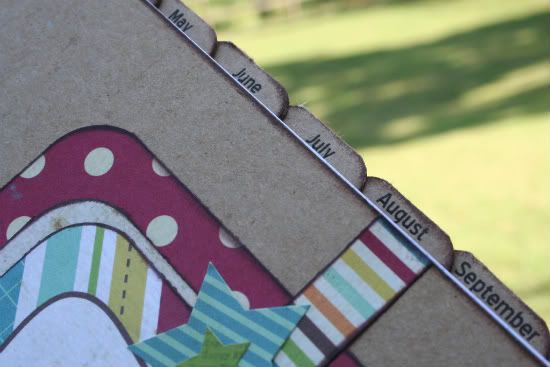
I then added months of the year tabs. I printed them on kraft paper, folded them in half, rounded the corners and attached to the edges of the paper. I divided the number of pages in the notebook by 12 months. In my notebook, I placed a new tab every 8-9 pages. My finished tabs measured 1/2 x 1".


• • • • • • • • • • • • • • • • • • • • • • • • • • • • • •   


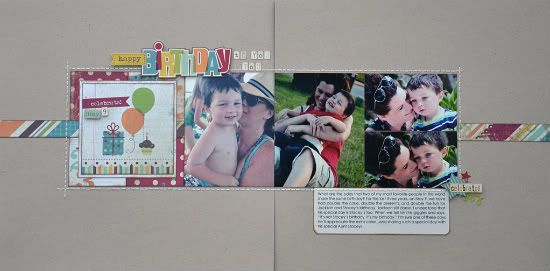
"Happy Birthday to You Too" by Allison Davis
Supplies - Cardstock: Bazzill; Patterned paper: Simple Stories; Cardstock stickers: Simple Stories

Since I'm not much of a card maker one thing I love doing with the card sketches is finding a way to adjust them for a two-page layout. To use a card sketch for a layout, two easy ways are to enlarge the size of the card for the design to stretch across the whole layout or you can keep the card sketch the same size as more of a decorative element on the page. The second way is what I did with this card sketch.

Variation #1 - To make this card sketch work for a two-page layout I kept the card design the same size as the sketch suggests. For the rest of my layout I added pictures that are the same height as the card design to stretch across the layout.

Variation #2 - I stretched the striped strip all the way across the layout. Technically this isn't really a variation since the striped strip stretches all the way across the card but if you are going off of the measurements of the card sketch, the measurement of the stripe is the only one I changed.

Variation #3 - I added a title to the top and my journaling to the bottom and an little embellishment cluster next to the journaling.

Variation #4 - Instead of stitching around the top square I hand stitched a border around the card design and the pictures.

• • • • • • • • • • • • • • • • • • • • • • • • • • • • • •   


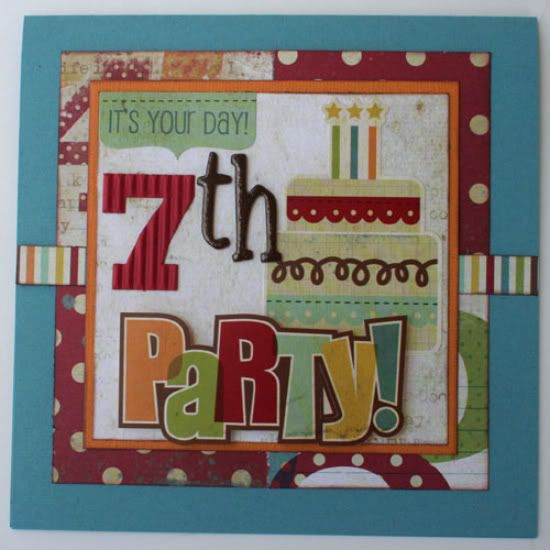
"Party!" card by Christine Chain
Supplies - patterned paper and stickers: Simple Stories; letter stickers: American Crafts; corrugated number: Jillibean Soup; ink: Tsukineko; cardstock: Bazzill Basics

This was such a fun card to put together using this card sketch.

1) I used both sides of a sheet of patterned paper to create my background layer. I just cut four 2 1/2" squares and then placed two face up and two face down, in opposite corners. Then I inked just the outside edges to give it a bit more definition.

2) I wanted a nice, simple stripe to cross over them, so I trimmed approximately 1/2" of striped paper from one of the sheets of paper. It came off of a journaling block that I wasn't using. Again, I inked the edges.

3) Next I layered a piece of orange cardstock (inked) and a plain piece of patterned paper. This is the inside of the same journaling block that I got the striped piece from. I wanted something simple to layer my stickers on top of.

4) Now that I had a nice base, I picked out a few stickers, popped up the word party, and added "7th" with some letters and numbers from my stash. (My son has a bunch of friends turning seven soon so I know this will get used).


• • • • • • • • • • • • • • • • • • • • • • • • • • • • • • 
•••••••••••
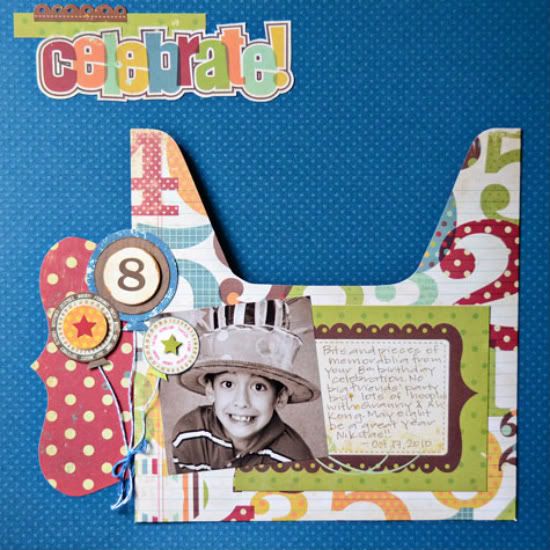
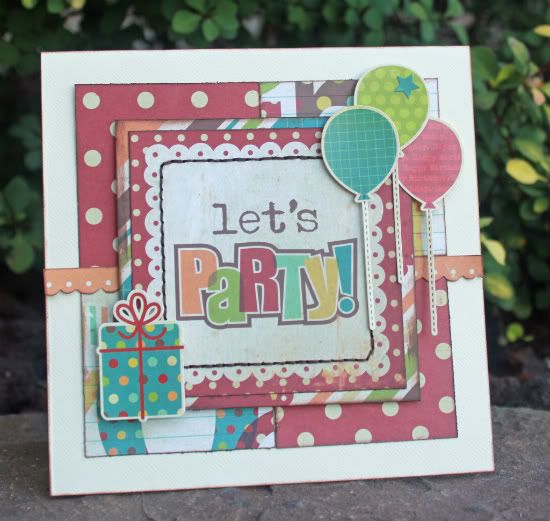
"Let's Party" card by Christina Hoffman
Supplies - Cardstock: Bazzill; Patterned paper, Balloons and Present: Simple Stories; Embroidery Thread: DMC

Variation #1: In place of the 3/4 inch striped strip I used a 1/4 inch scallop.

Variation #2: I used a patterned paper with a title already on it for my message which I centered on the card and stitched around.

Variation #3: I added balloons to the top right corner and a present to the bottom left corner of the card to balance it all out.

• • • • • • • • • • • • • • • • • • • • • • • • • • • • • •  
 Now it's your turn!

Crafty challenges are always fun so during this month we will have four different challenges for you to participate in too. Each week will be a different challenge with a different sketch. So grab your supplies, print the sketch, and have some fun! Your first challenge is:

• Create a layout based on Card Sketch #12.

After you have created your layout, upload it to our Sketch Support Gallery (make sure you put in the description that it is for the Sketch Support challenge) and then post the link to your layout in the comments.

This week we are giving away a copy of Sketches for Scrapbooking, volume choice is all yours, to the winner of the challenge. You have until Friday, October 14 and we will post the winner on Sunday, October 16.

We look forward to seeing your creations!
••••••••••••••••••••