Showing posts with label Tammy Tutterow. Show all posts

Wednesday, September 28, 2011

One-page Week, Part 3

••••••••••••

One-page Sketch #13


You can download and print this sketch by clicking on the one-page sketches link found under the "printable sketches" tab on the right sidebar.


"All the Best Moments..." by Allison Davis
Supplies - Cardstock: Bazzill; Patterned paper: My Mind's Eye; Label stickers: My Mind's Eye; Chipboard: My Mind's Eye; Brads: My Mind's Eye; Buttons: My Mind's Eye

For this layout I did kind of a half flip on the sketch and added a few extra layers.

Variation #1 - I flipped the strips that run behind the pictures from horizontal on the sketch to vertical on my layout. I like the strips as they are on the sketch but with the other variations I did to the sketch I ended up liking them a little better going up and down instead of across.

Variation #2 - I added two background pieces to my layout. I really wanted to get more paper on the layout and this was an easy way to do it!

Variation #3 - I cropped all three of my pictures to 3 x 3 instead of just having two and then a larger photo. I love these photos but there was a lot of empty space in them and I liked the cropped version better.

Variation #4 - I decided to remove the journaling block and instead wrote my journaling directly on the page. Since the paper that was showing had lines it worked out perfectly!

Variation #5 - I moved my title to the right of the top photo.

  • • • • • • • • • • • • • • • • • • • • • • • • • • • • • •
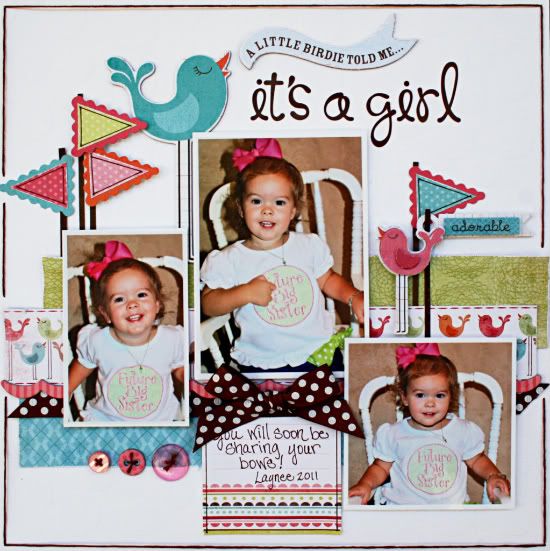

"It's a Girl" by Robbie Herring
Suppliy List - Bazzill: Polka Dot White Cardstock; My Mind's Eye Fine and Dandy Collection: Stickers, Patterned Paper, Chipboard, Buttons and Journal Card; Doodle Bug Designs: Alphabet Stickers; Bo Bunny: Double Dot Ribbons.

Variation 1: I changed the size and orientation of the photos. The center photo is 3 1/2 x 5. The left photo is 2 1/2 x 4 and the right photo is 3 1/2 x 3 1/2.

Variation 2: I switched the journal card and the right photo's position.

Variation 3: Instead of the clouds in the upper right, I used a large bird and a banner embellishment that moves across the center of the page and becomes part of the title.
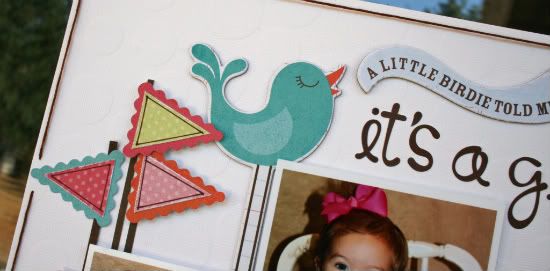

Variation 4: I Added more flags and poles to the right side of the page to balance my large title work.
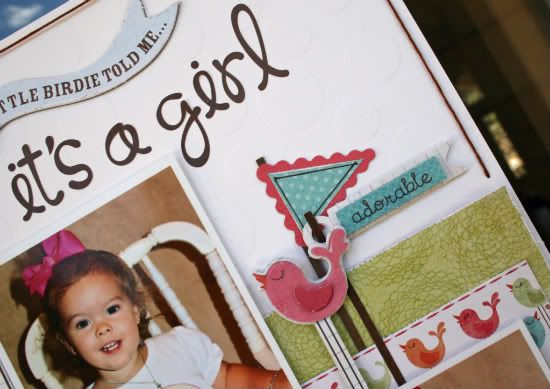

Variation 5: Instead of the butterfly on the right lower side, I used buttons and a bow to add more weight to offset the heavy embellishing at the top of my page.

Hints: Because I used chipboard as part of the layering across the center of the page, I added foam dots to the back of the smaller photos. To help prevent bending of these photos over time in your book, cut a piece of transparency and tape to the back before adding your foam dots. The same thing can be done with stickers that are attached with foam dots.

To save time on stitching, just do a long stitch along each edge and use tape to secure it on the back of the page. I use all 6 strands of floss when I use this technique.

  • • • • • • • • • • • • • • • • • • • • • • • • • • • • • •
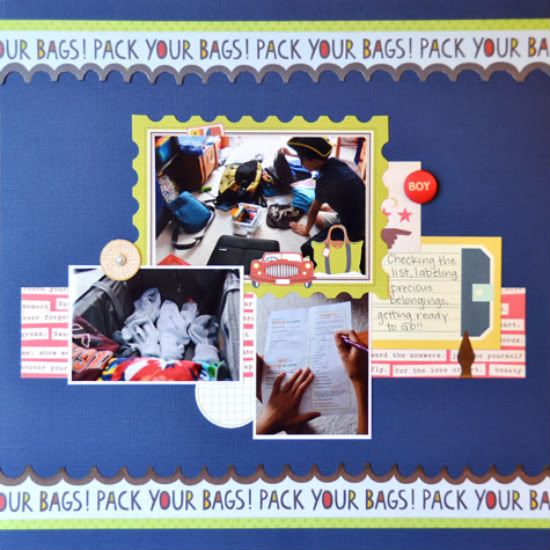

"Pack Your Bags" by Suzanna Lee
Supplies - Cardstock: Bazzill; Patterned Paper: Prima, Cosmo Cricket, BoBunny; Brads: My Mind's Eye, Crate Paper; Journal Spots: Prima, Jillibean Soup; Book Dart: Lee Valley

The most obvious is my inclusion of top and bottom borders. I doing so, I omitted the embellishment cluster at the top right corner. I still have the "main" strip moving across the page behind the pictures but chose to eliminate the smaller ones. I flipped the journal spot for some symmetry across the page.
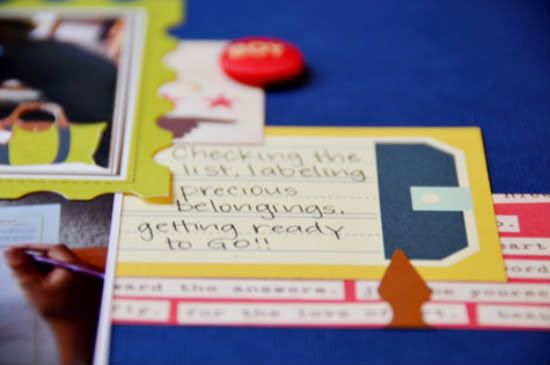

I also used a journal spot to frame my main picture while fussy cutting some elements. I omitted the flags as I felt the page was busy enough and didn't really need anything else.

  • • • • • • • • • • • • • • • • • • • • • • • • • • • • • •


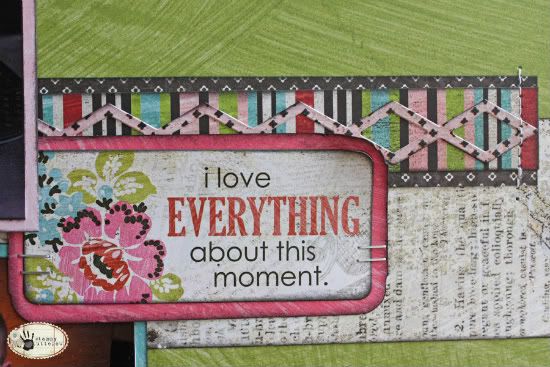
"I Love Everything About This Moment" by Tammy Tutterow
Supplies - paper: BasicGrey (Out of Print: Reprint, Giclee, Storyteller, Headline, Daily News, Mish Mash, Classifieds, Lithograph); stickers: BasicGrey (Out of Print Stickers); flowers: Bazzill Basics (Wild Rose: Precious Pink and 1" and 1.5" Twisted Flowers); ink: Tim Holtz Distress Ink (Black Soot); mist: Ranger Ink Perfect Pearls Mist (Biscotti, brushed on the flowers which doesn't really show in the photos); stamps: Hero Arts (Printer's Type Uppercase Alphabet, numbers); tools: Bazzill Basics (In-Stitchz Junior Mat), Tim Holtz (Idea-ology Tiny Attacher), Fiskars (Twist n Flip Corner Punch, Round n Round); adhesive: Therm O Web Adhesive Foam Squares, Sticky Strip Runner; Craft Zots

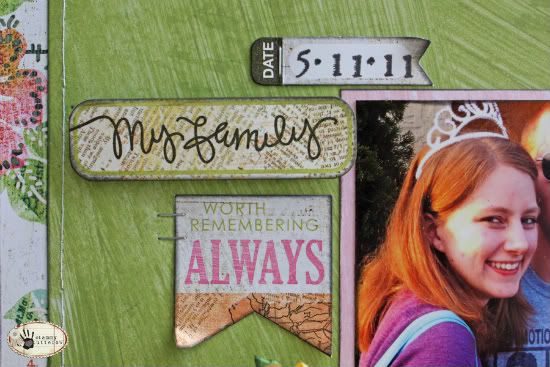
For my page, I really loved the sketch design so I wanted to stay pretty true to the original. The main change I made was to turn the top photo vertically, which worked better for the photos I wanted to use. I also omitted some of the embellishments and the titles. I found that after I had my photos and papers in place along with a couple of small tags that it just felt complete.

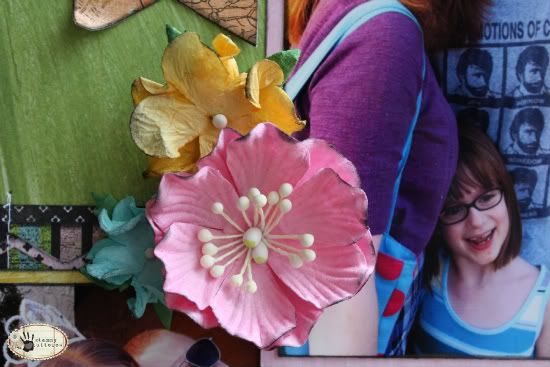
Here's a closer look at the details:


••••••••••••••••••••

Tuesday, September 20, 2011

Add-on Week, Part 2

••••••••••••••
Add-on Sketch #9

You can download and print this sketch by clicking on the add-on sketches link found under the "printable sketches" tab on the right sidebar.


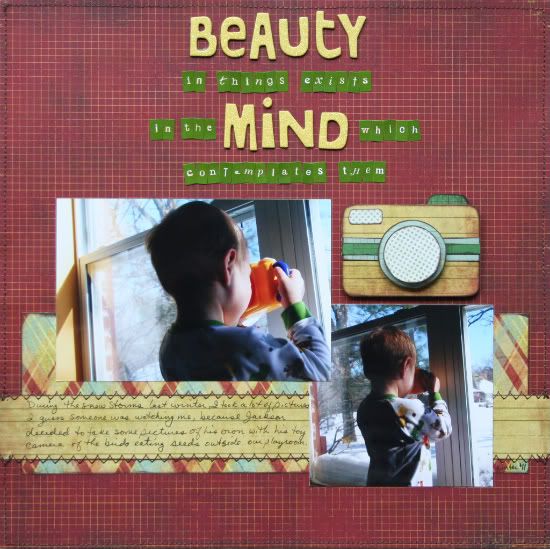
"Beauty in things..." by Shari Thurman
Supply List - Patterned Paper: Pink Paislee; Alphabets: American Crafts and My Little Shoebox; Tools: Corner Chomper by We R Memory Keepers, Circle punches by Stampin' UP; Ink: Colorbox Chalk Ink in Dark Brown; Adhesive: 3D Foam by Thermoweb, ATG; Other: Machine Stitching

When I saw this months add-on sketch, I remembered that I had these photos of Jackson from last winter playing with his toy camera. How amazing is it that I actually had photos to go with the sketch? I was excited!

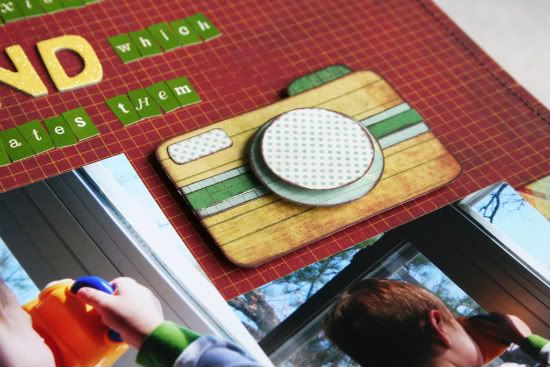
The overall size of this camera is about 2x3". I inked the edges of all the paper. I added 3D foam adhesive to the camera lenses.


The title is a quote that I loved, "Beauty in things exists in the mind which contemplates them." David Hume

Journaling reads, "During the snow storms last winter, I took a lot of pictures. I guess someone was watching me, because Jackson decided to take some pictures of his own with his toy camera of the birds eating seeds outside our playroom."

  • • • • • • • • • • • • • • • • • • • • • • • • • • • • • •


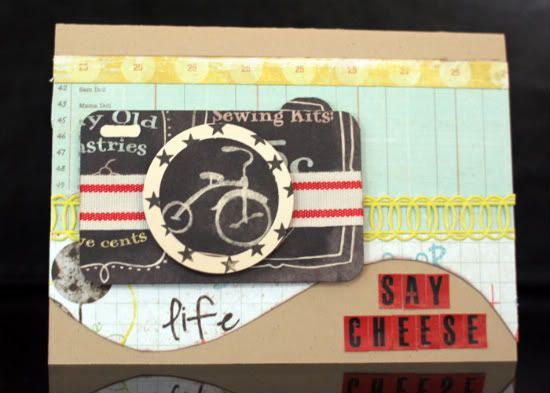
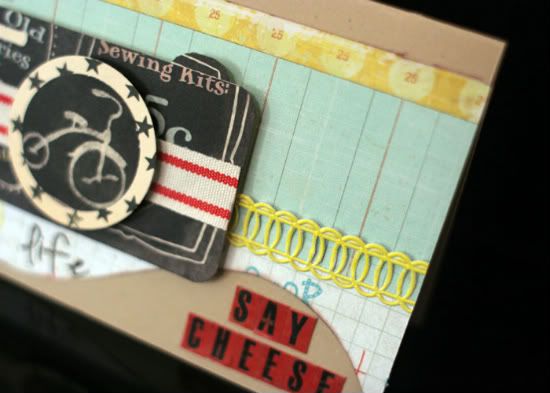
"Say Cheese" card by Christine Chain
Supplies: patterned paper: Crate Paper, October Afternoon, and Bo Bunny; letter stickers: Echo Park; ribbon paper: Basic Grey; punches: Stampin' Up!; sketch: Card Sketch #7, Sketch Support; Other: ink, pop dots, ribbon from my June Green Tangerine's kit club

As soon as I saw this sketch I thought it would be fun to put on a card. I altered the dimensions of the camera slightly; I printed out the sketch on a regular sheet of paper, and liked that size, so I used those dimensions (it's now 3"x2", roughly). I'm glad I made it a little bigger than the sketch because I think this size works nicely on a 4 1/4" x 5 1/2" card.


Once I made the camera, I needed to come up with a card design to put it on, so I went through the card sketches at Sketch Support and came across this one, which I thought would work nicely. I moved the sentiment to the "open" space on the lower right because it looked off-balance below the camera.

  • • • • • • • • • • • • • • • • • • • • • • • • • • • • • •

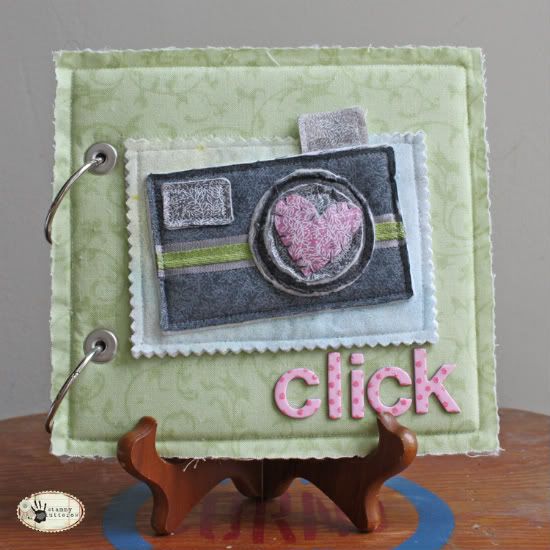
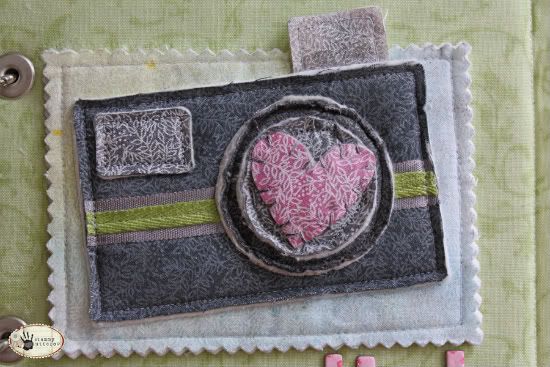
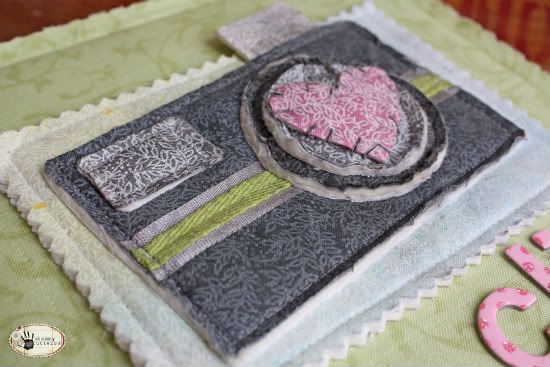
Camera fabric applique by Tammy Tutterow
Supplies - fabric; cotton batting; Glimmer Mist: Yellow Daisy, Blue Skies, Black Magic, Slate; Glimmer Glaze: Pink Lady; Glimmer Mist Chalkboard: Charcoal; adhesive: Therm O Web Super Stick, Helmar 450 Quick Dry; alphabet: American Crafts Thickers (Subway); sealant: Creative Imaginations Super Seal

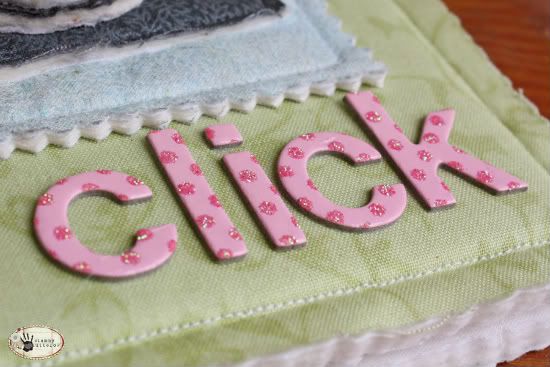
I really fell in love with the camera design for this month's add on and thought it would be a super cute fabric applique. I used white fabric that had a white on white design on it. I added color to each piece with assorted colors of Glimmer Mist products.


Each piece was cut following the design of the sketch (I didn't measure my pieces) and then colored. Once the color was dried, I cut batting pieces to match. I used Super Stick to adhere all the layers together while I sewed them.


The assembled piece was adhered to the front of a fabric album using Helmar 450QD. I sealed the cover to resist water damage with Super Seal.


  • • • • • • • • • • • • • • • • • • • • • • • • • • • • •

Wednesday, June 22, 2011

One-Page Week, Part 3

•••••••••••••••••••••••••••••

One-page Sketch #10


You can download and print this sketch by clicking on the one-page sketches link found under the "printable sketches" tab on the right sidebar.


"Elfin Around" by Suzanna Lee
Supplies - Patterned paper, stickers: Echo Park; Stamps: Unity, BasicGrey; Bling: Heidi Swapp; Ink: Distress Ink, Colorbox; Glitter accent: Stickles; Floss: DMC

I stuck with the basics, the 5x7 photo (isn't she just cheeky?), the title placement and the three squares. The rest, well, I interpreted!! I still used some of the circular holes for things to nestle in. And rather than stitch around them, I used a circle of bling or a stamp.


I used one strip but felt the others were best served with the other elements I used.


The top right square is a tad smaller than the others with the edges distressed. I then hand stitched the
outline the same size as the other squares.


The paper behind it is a journal block with a Unity stamp ("Have you been good?). The edges of the other two squares are subtly distressed. My only other deviation is the corner sticker at the top right corner. No journaling strips. In fact, no journaling - the picture says it all!!

 • • • • • • • • • • • • • • • • • • • • • • • • • • • • • •


"Sailing" by Mireille Divjak
Supply list - Cardstock: Echo Park (Summer Days - orange, blue); Patterned paper: Echo Park (Summer days - Big Dots, clouds, ice cream); Thickers: American Crafts ("lullaby " foam, sunflower); Chipboard: Pebbles Inc.; Letter stickers: Adorn it, Carolee's Creations; Punches: Make Me! (circles), Carla Craft (corner rounder and flower punch); Ink: Colorbox (Cats eye - Raven black); Pens: American Crafts and Sakura; Tools: Sew Easy, We R Memory Keepers

Story: Noah is/was so afraid of water. Spending a month at sea isn't his idea of vacation and good times. He played next to the water constantly, careful not to get his toes wet. The only thing he was okay with was if I was able to get him into that rubber boat without getting wet... and "sail" with him.

I love the colors in the Echo Part Summer Days collection. So very fun! And because I am in these pictures too and it's his sisters pink boat, I thought it would be totally okay to throw in a little pink.

 • • • • • • • • • • • • • • • • • • • • • • • • • • • • • •


"Holding Hands..." canvas by Tammy Tutterow
Supplies - patterned paper: Glitz Design (Love Games Floral and Polka; Glitz Design Love Games Paper Layers); stickers: Glitz Design (Love Games Glitzers); cardstock elements: Glitz Design (Love Games Whatnots); transperencies: Glitz Design (Love Games Peek-a-Boos); embellishments: Bazzill Basics Paper (Fabric Flower); Tim Holtz Idea-ology (Game Spinners); ink: Tim Holtz Distress Ink (Black Soot); paints: Tattered Angels Glimmer Mist (Burnt Red), Tattered Angels Glimmer Glaze (Mellow Yellow); adhesive: Claudine Hellmuth Studio Matte Mutli Medium, Therm O Web Super Stick, 3D Adhsesive Foam Squares, and Zots

I wanted create a canvas decor project to focus on a fun cardstock element from Glitz Design's Love Games collection. The piece with the phrase about holding hands makes me smile so I thought it would be a fun focus point of a decor item.


I used this month's one page sketch as the basis for the design. I followed the basic design of the sketch but altered the measurements to fit the canvas. I had to move and simplify the trio of squares in the upper corner.


I also used the text on the cardstock piece as a title and moved that down into the photo area. I added additional embellishments to the left side to create some visual interest instead of a photo.


 •••••••••••••••••••••••

Tuesday, June 21, 2011

One-page Week, Part 2

•••••••••••••••••••••••••••••

One-page Sketch #10


You can download and print this sketch by clicking on the one-page sketches link found under the "printable sketches" tab on the right sidebar.


"Emma Age 4" by Tammy Tutterow
Supplies - patterened paper, specialty paper, and cardstock: Bazzill Basics Paper (Worth Remembering 8x8 paper collection); 12x12 black cardstock stickers: Bazzill Basics Paper (Worth Remembering Sticker Sheet); die cuts: Bazzill Basics Paper (Worth Remembering Die Cuts) embellishments: Bazzill Basics Paper (Worth Remembering Pretty Buttons), Adhesive Pearls, Flower Gems; Mini Paper Clip: Tim Holtz Idea-ology; alphabets: American Crafts (Thickers, Shoebox), K&Co (Glitter Alphabet, Coral); Silver Glitter: Making Memories; ink: Tim Holtz Distress Ink (Black Soot); Marker: Copic Marker R89 (used to turn pink "4" to red); trim: Maya Road (Black Velvet Ric Rac); tools: Fiskars XXXL Circle Punch

For my page, I stayed pretty true to the original sketch, making only a few slight changes.  I really loved the large circle design on one of my pieces of patterned paper, so I used it and added several layers to it and made it a focal point in one of the three squares.


I moved my title to the right a bit so I needed to move my ribbon and button in the upper left square
to accommodate the title.


 I moved the ribbon and button in the third square so that it mirrored the placement in the left square.


The photo I wanted to use looked best to me in a square so I filled the original photo space with
a photo mat and placed the photo in that space.


I didn't really have anything I wanted to journal about this photo (I just love the photo and wanted to celebrate it with a pretty page built around it) so I omitted the journal strips.

 • • • • • • • • • • • • • • • • • • • • • • • • • • • • • •


"Mr. Personality" by Carolyn Wolff
Supply List - Patterned Paper: Basic Grey (Max & Whiskers); Alpha Stickers: Doodlebug (Loopy Lou Letters), Quickuts Die; 3D Stickers & Other Embellishments: Basic Grey (Max & Whiskars); Floss: We R Memory Keepers; Ink: Ranger Distress Ink (Vintage Photo)

I have had this collection of paper in my stash for quite a while and when I found this photo I thought it was the perfect opportunity to use it. Last month I did my one-page sketch using a photo of Cooper and this month he is the star again (this time he is much younger).

Variation #1 – I didn’t vary too many things from the sketch. I liked it just the way it was. I used two layers of paper for the squares and then added an outline of black stitching. I added the strips shown on the sketch using a border sticker and matting it on black cardstock. Instead of the flowers, I added some stickers that were themed to my layout.


Variation #2 – I love to mat my photos. I used a 5 x 7 picture and matted it with black and teal cardstock.

Variation #3 – I added a border and a row of stitching to the bottom of my layout.

 • • • • • • • • • • • • • • • • • • • • • • • • • • • • • •


"Valentine's Day Love" by Noey Hunt
Products used - Paper: Bazzill Bling, Making Memories (aqua floral & note paper), SEI (pink floral); Flowers: Prima; Brads: American Crafts; Letters: Jillibean Soup (white), Making Memories (green); Tools: Cricut Country Life cartridge (apron)

Variation 1: I wanted to make this layout work with Valentine's paper and not just match the warm tones of the photo. I selected a bold pattern (the pink floral) to start the "transformation." Because I used bold patterns for two of the three squares, I simplified the striped strips into solid.


Variation 2: I liked how this scrap of simple notebook paper worked with my other two patterned squares. I decided to use the notebook paper for my journaling instead of adding strips like on the sketch. But I needed to replace the strips somehow for balance. The apron continues the homemade meal theme from the photo. It completes the visual triangle of green elements on the page and finishes off the decorative corner of the layout.
•••••••••••••••

Friday, April 29, 2011

One-Page Week, Part 5 - Another Unibind book and Giveaway

•••••••••••••••••••••••••••••••••••••••••
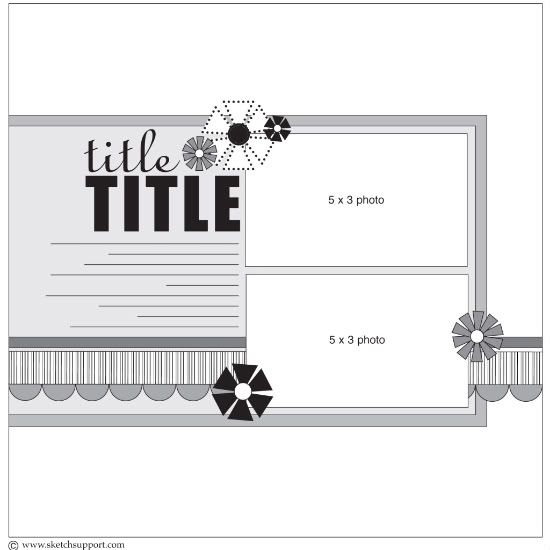
I always love seeing sketches used for projects other than a scrapbook page. It's amazing just how many uses you can get out of a sketch and what it can be used with. Today we've got two beautiful home decor creations from Tammy and Christina that are such fun uses of the sketch. (Just wait until you see Tammy's awesome attention to detail in her unique use of the sketch and Christina's pretty handmade flowers!)

Plus, I'm sharing another PhotoBook Creator book that I made, this time using the one-page sketch for this month and we've got another great giveaway!

One-page Sketch #5


You can download and print this sketch by clicking on the one-page sketches link found under the "printable sketches" tab on the right sidebar.


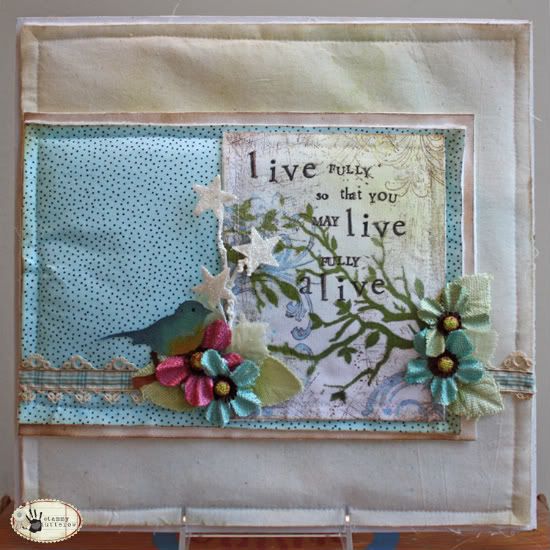
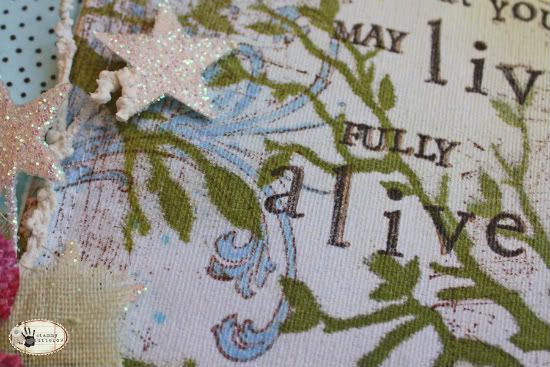
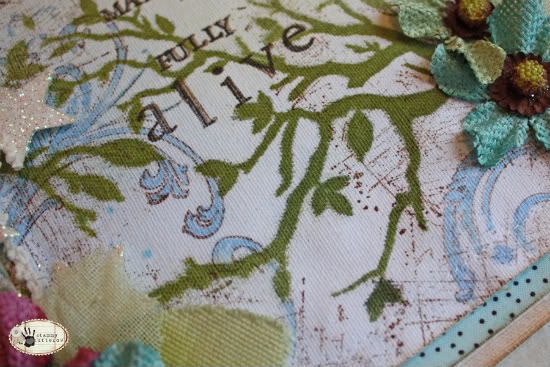
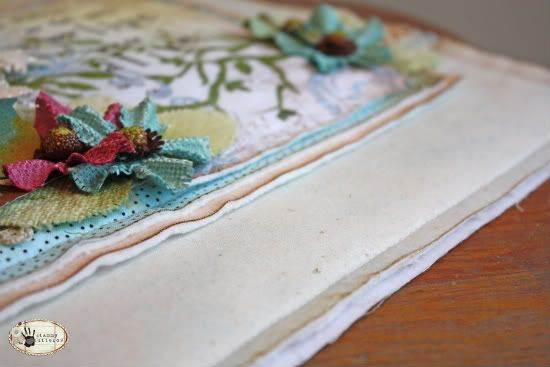
"Alive" Quilted Art by Tammy Tutterow
Supplies - Fabric: Printed cotton and muslin: Joann's Fabrics; Claudine Hellmuth Sticky Back Canvas; Ribbon: BasicGrey; Lace: Vintage; mists: Adirondack Color Wash (Lettuce and Meadow) and Tattered Angels Glimmer Mist (Yellow Daisy, Blue Skies, and Vanilla Breeze); stamps: Tim Holtz (Slight Alterations and Fabulous Flourishes) and Hero Arts (Printer's Type Upper and Lowercase and Playful Letters); stencil: The Crafter's Workshop Birds of a Feather stencil; markers: Letraset Promarker (Primrose, Powder Blue, and Burnt Siena); stains: Tim Holtz Distress Stains (Wild Honey, Broken China, Faded Jeans); ink: Tim Holtz Distress Ink (Black Soot and Vintage Photo); flowers, stars, and leaves: Prima Homespun Bittles, Galaxy Stars, and Calcutta Leaves; misc: Tim Holtz Grungepaper

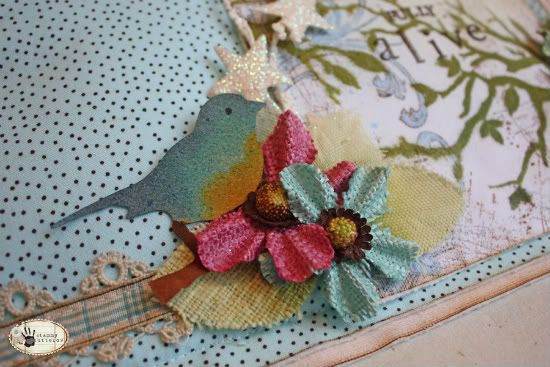
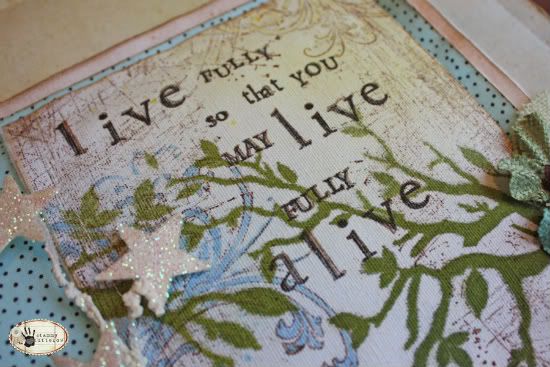
One day last week I came upon a photo by a photographer who's business name is Fully Alive. I was really taken with the name and thought to myself that it would be a great motivational motto. I decided to create a decorative piece to remind me of the idea. I used fabric to create a quilted art quilt that includes stamping and stenciling and a small bluebird nestled in flowers.

I varied my creation from the sketch in that I omitted photos and switched the journaling block to the right.

Here's a closer look at the details:


• • • • • • • • • • • • • • • • • • • • • • • • • • • • • • • • • • • • • • • • • • • • •


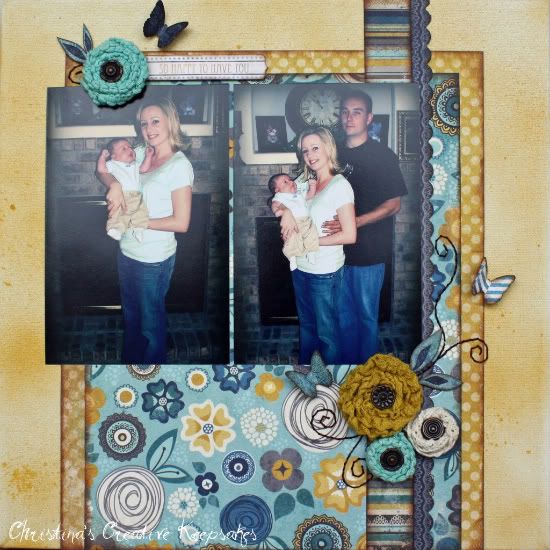
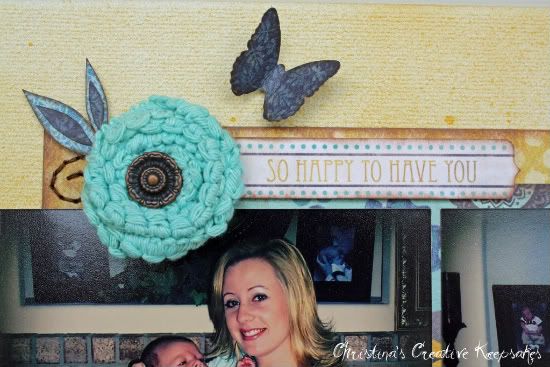
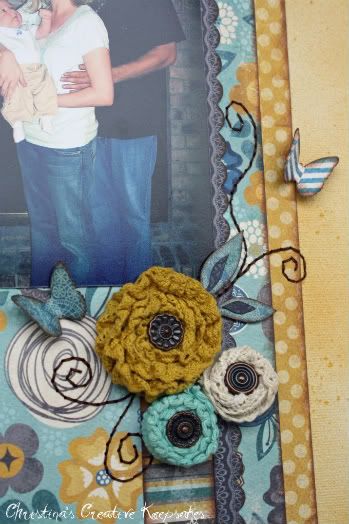
"So Happy To Have You" by Christina Hoffman
Supplies - Canvas: unknown; Patterned paper: My Mind's Eye; Spray stain: Design Master Home Decor Stain in Pecan; Title: My Mind's Eye; Flowers: Created with My Mind's Eye tulle, lace, and ribbon; Brads: Making Memories; Embroidery floss: DMC; Tools: Martha Stewart Butterfly Punch and Fiskar's Scallop Punch.

Variation #1: I used a 12 x 12 piece of artist canvas. I also sprayed it to give it color instead of using a colored piece of cardstock.
Variation #2: I flipped the sketch to accommodate my pictures.

Variation #3: I also shifted my pictures to the left because I did not want to cover up all of the scalloped border. I also liked the look of the pictures hanging over the side a little.

Variation #4: I only used one strip and a scalloped border.

Variation #5: I moved my title to the top of the page since it was so small.


Variation #6: I opted not to add any journaling.


• • • • • • • • • • • • • • • • • • • • • • • • • • • • • • • • • • • • • • • • • • • • •

My Unibind PhotoBook Creator book using One-page Sketch #5

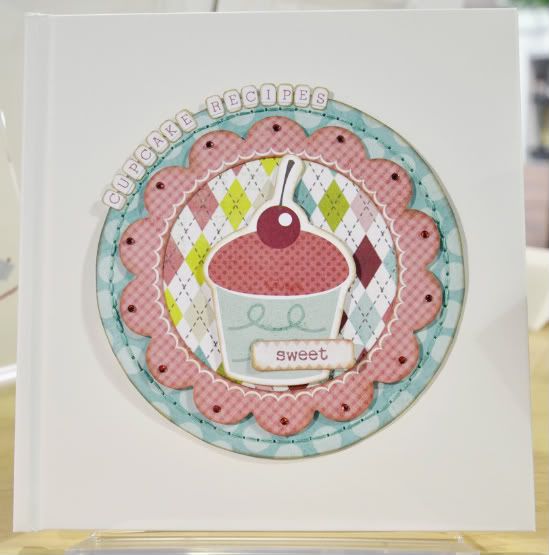
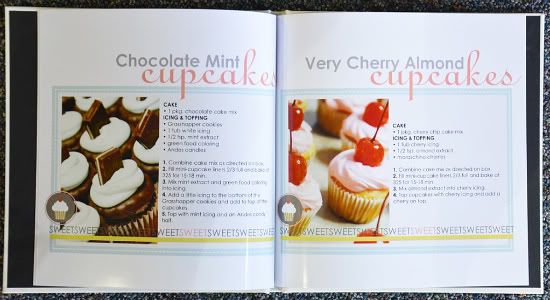
The book I'm sharing today is one of the reasons why I wanted to get a PhotoBook Creator. I love cookbooks and have always wanted a way to make some for myself and as gifts for my family. The PhotoBook Creator is so great for creating hard cover, durable cookbooks that are sure to last a long time.

I used the white 8 x 8 cover to make a book of cupcake recipes. I have a ton of cupcake books and this was a great way for me to have all of my favorites in one place. Plus it has my alterations to some of the ingredients in the book instead of me trying to remember what I added or took out.


Lately I've been on a cupcake baking kick and have been enjoying playing around with different recipes and flavors. It worked out perfectly that the scrapbooker in me always takes a picture of each of the different flavors when I make them.

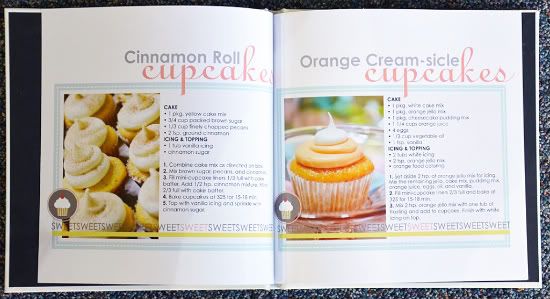
I used the one-page sketch from this week to make the inside pages that have the pictures and recipes.


I did make a few changes to the sketch to fit what I was working with.

Variation #1 - I had to downsize the measurements of the sketch to fit the smaller 8 x 8 size. Since it was still the same proportions it was easy and I mostly eye-balled everything.

Variation #2 - I flipped the sketch. I wanted the edge of the recipe to be aligned with the edge of the picture. Usually I don't mind having my text aligned on the right but with a recipe I thought it might be a little confusing and easy to lose your place in the recipe. I moved the picture to the left so I could have my text aligned on the left edge. 

Variation #3 - I centered the background pieces instead of having them on the left edge. This is so I wasn't cutting anything off the edge that would be in the spine of the book.

Variation #4 - I used the title and journaling area for the recipe and then moved the name of the cupcake to the top.

Variation #5 - I only used one of the embellishment areas on the sketch. I wanted to keep everything super simple on the pages so one was enough. If you look closely you'll see that it's the cupcake add-on sketch that I used in the small gray circle.

I used the Unibind double sided glossy photo paper for this book so I have recipes printed on both sides of the page. I know with cookbooks, it's frustrating to have one that doesn't lay open very well. With the double sided photo paper the pages aren't bulky and it lays open so I don't have to worry about losing my page in the book. And the best part is that I can keep adding to the book since all I have to do if I want to add more pages is reheat and insert the new pages!

• • • • • • • • • • • • • • • • • • • • • • • • • • • • • • • • • • • • • • • • • • • • •

It's giveaway time thanks to our April Sponsor! 

We've got another PhotoBook Creator to give away today!

For this awesome giveaway, answer this question: If you had the Unibind PhotoBook Creator what kind of book would you make?

You've got all weekend to answer the question in the comments section of this post. We will randomly pick a name and announce the winner on Monday.
•••••••••••••••••••••••••••••••••